
无需购买服务器跟域名,使用 Github 和 Hexo 搭建自己的独立博客(一)
无需购买服务器跟域名,使用 Github 和 Hexo 搭建自己的独立博客
1 | # 该笔记参考UP主:安知鱼 |
0、前言
Github Pages 可以被认为是用户编写的、托管在 github 上的静态网页。使用 Github Pages 可以为你提供一个免费的服务器,免去了自己搭建服务器和写数据库的麻烦。此外还可以绑定自己的域名。
Hexo 是一个快速、简洁且高效的博客框架。Hexo 使用 Markdown(或其他渲染引擎)解析文章,在几秒内,即可利用靓丽的主题生成静态网页。
这是 Hexo 的官网 地址:https://hexo.io/zh-cn/
1 | # 此笔记以Linux环境部署(Windows、Mac系统差不多流程部署) |
1、安装node.js
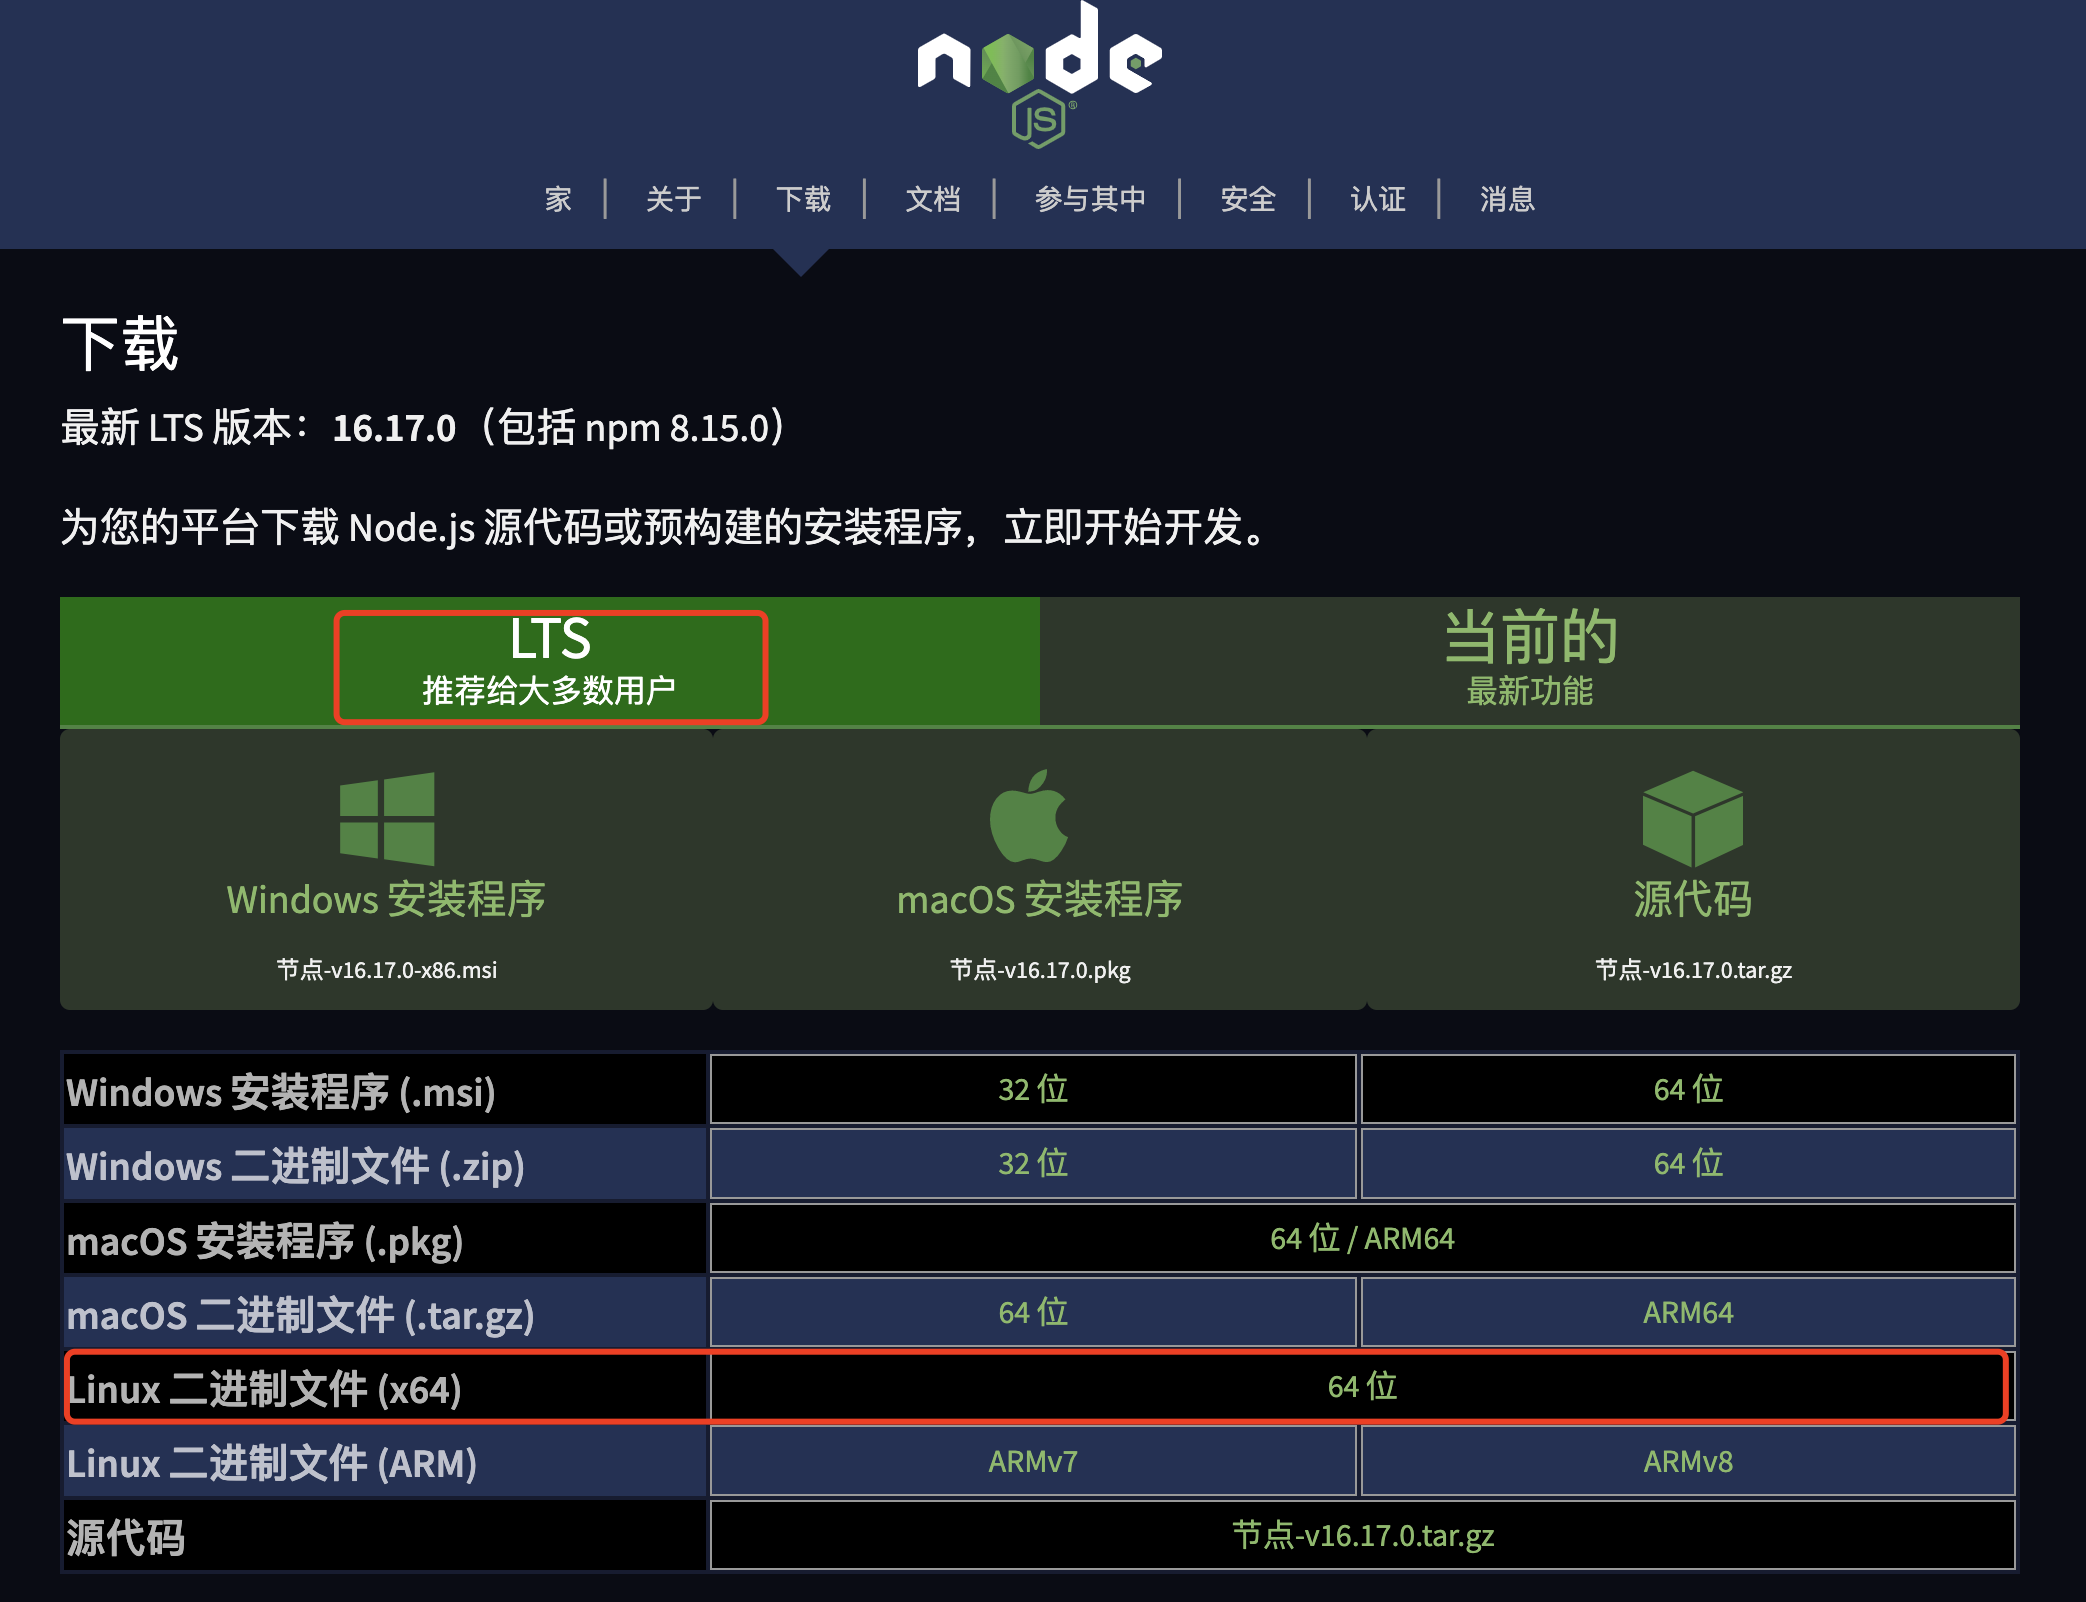
进入Node.js 官网:https://nodejs.org/en/download/
按照自己的机器选择对应的版本下载
上传nodejs安装包到Linux服务器

1 | [root@hexo ~]# wget https://nodejs.org/dist/v16.17.0/node-v16.17.0-linux-x64.tar.xz |
2、安装git
1 | # Centos7.6 用yum安装git默认是老版本,有一些软件不支持低版本,建议安装新版本git,提前避坑 |
1 | # 首先,把老版本的 Git 卸掉 |
3、安装Hexo
1 | [root@hexo /opt]# mkdir /opt/hexo-blog -p |
安装hexo脚手架,如果安装失败了就再输入一次
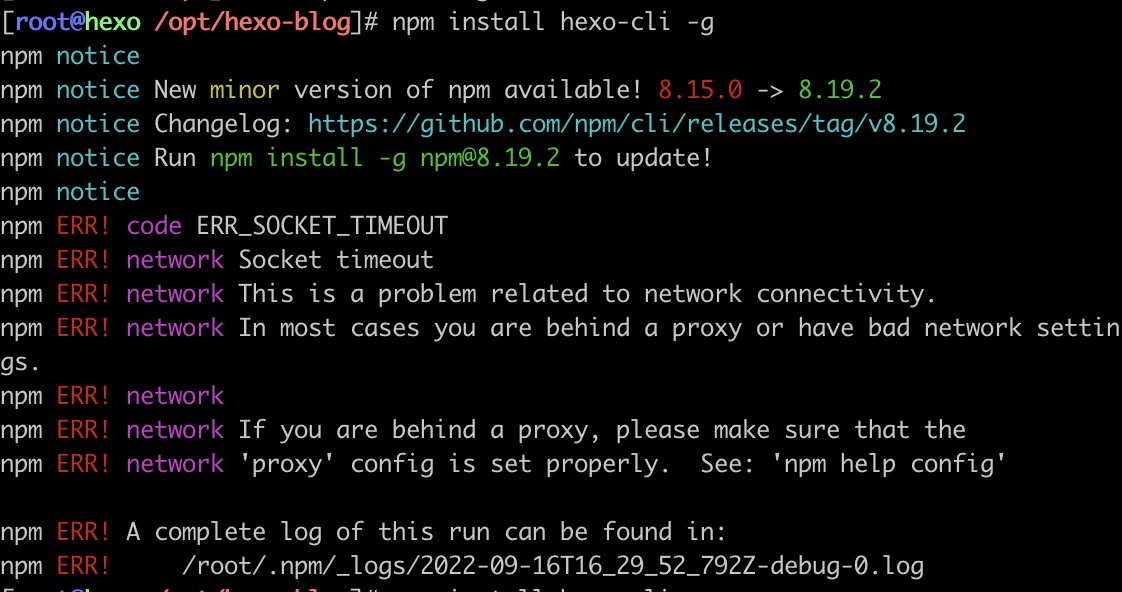
WARN警告提示需要运行“npm install”

安装后会在/opt/hexo-blog目录生成所有文件信息
1 | # 目录下文件目录解析 |
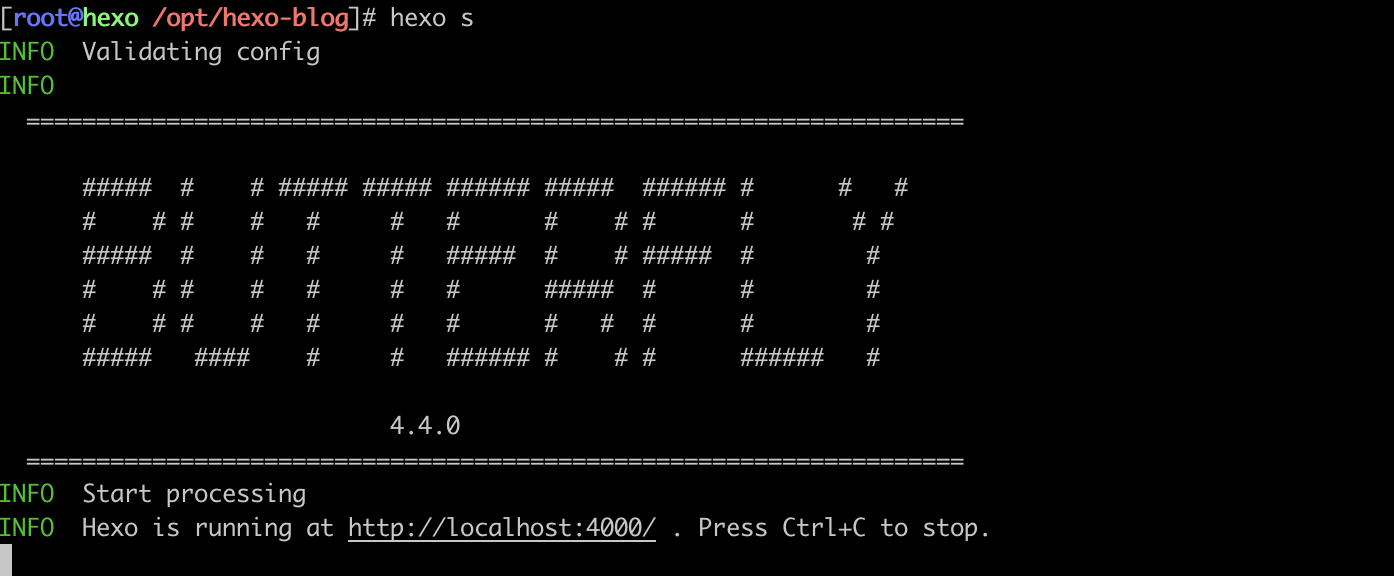
本地查看效果
1 | # 生成本地文件 |
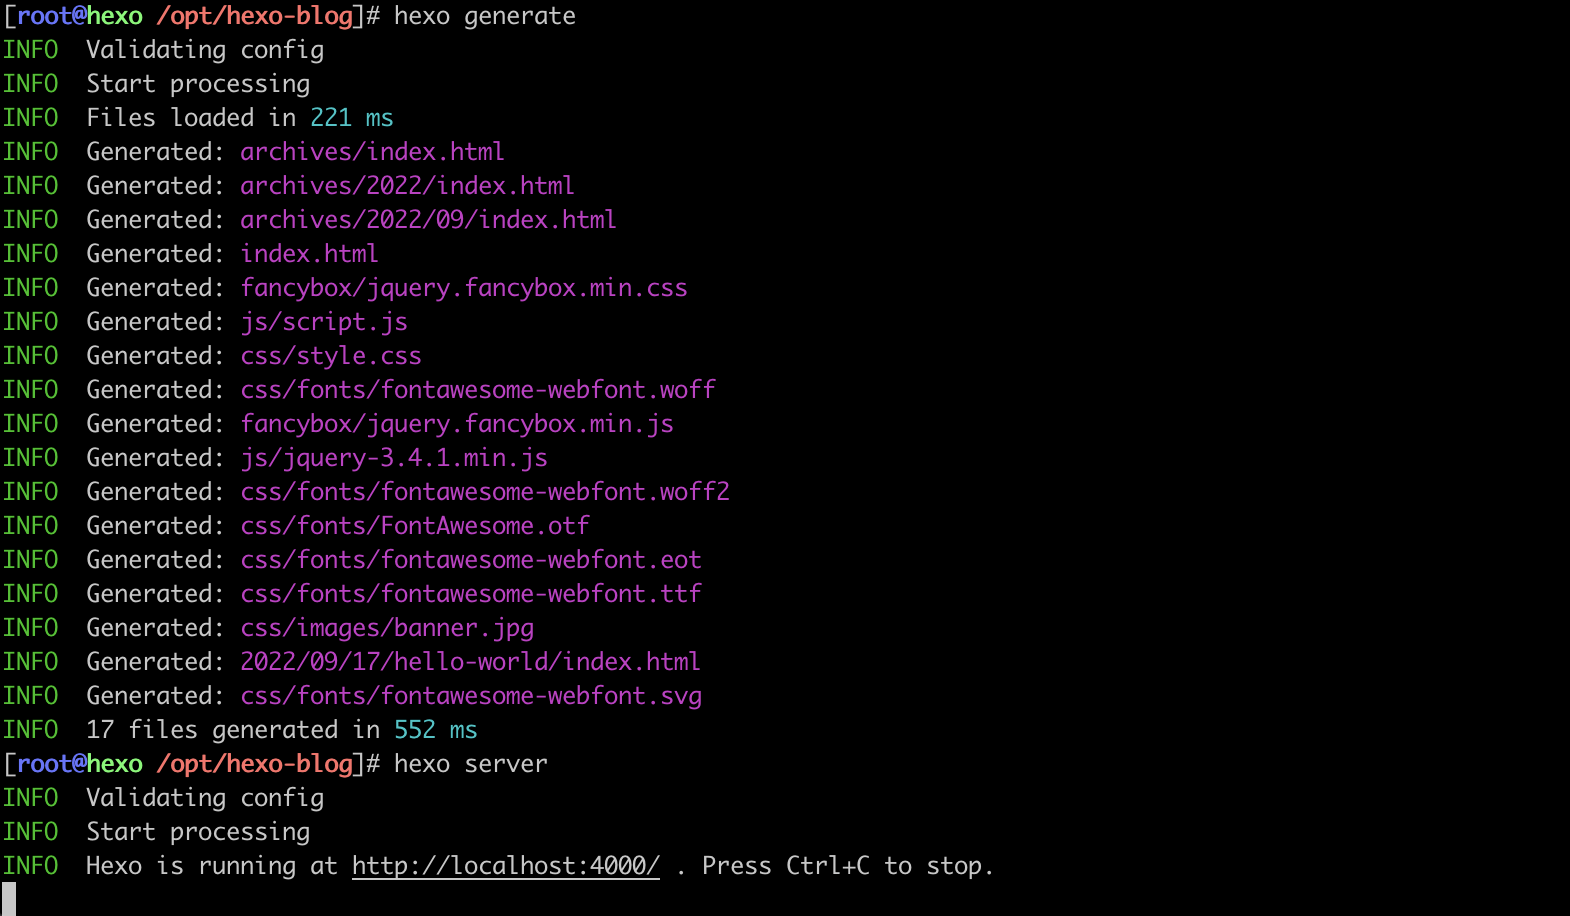
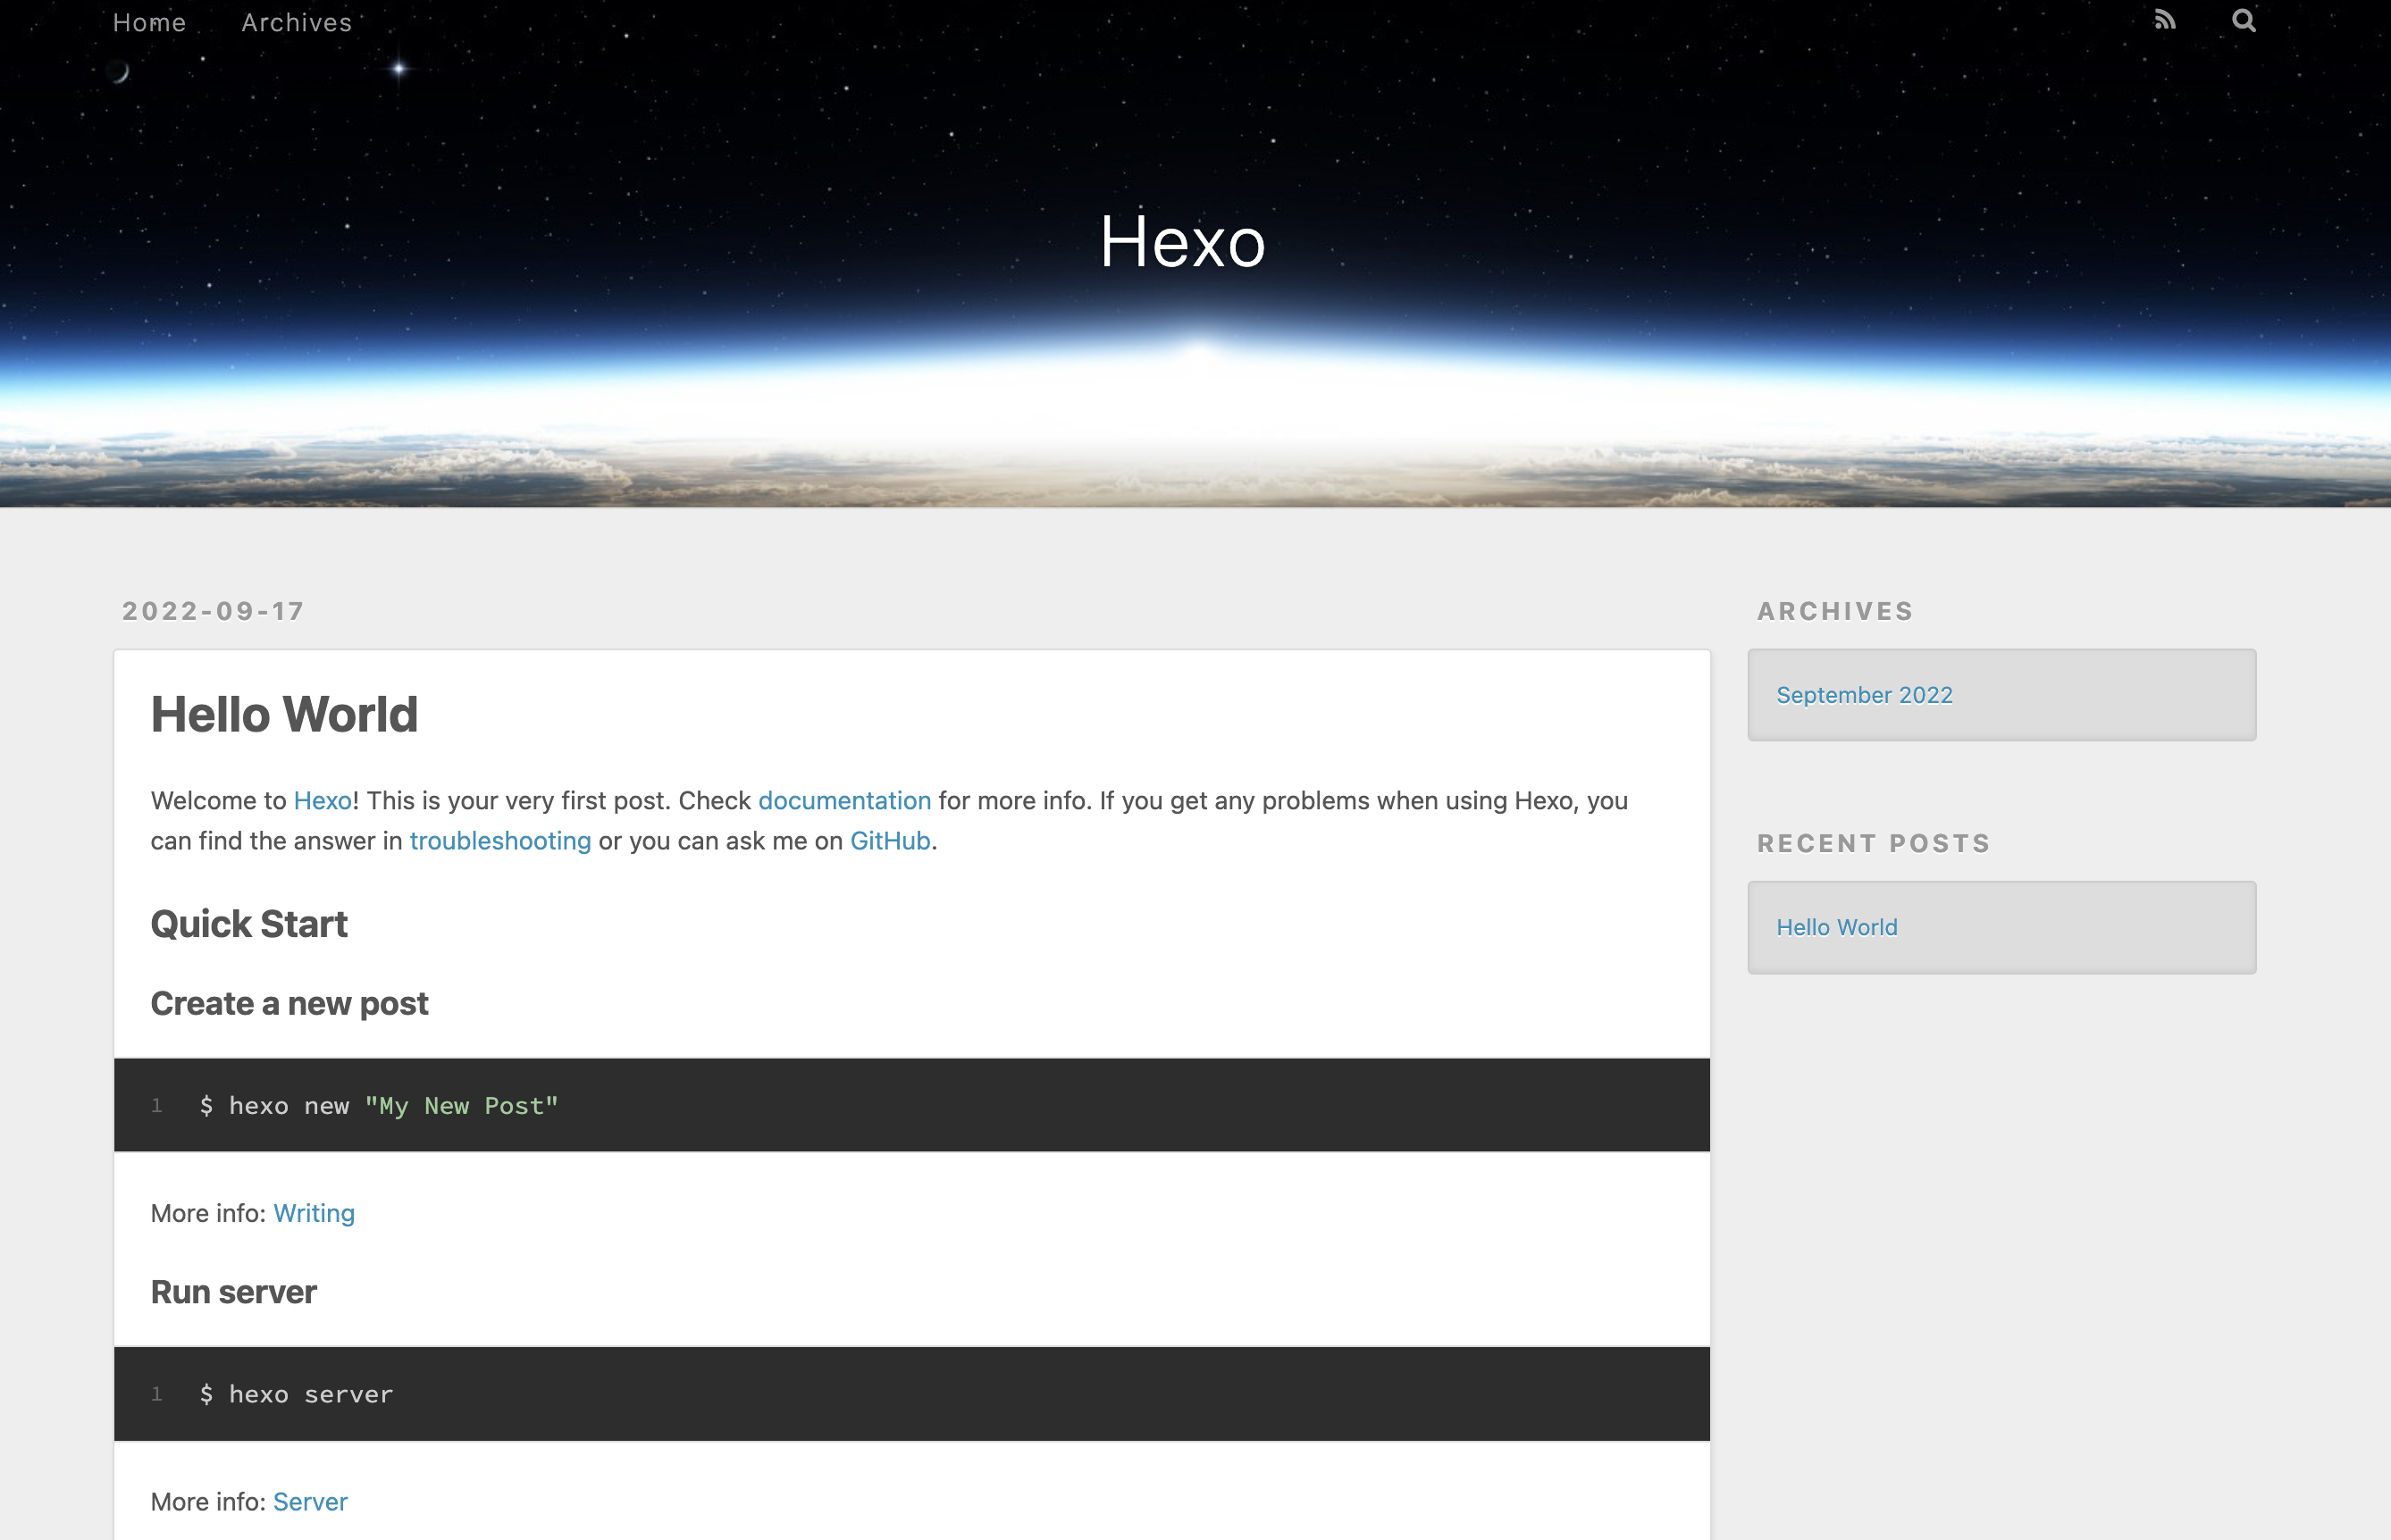
在浏览器输入Linux服务器IP:4000,访问默认hexo页面
4、Hexo安装butterfly主题
安知鱼UP主推荐的参考文档:https://butterfly.js.org/posts/21cfbf15
1 | # Ctrl+C 中断服务,进入到hexo根目录 |
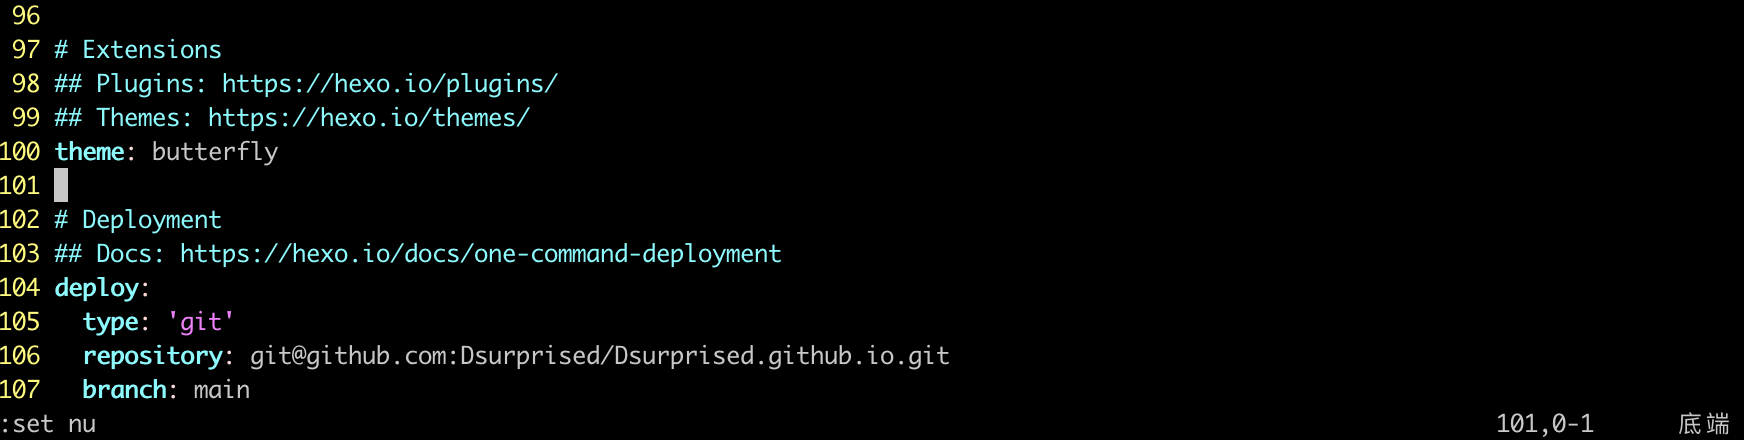
修改 Hexo 根目录下的 _config.yml,把主题改为butterfly
1 | # 把100行,默认主题“theme: landscape” 更改为“theme: butterfly” |
安装pug 以及 stylus 的渲染器插件
1 | # 用于渲染前端主题页面的 |
为了减少升级主题后带来的不便,请使用以下方法
在 hexo 的根目录创建一个文件 _config.butterfly.yml,并把主题目录的 _config.yml 内容复制到 _config.butterfly.yml 去。( 注意: 复制的是主题的 _config.yml ,而不是 hexo 的 _config.yml)
1 | # 注意:不要把主题的 _config.yml 删掉 |
1 | # 进入根目录 |
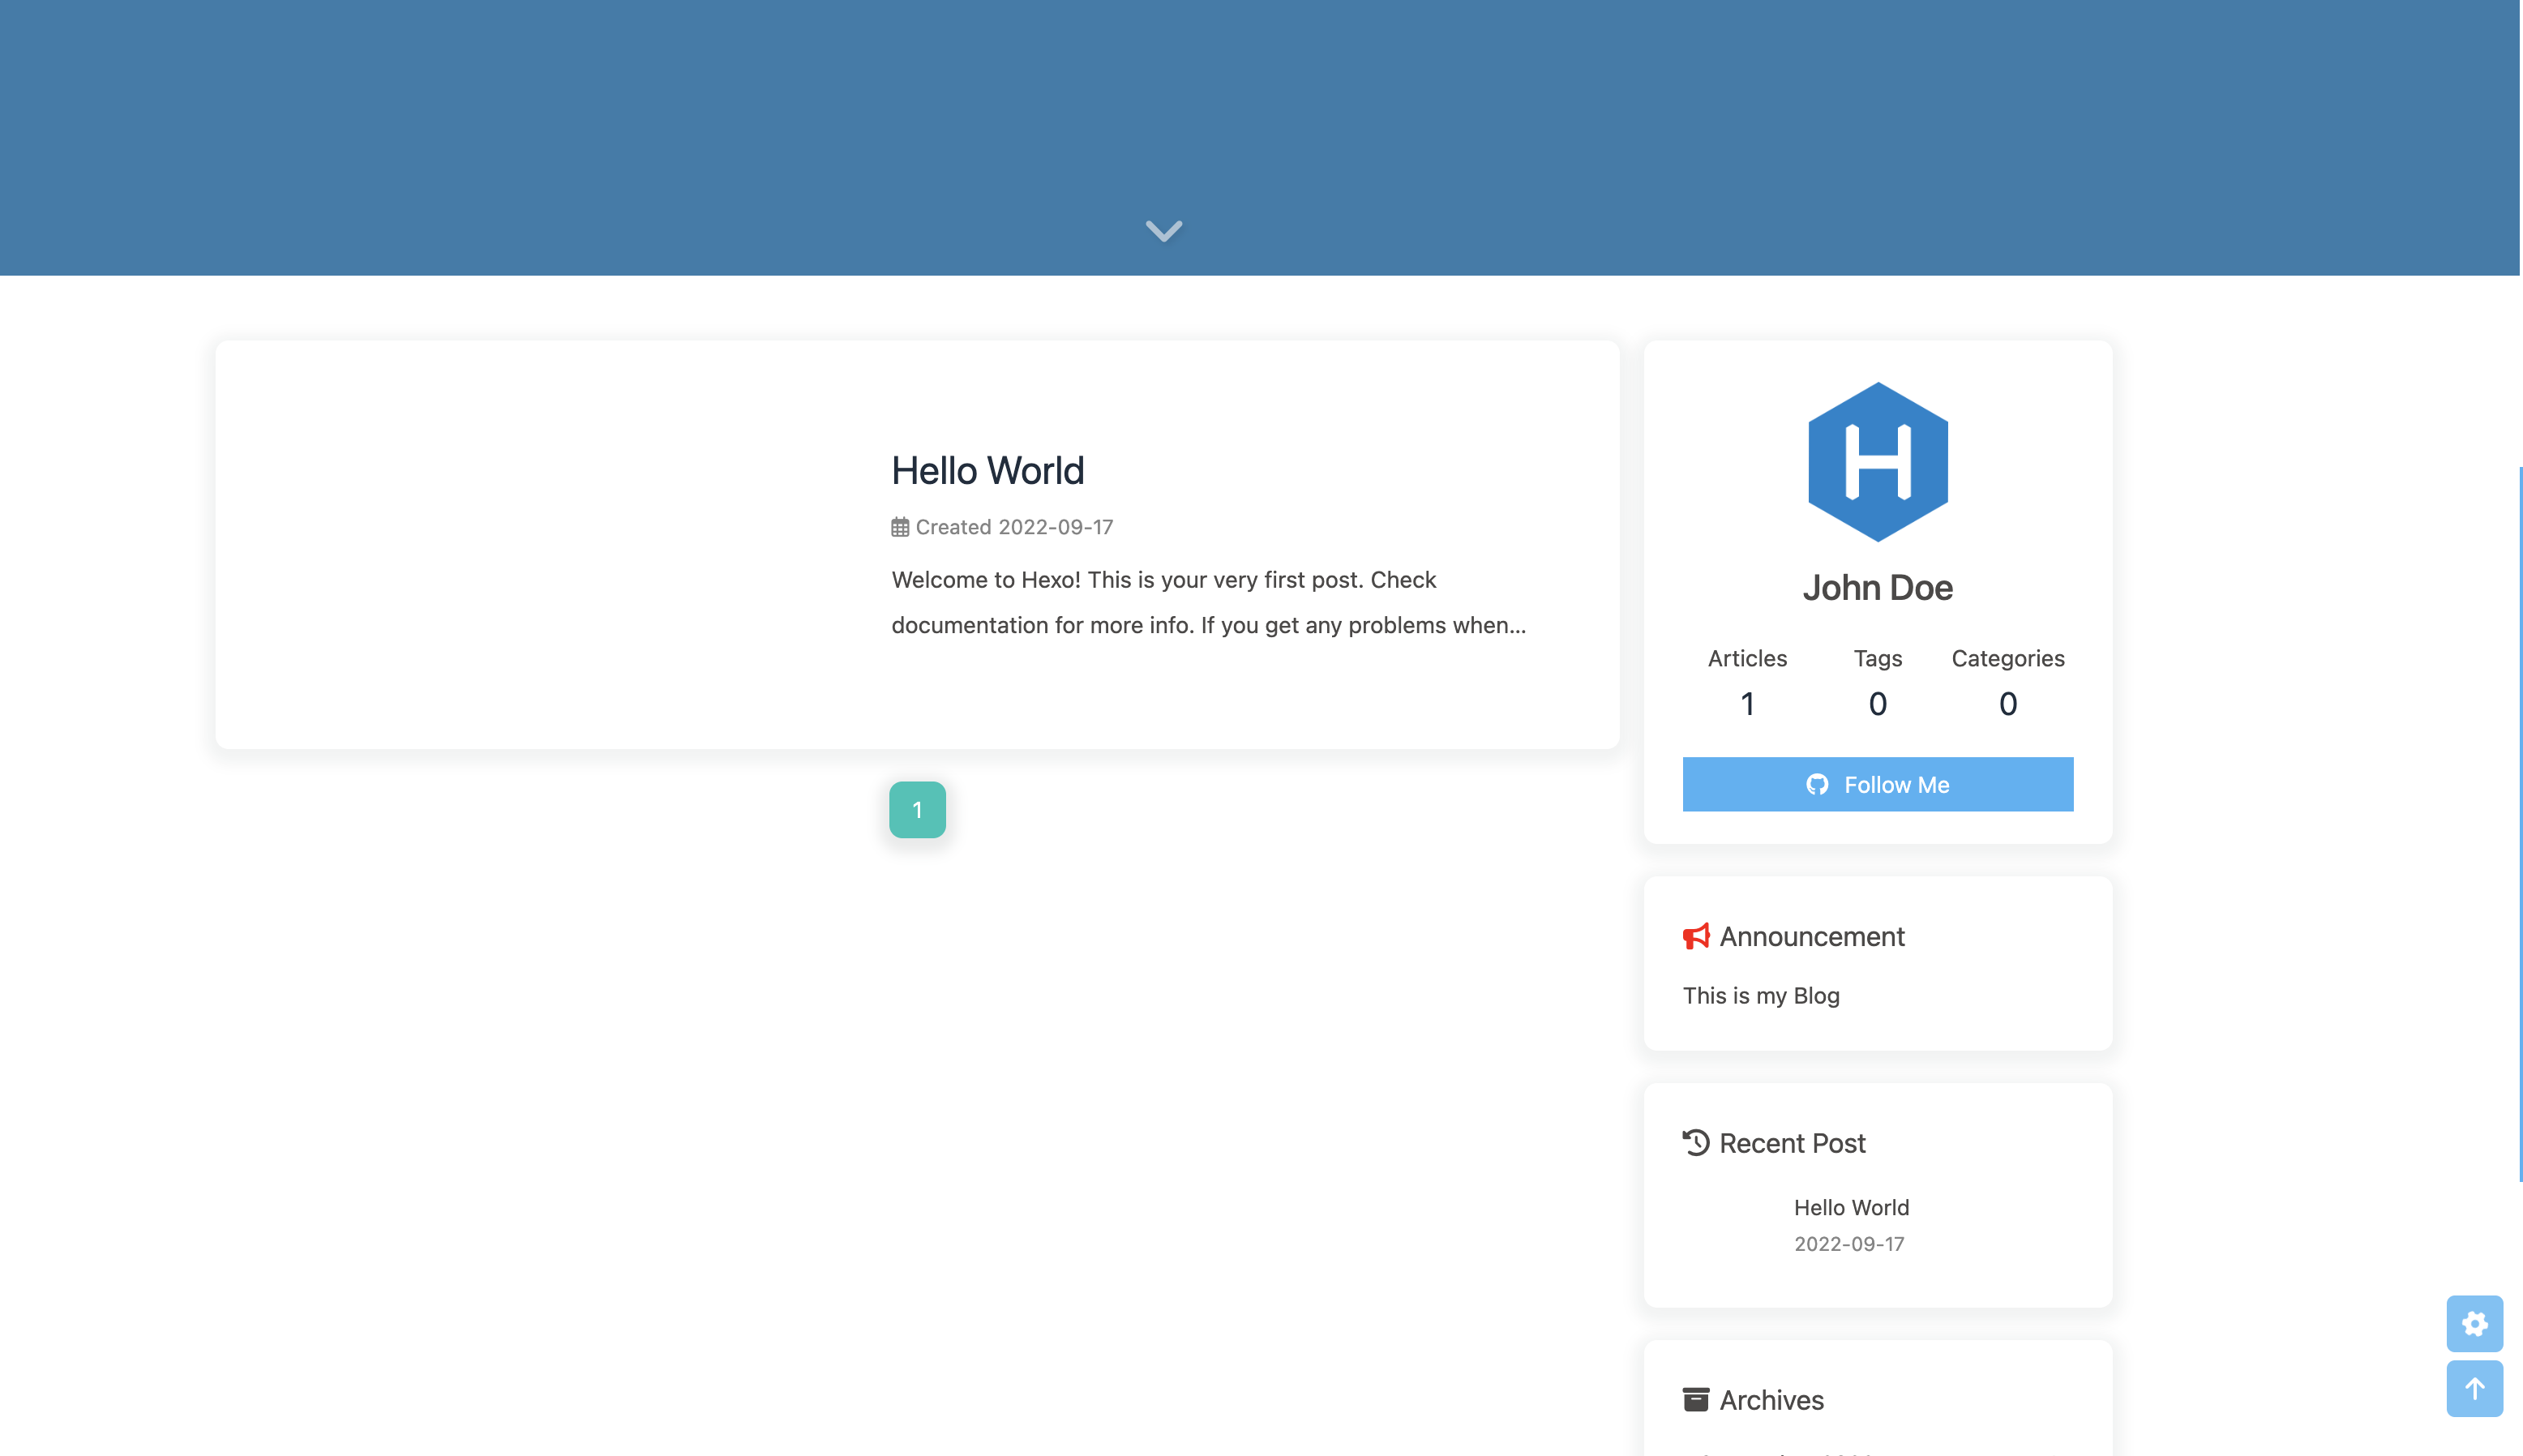
在浏览器输入Linux服务器IP:4000,访问默认butterfly页面
5、注册github账号
1 | 官网地址 |
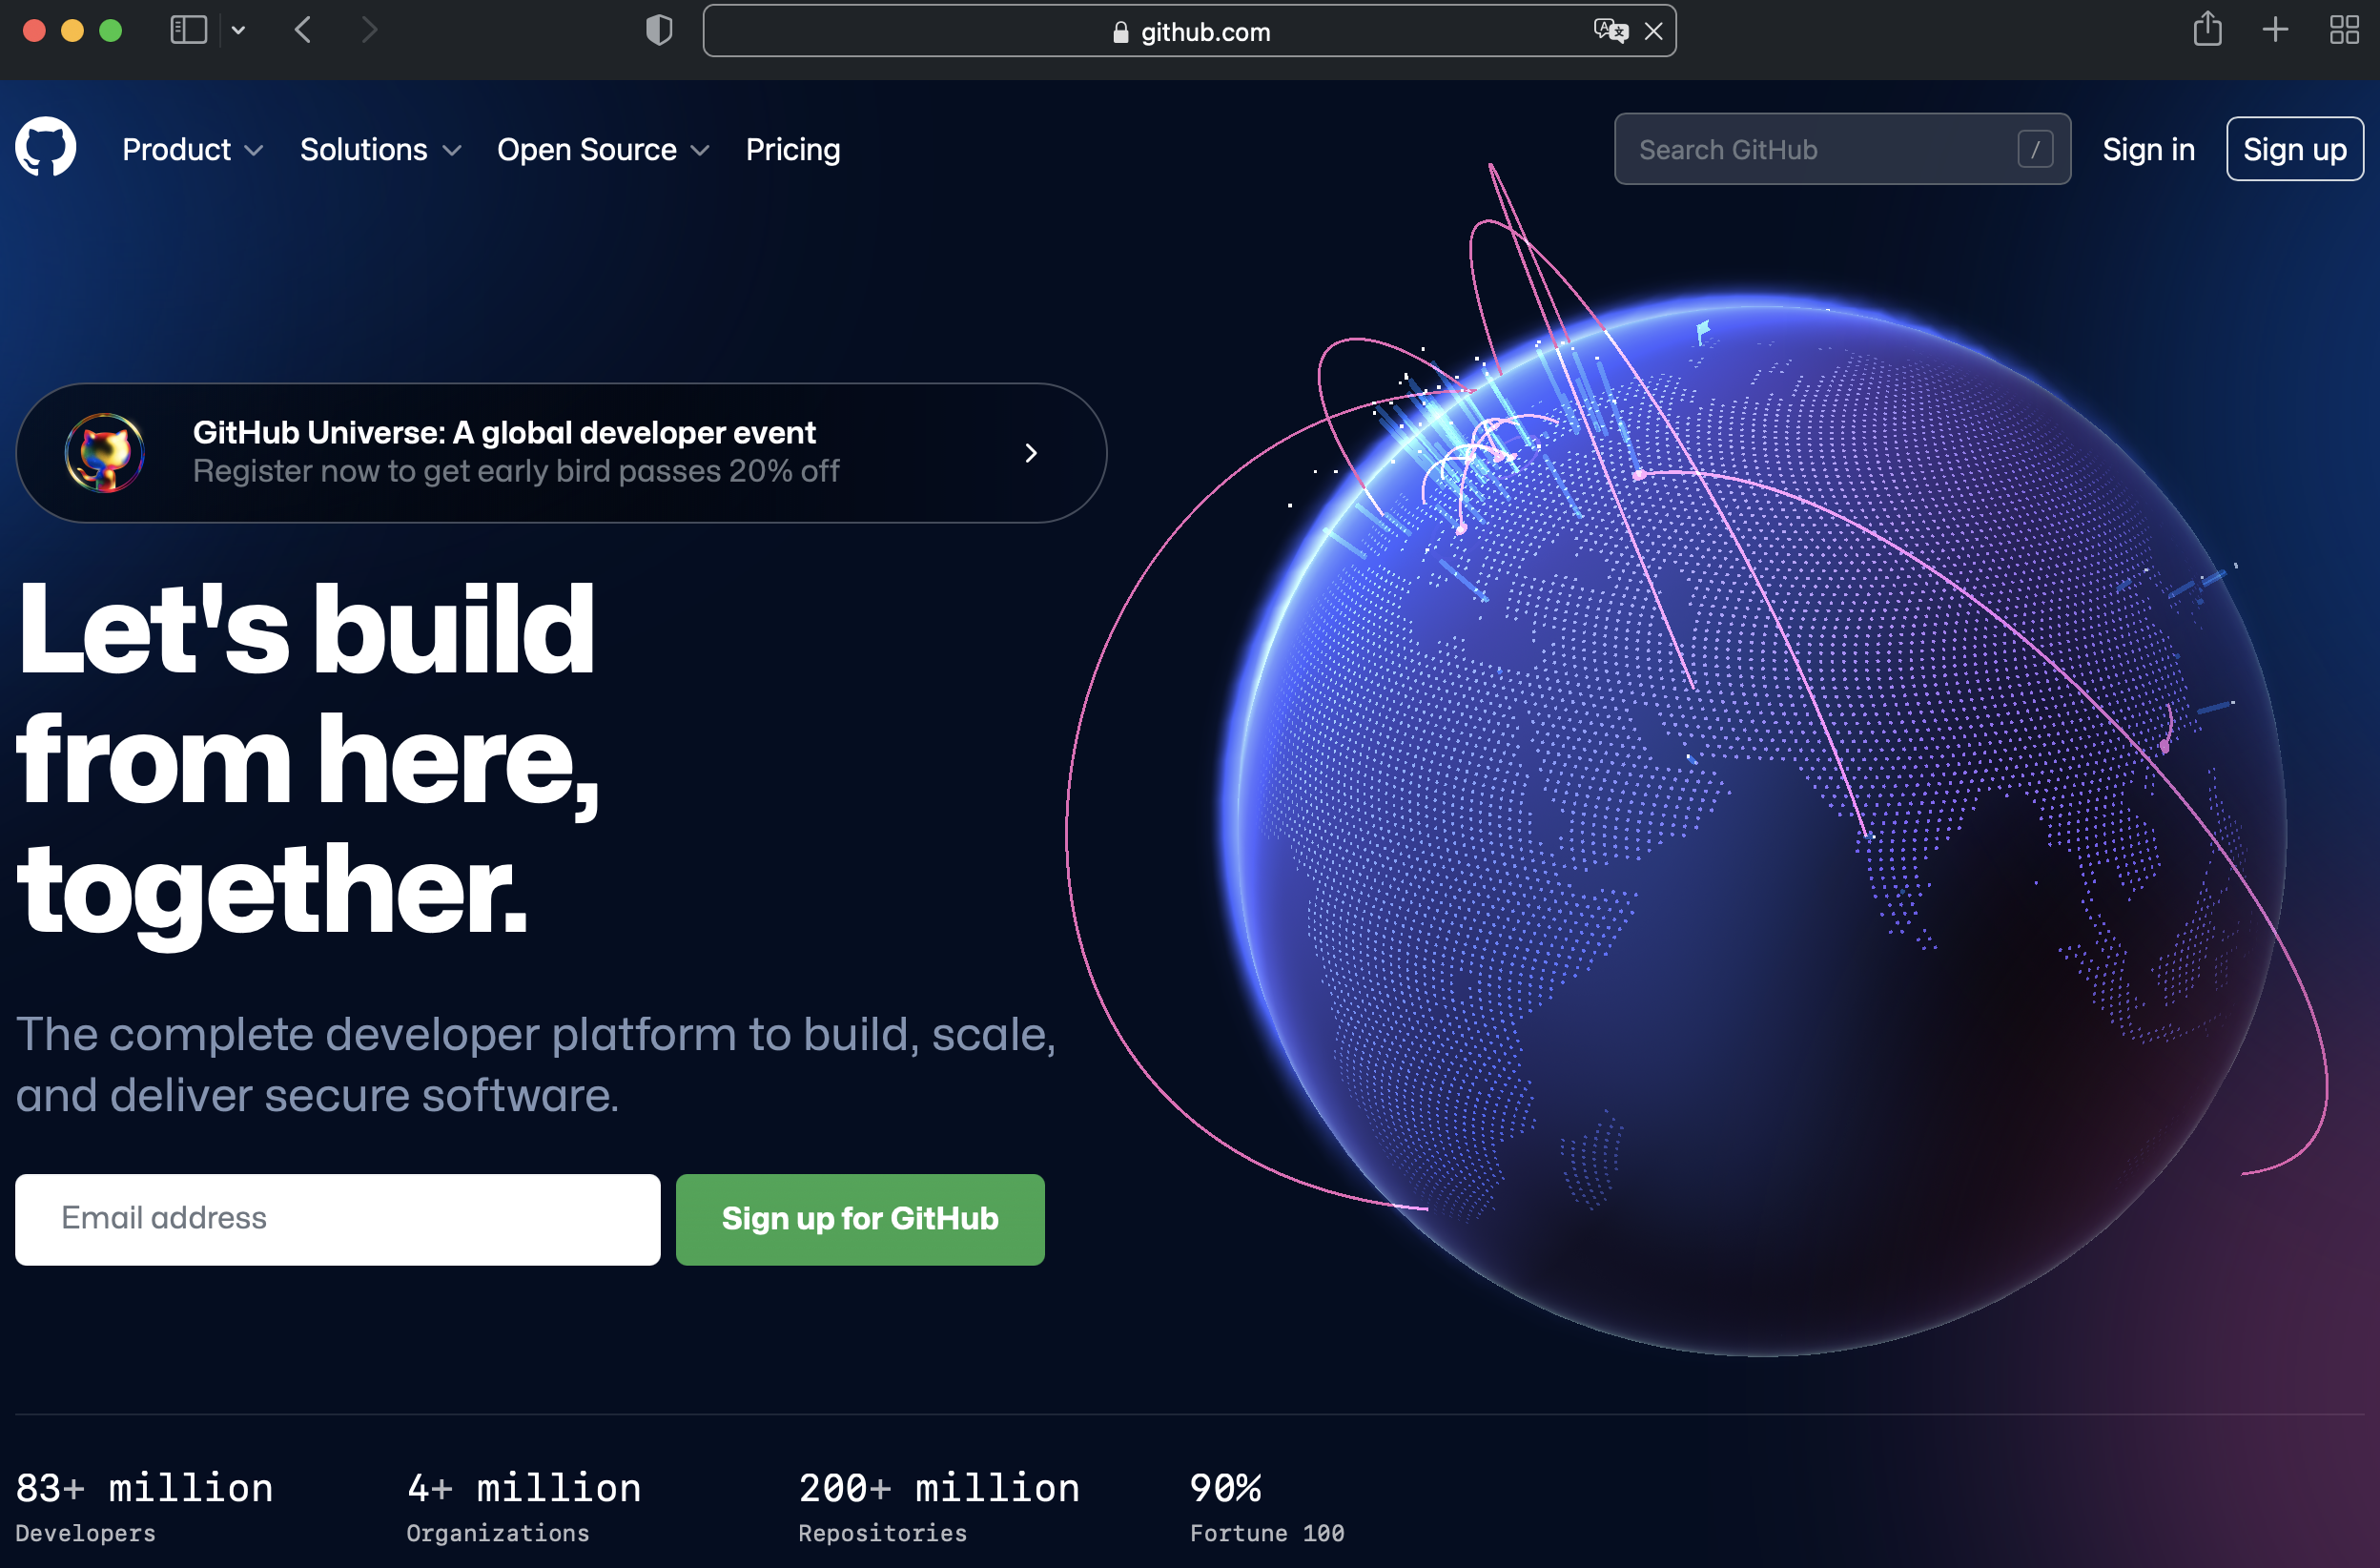
打开github官网
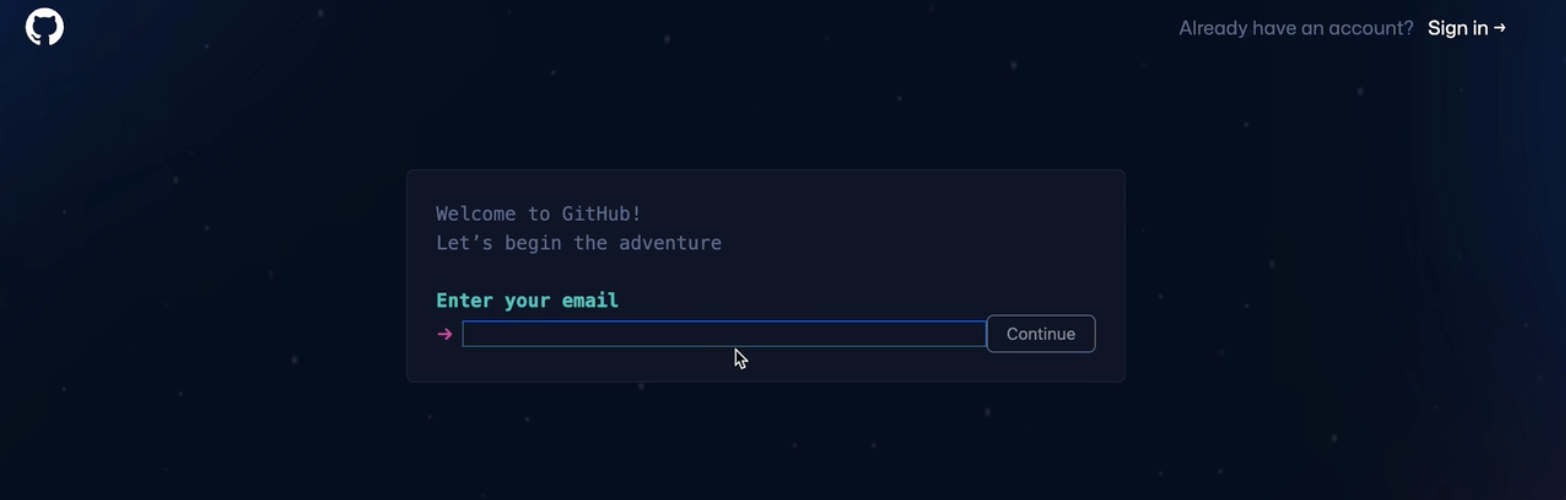
点击右上角“Sign up”按钮,打开注册入口

输入自己邮箱地址,点击continue
输入密码(注意:需要大小写加特殊字符),点击continue

输入用户名,这个用户名关系到后来你的默认域名,请慎重。点击continue

是否接受github的产品更新邮件,输入y。点击continue

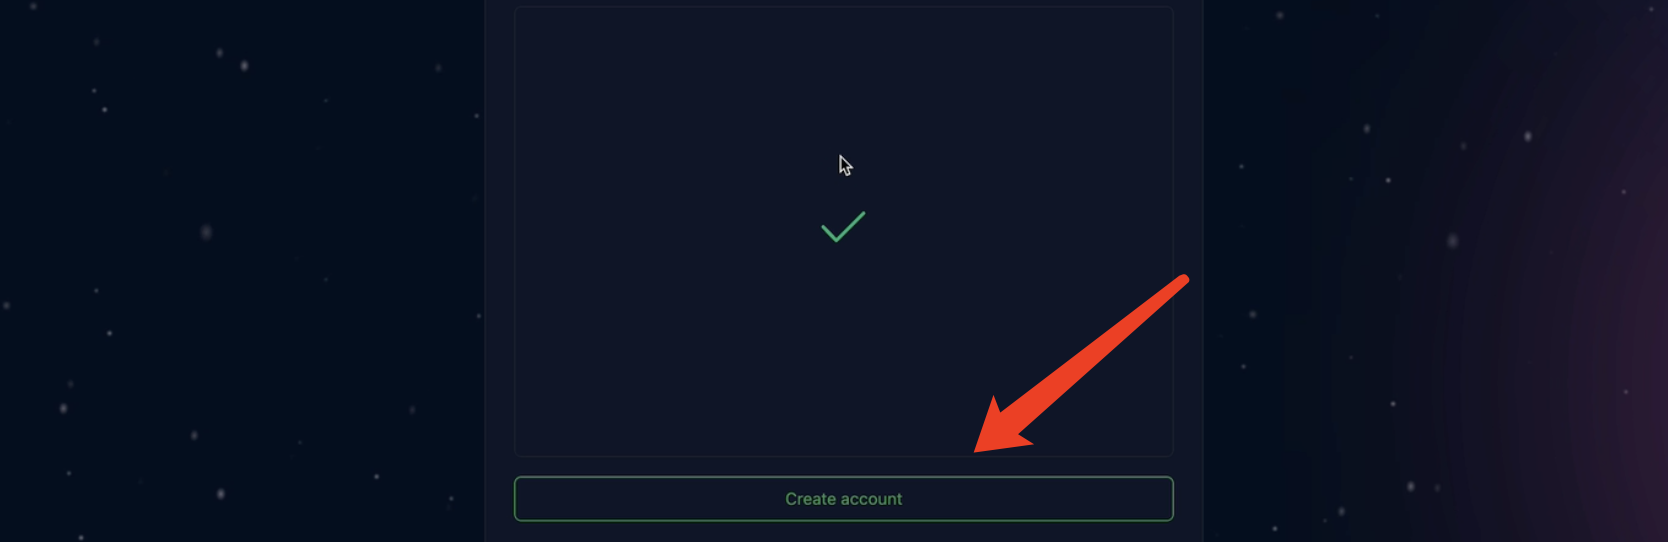
点击验证,验证成功后,点击Create account


登录刚刚填写的邮箱,把收到的验证码填上

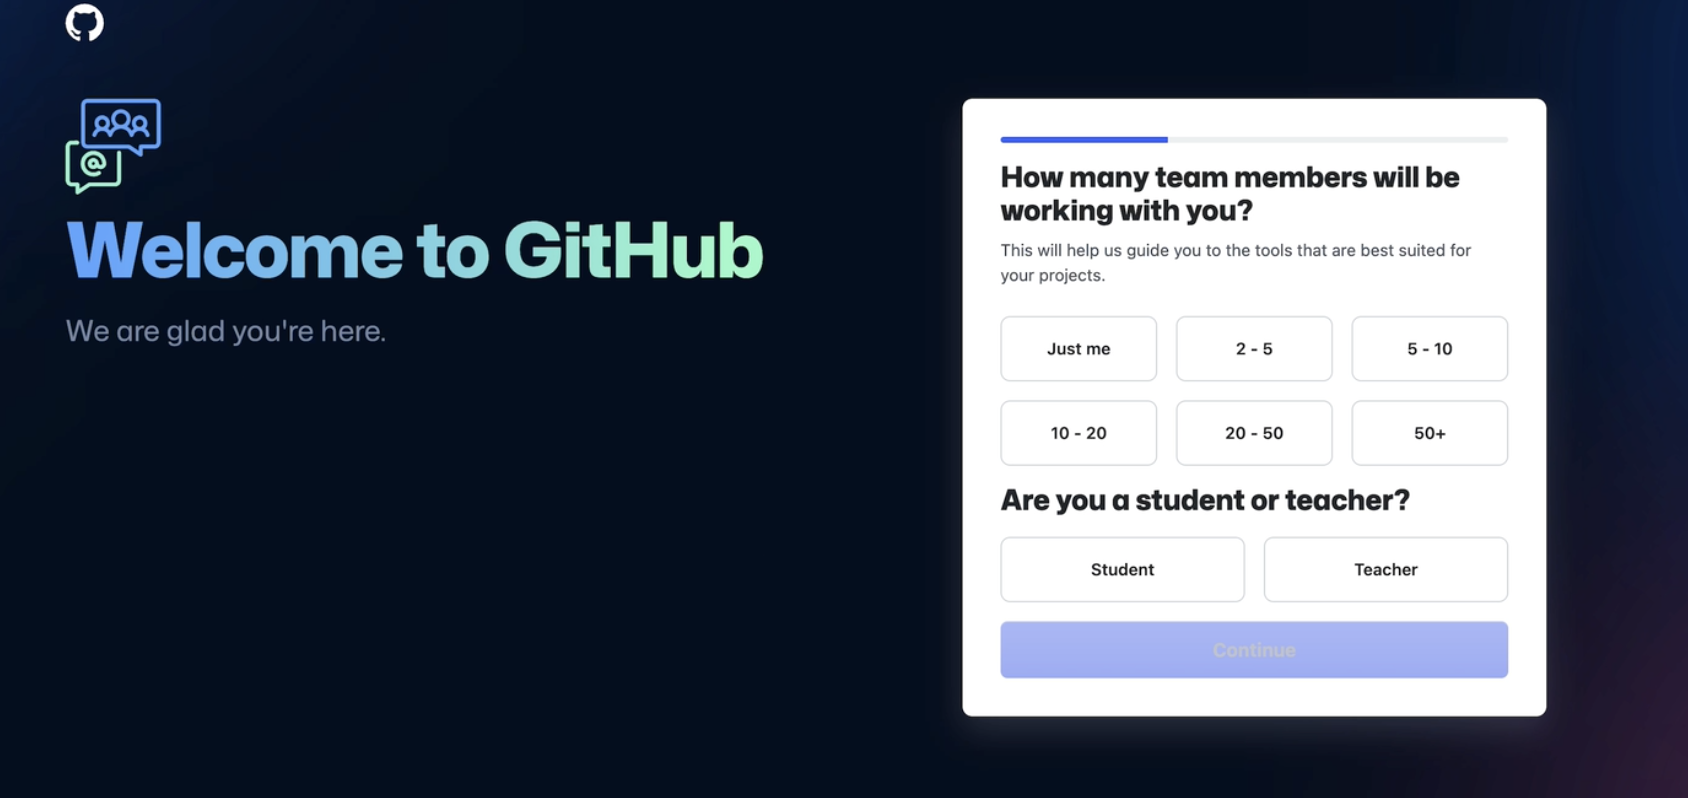
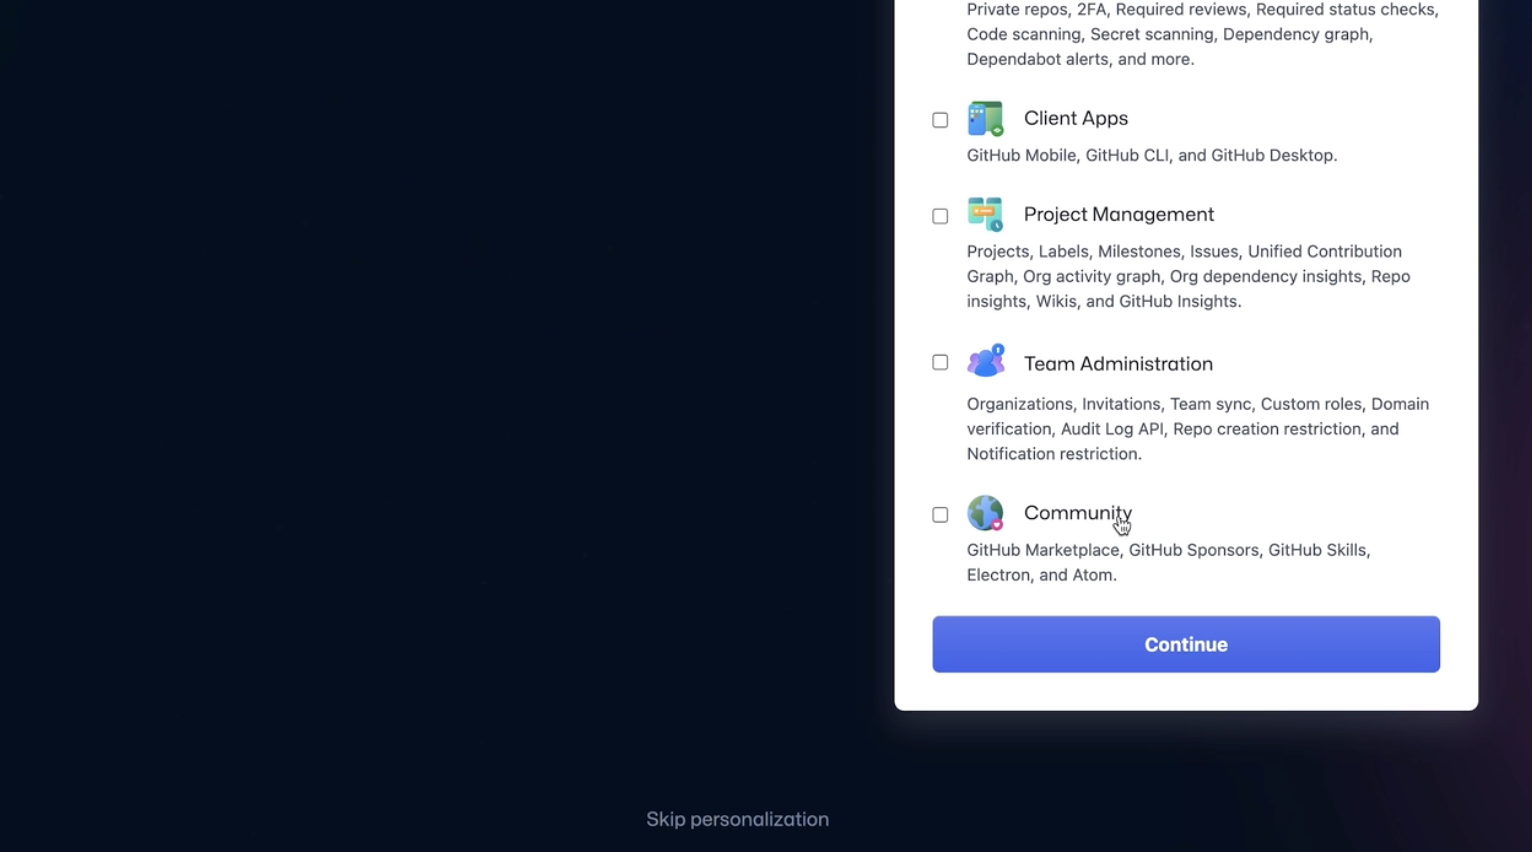
这些信息可填可不填,点击底部“Skip personalization”跳过即可
看到这个页面,就注册成功
6、上传hexo代码到github
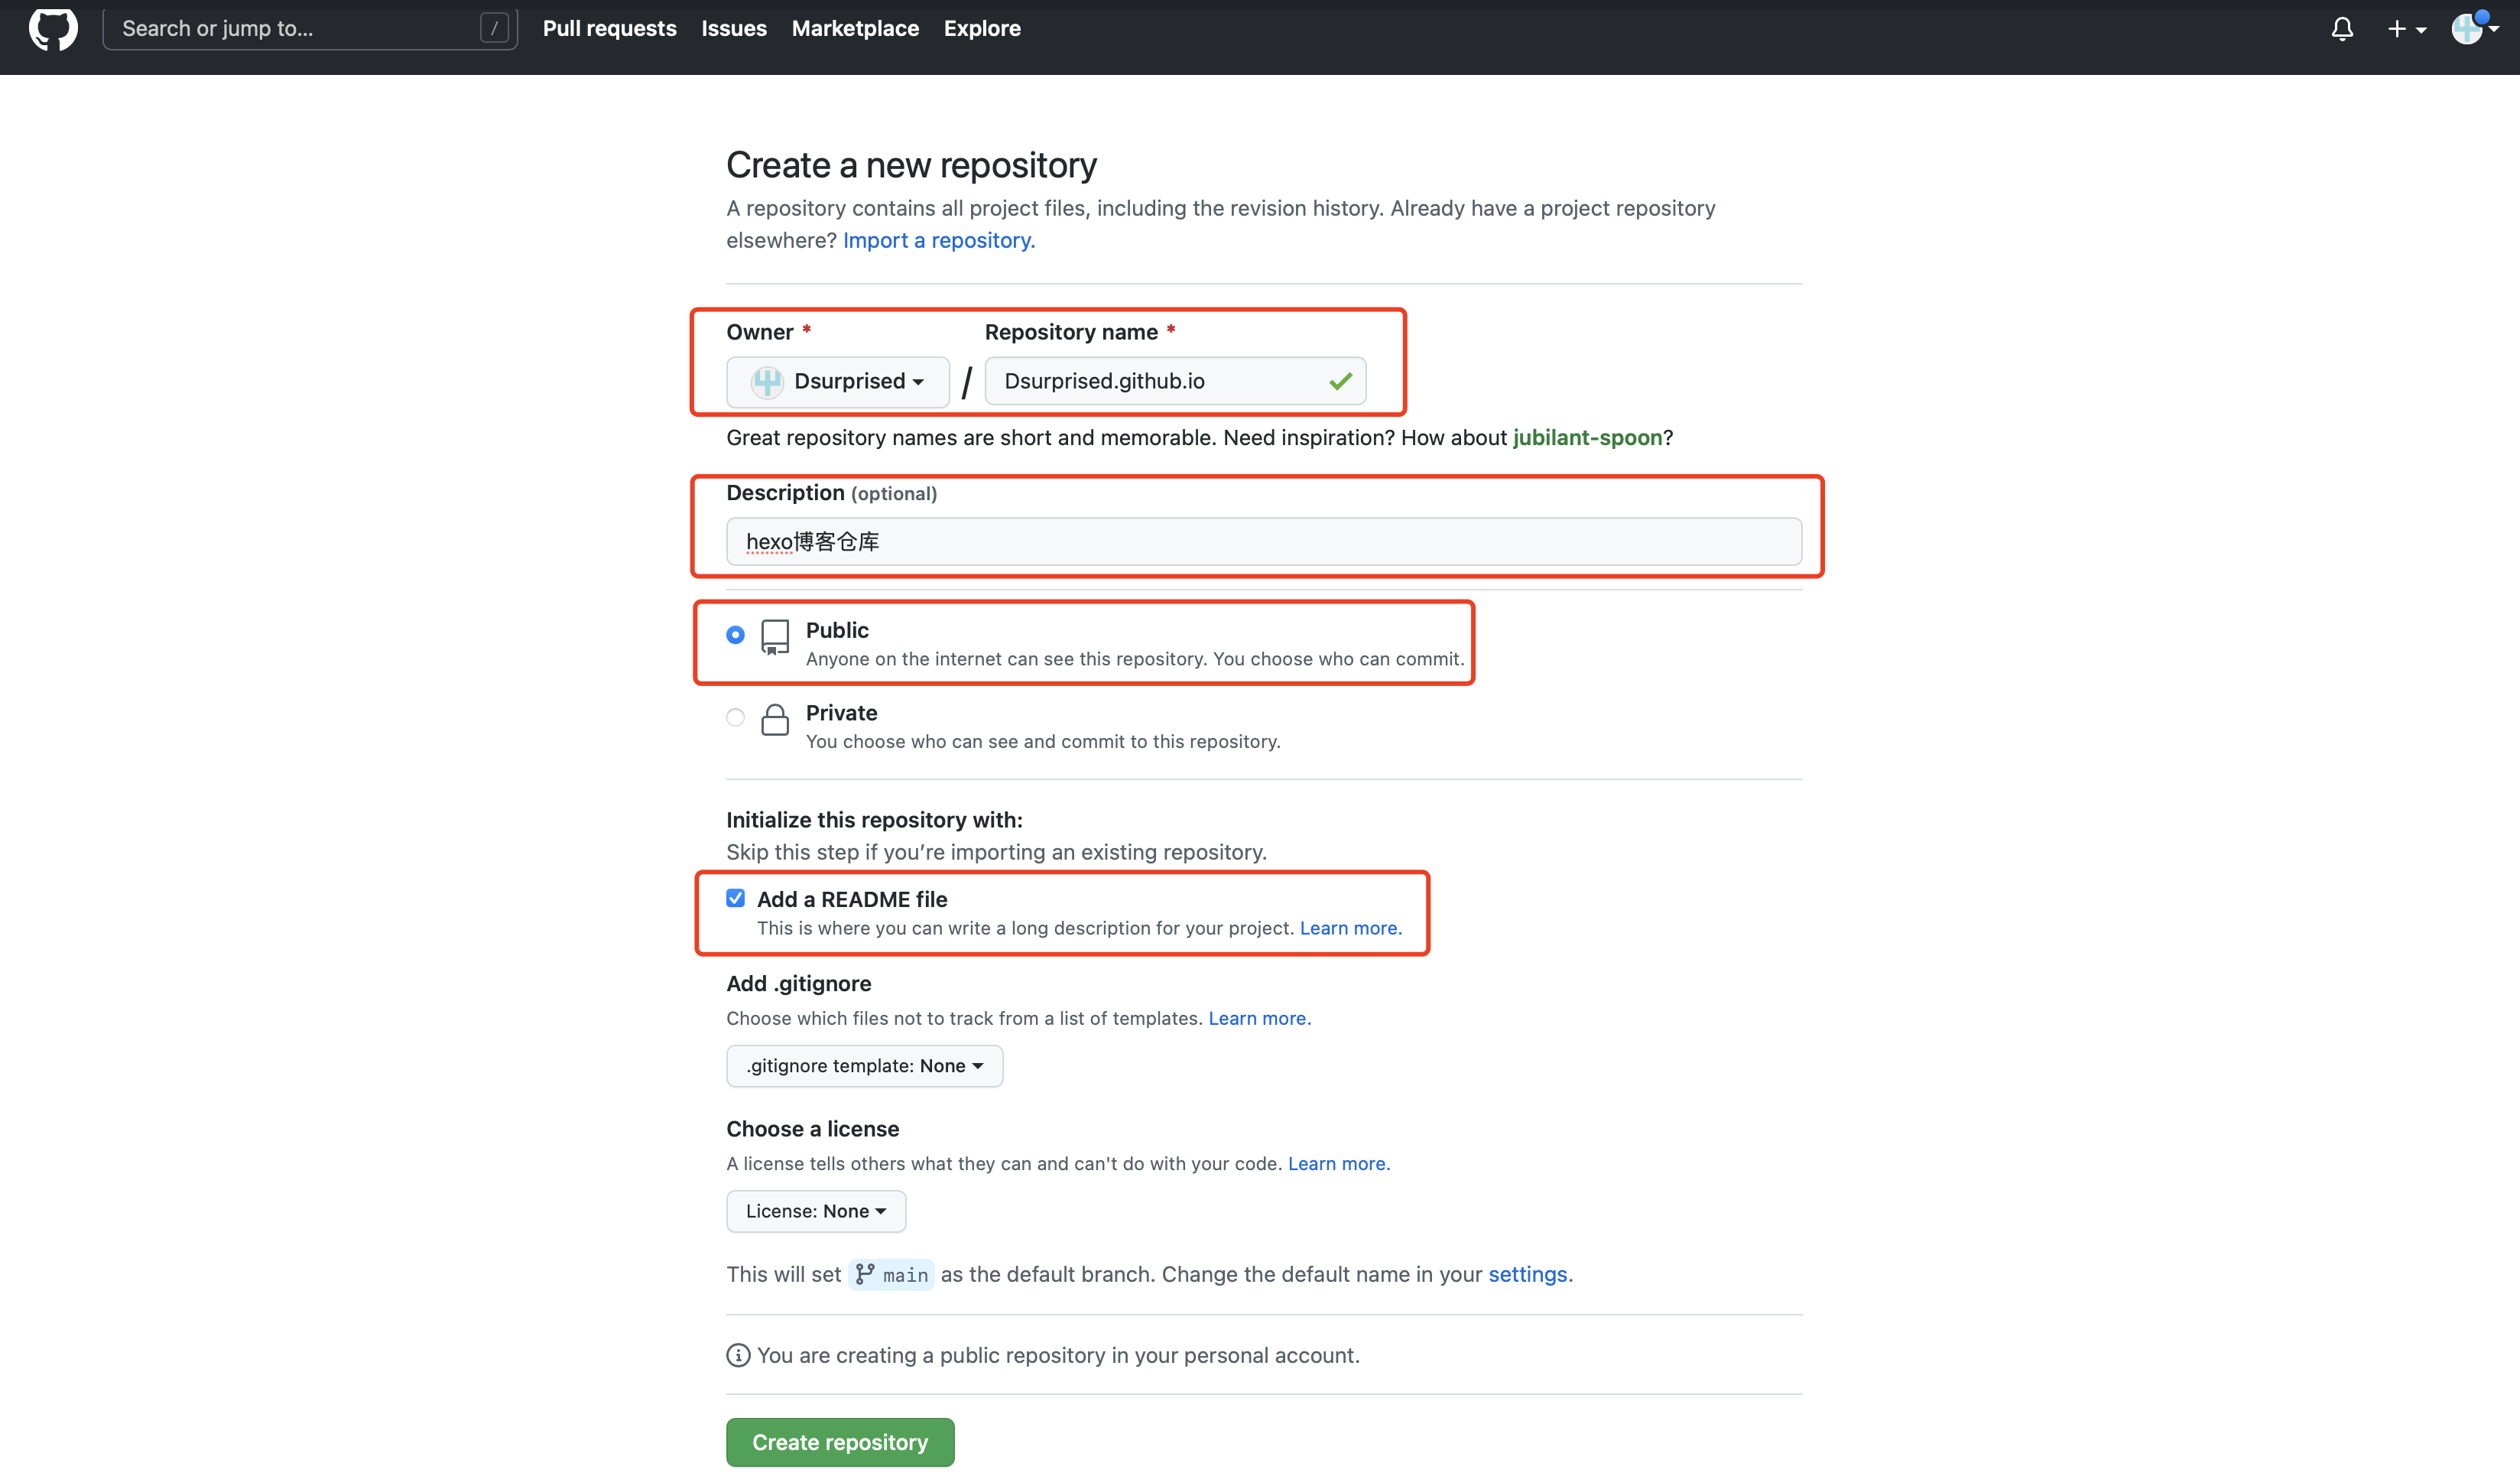
创建hexo仓库
填写仓库名称、描述、选择公开。点击“Create repository”
1 | # 仓库名称(Repository name)是用于后续访问的域名,请按照格式填写 |
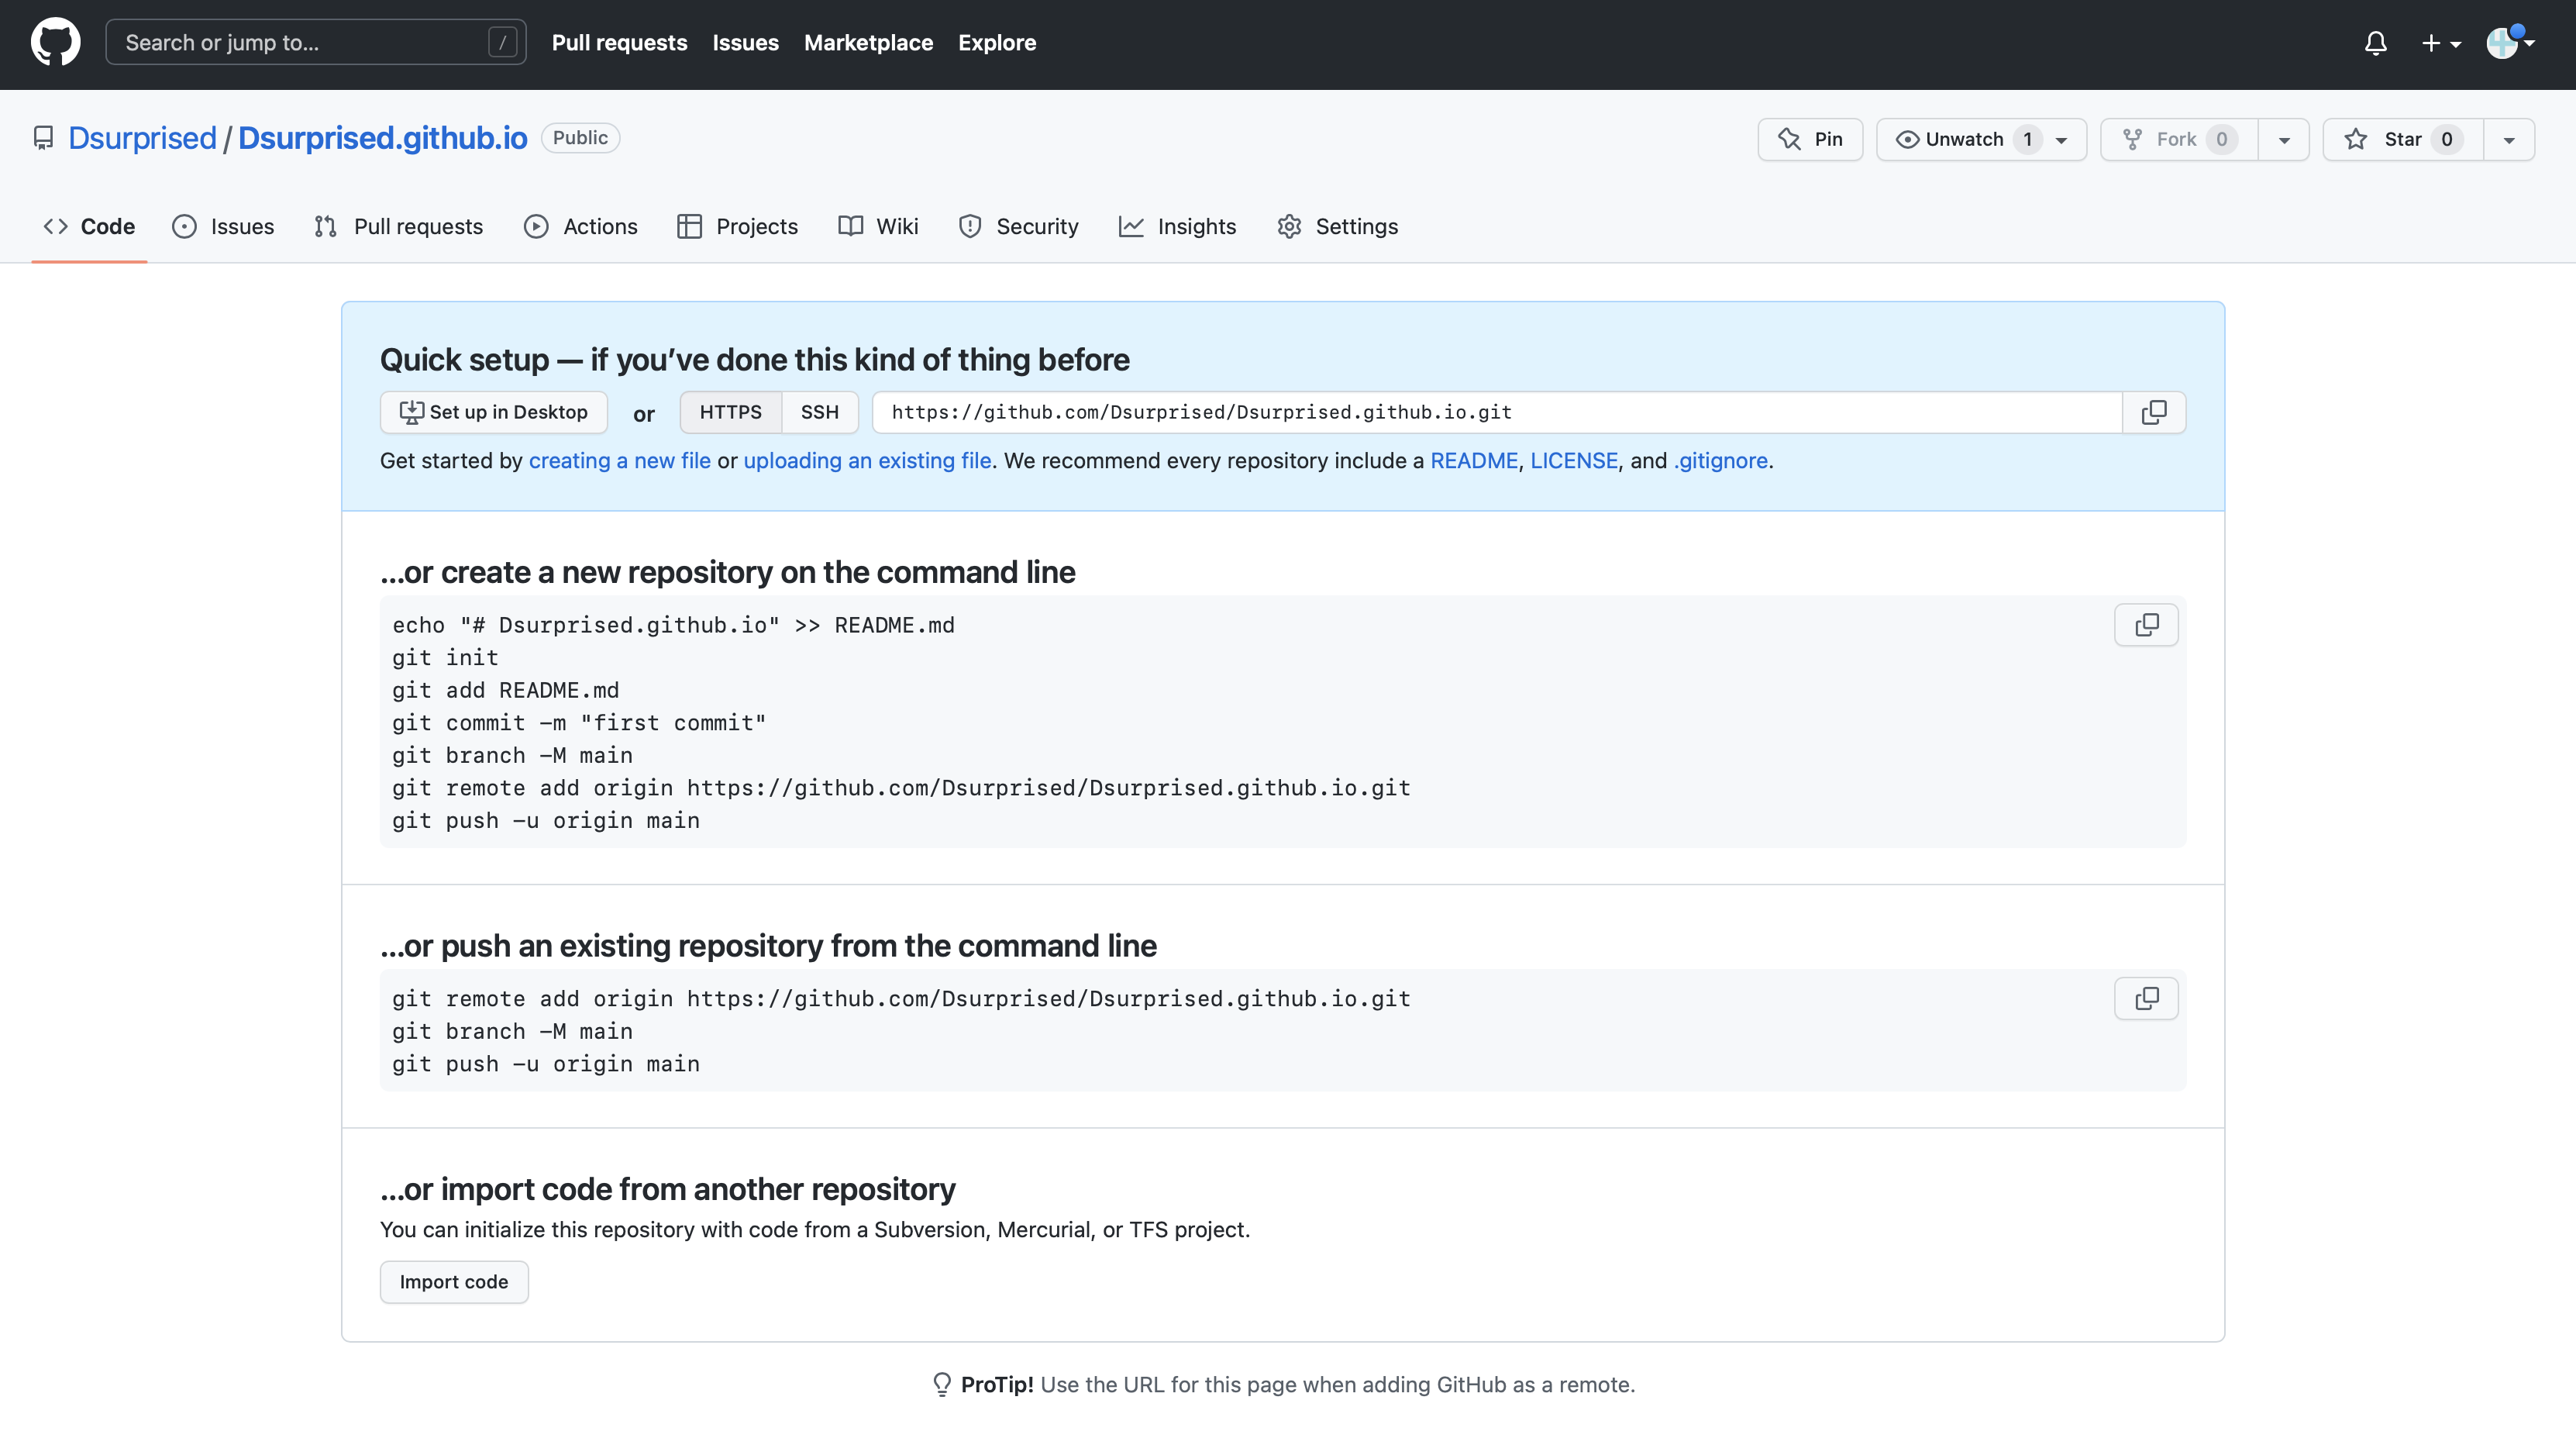
成功创建会跳转到这个页面,即表示成功
在Linux服务器创建密钥
1 | # 创建密钥,引号里面填写你的注册邮箱地址,然后一直回车 |
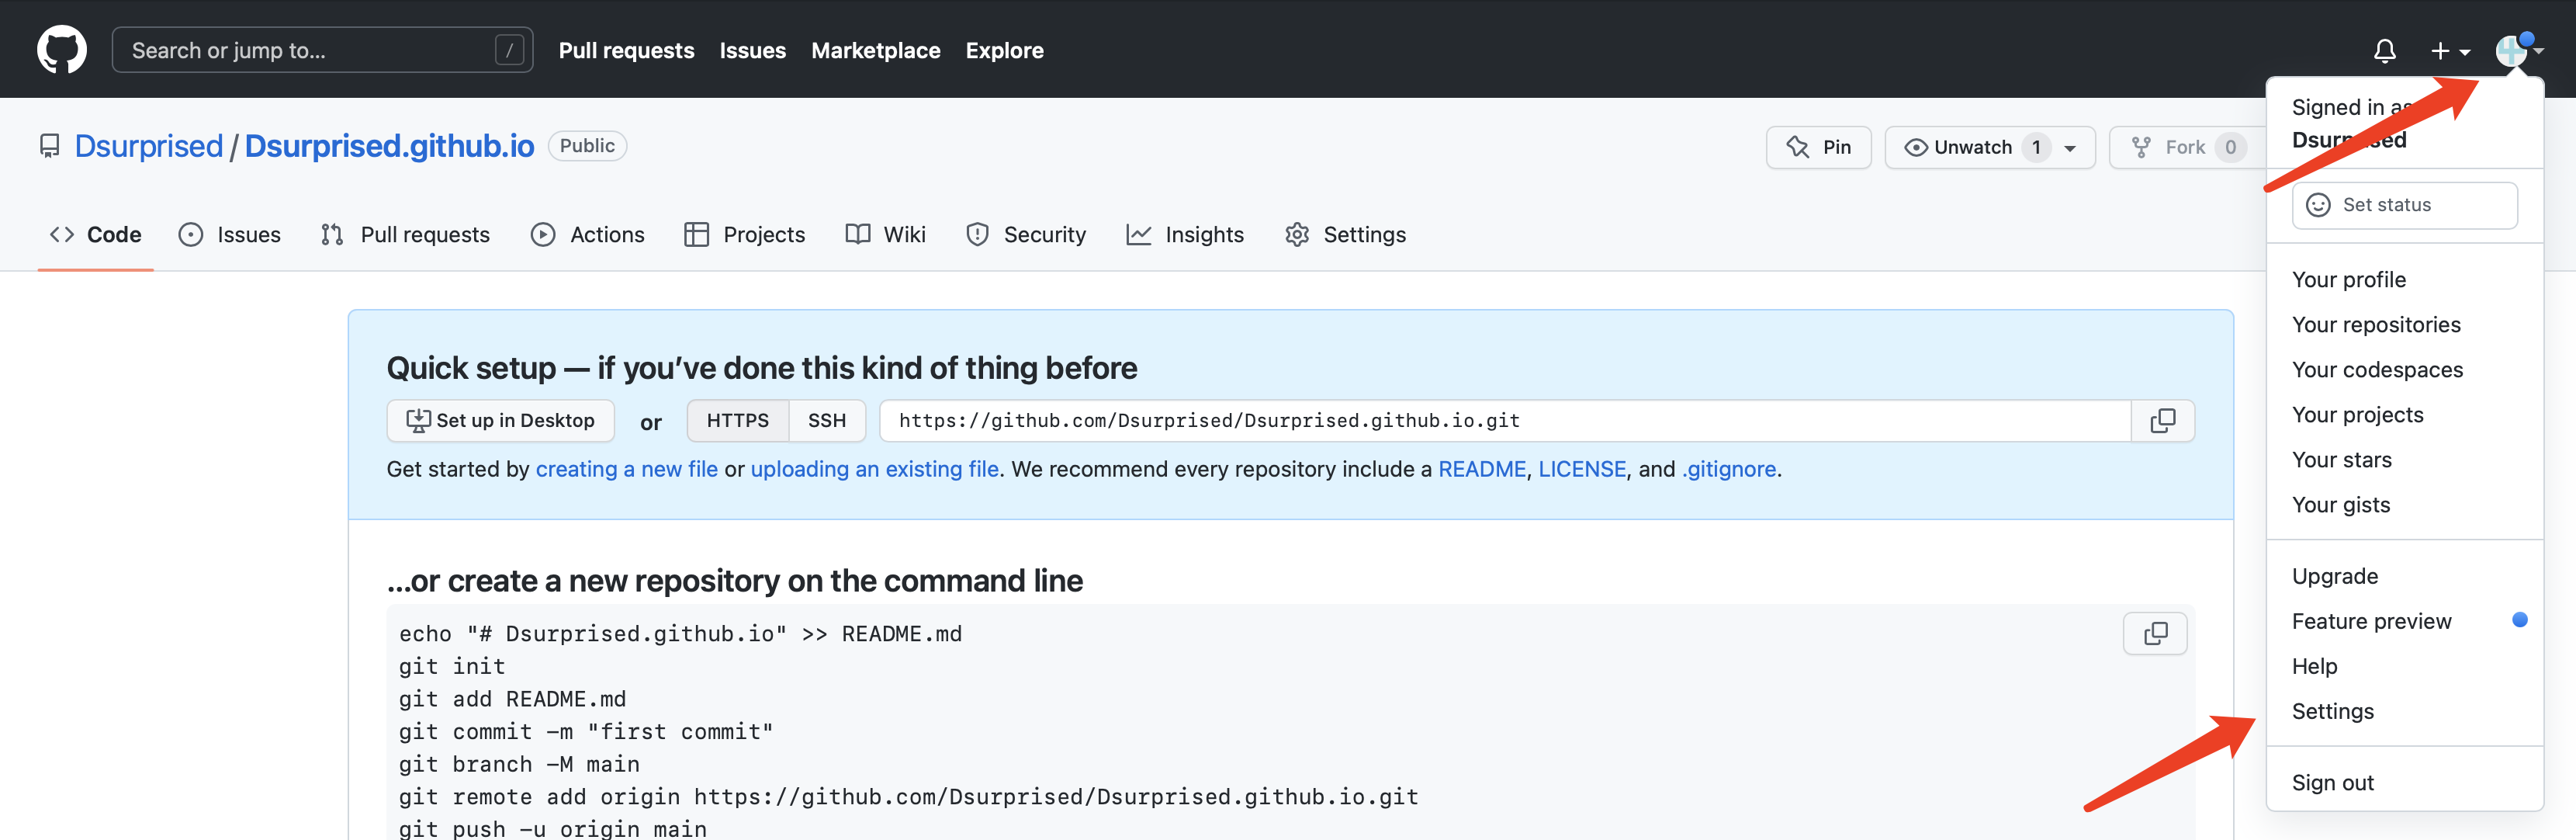
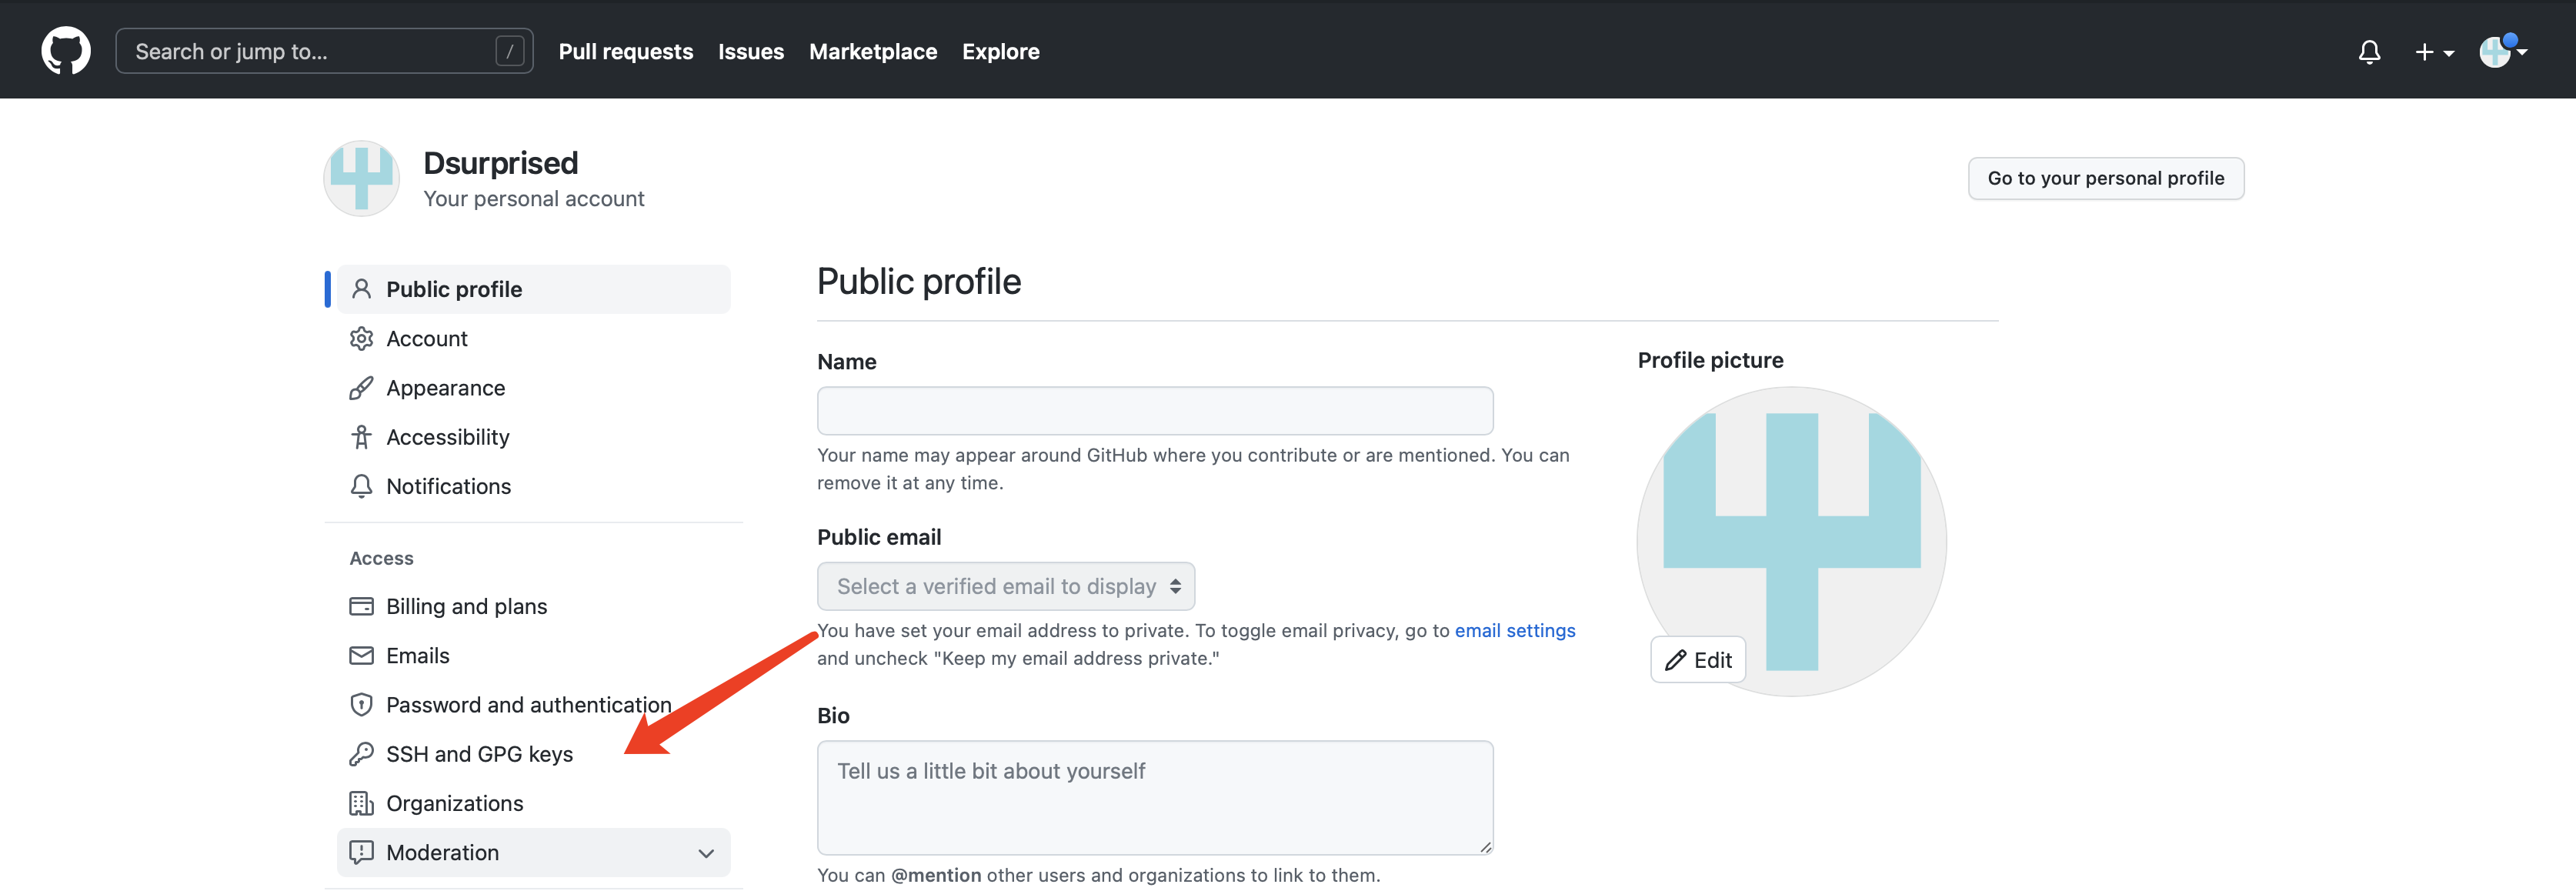
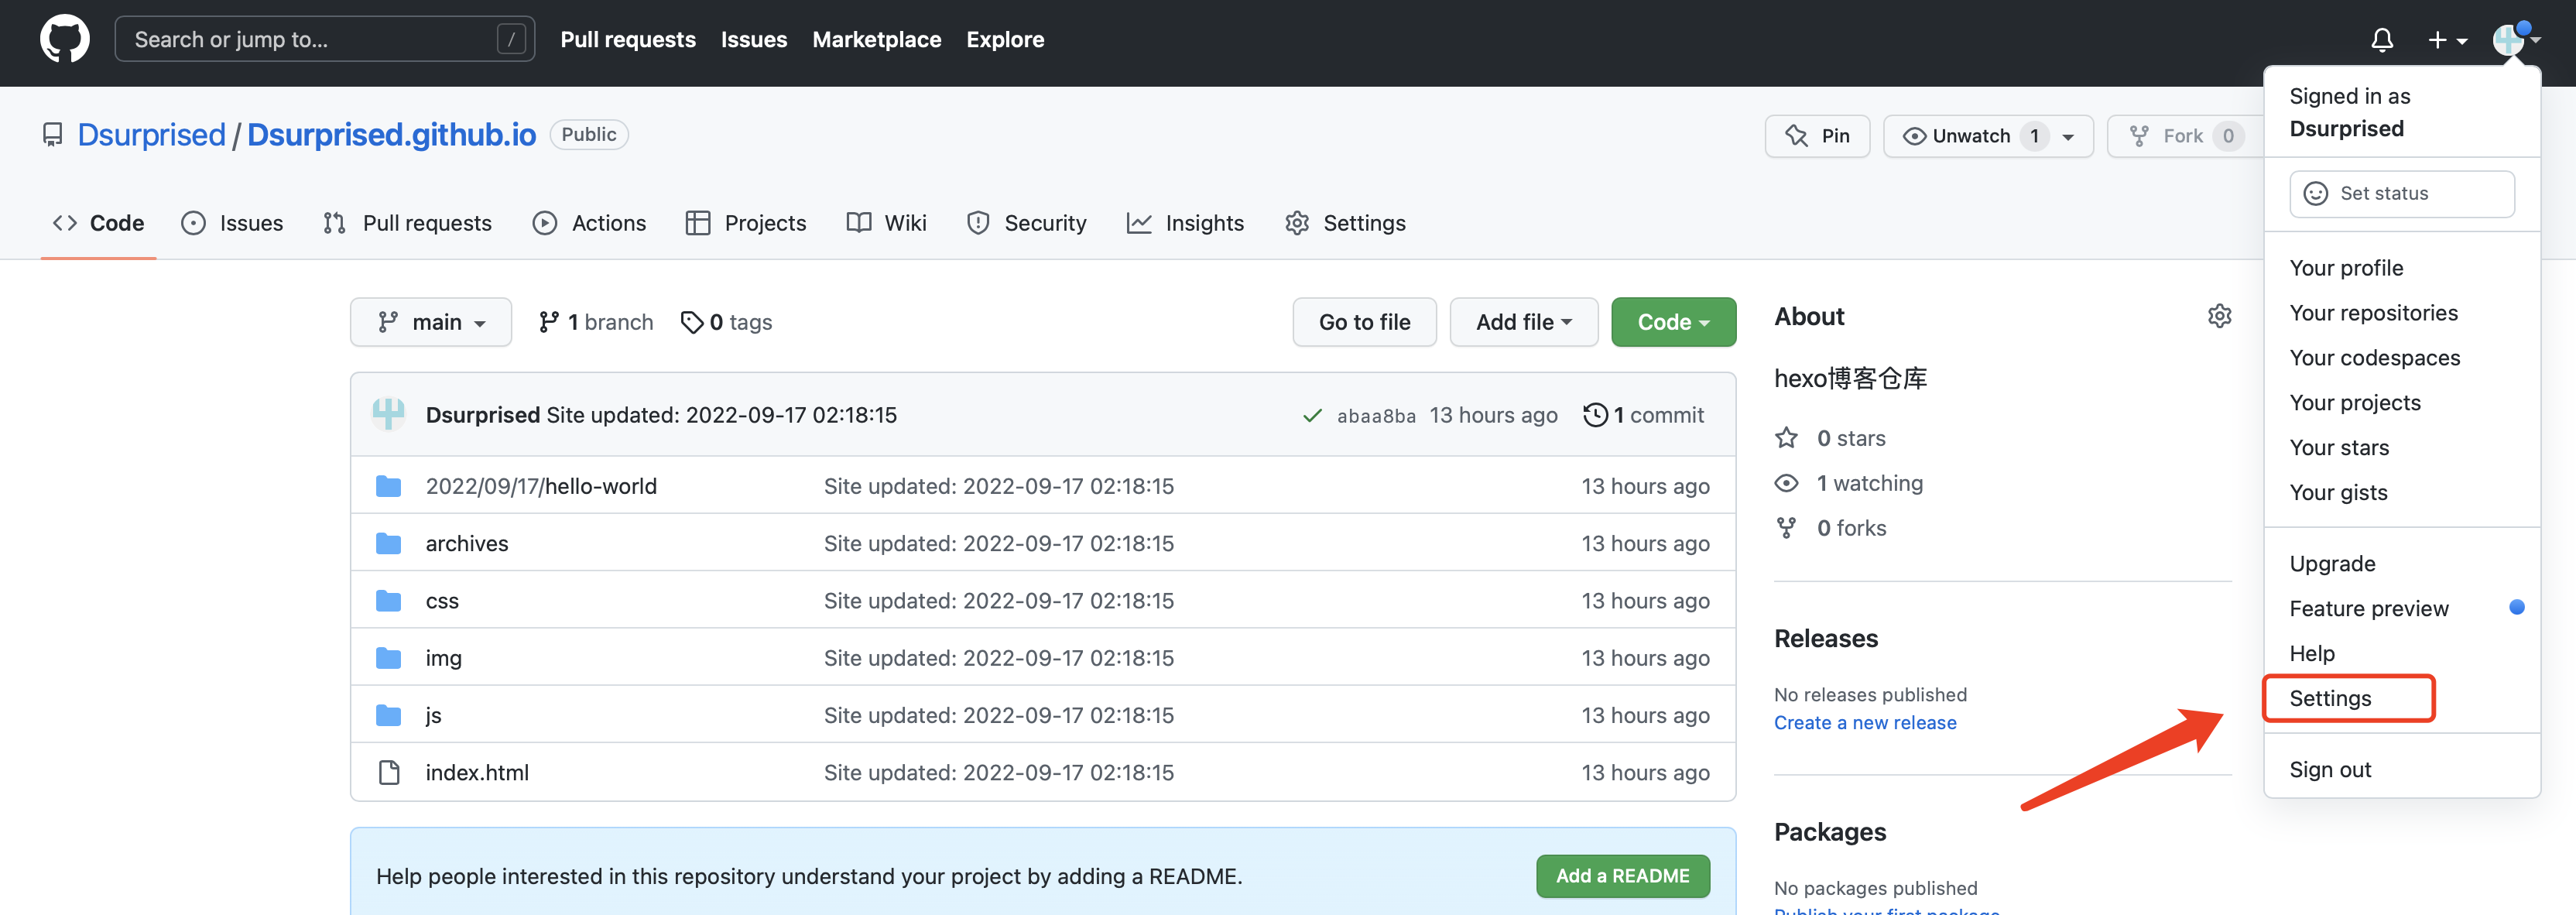
打开github,选择右上角图标,点击Settings
选择SSH and GPG keys
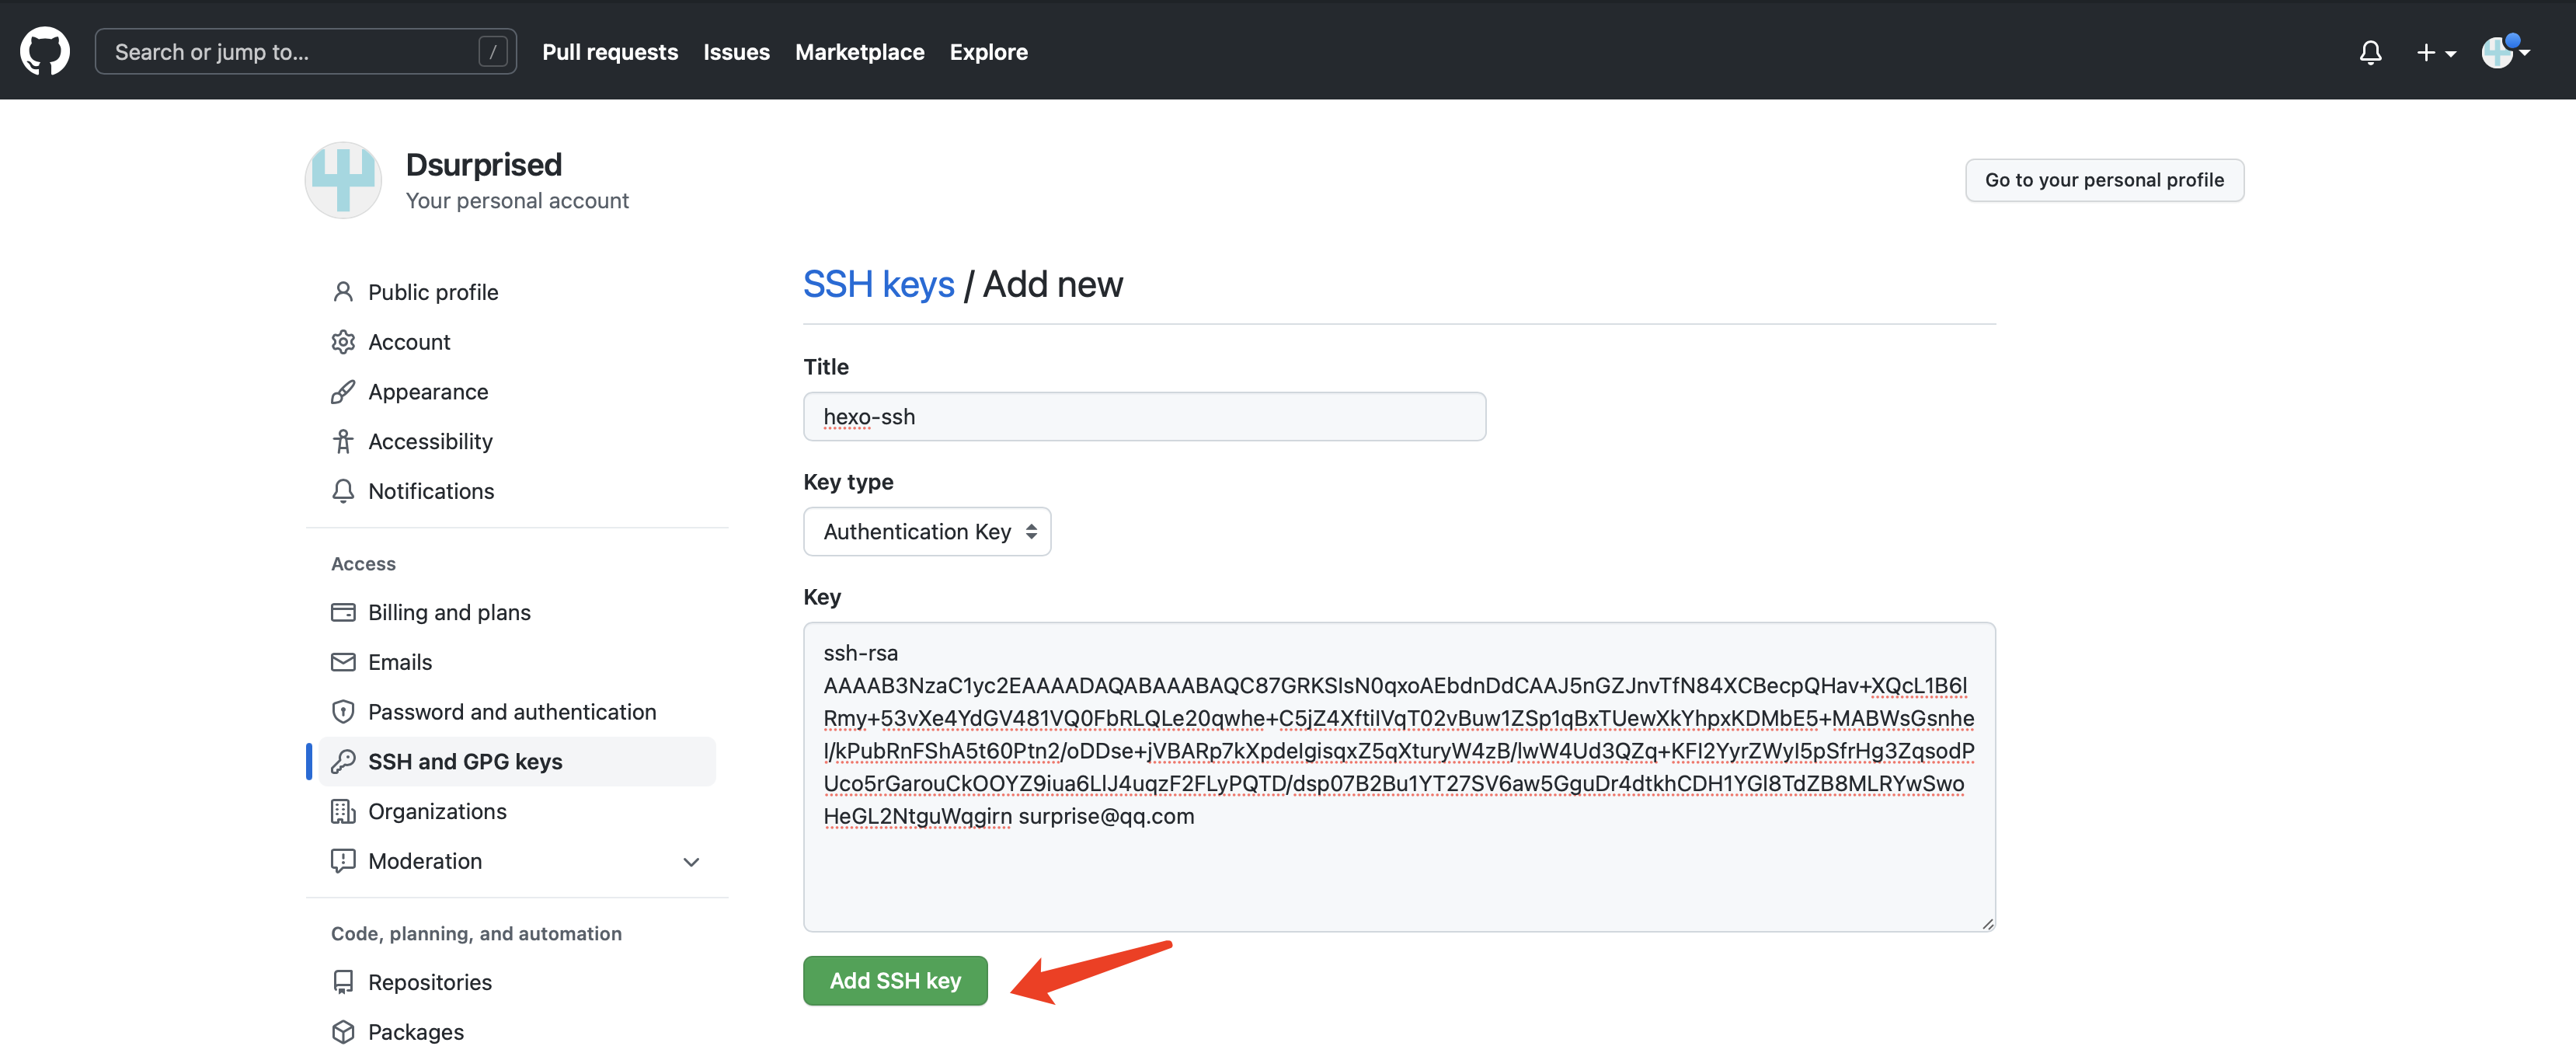
点击New SSH key

Titie名称随意填写,把生成的密钥复制到key上,点击Add SSH key
测试SSH 是否成功
1 | # 输入以下命令: |

配置 Git 个人信息
1 | # Git 会根据用户的名字和邮箱来记录提交,GitHub 也是用这些信息来做权限的处理,输入以下命令进行个人信息的设置,把名称和邮箱替换成你自己的,名字可以不是 GitHub 的昵称,但为了方便记忆,建议与 GitHub 一致 |
回到刚创建的仓库页面,复制仓库地址

1 | # 打开_config.yml文件 |
执行hexo d后,代码已提交到github,如下
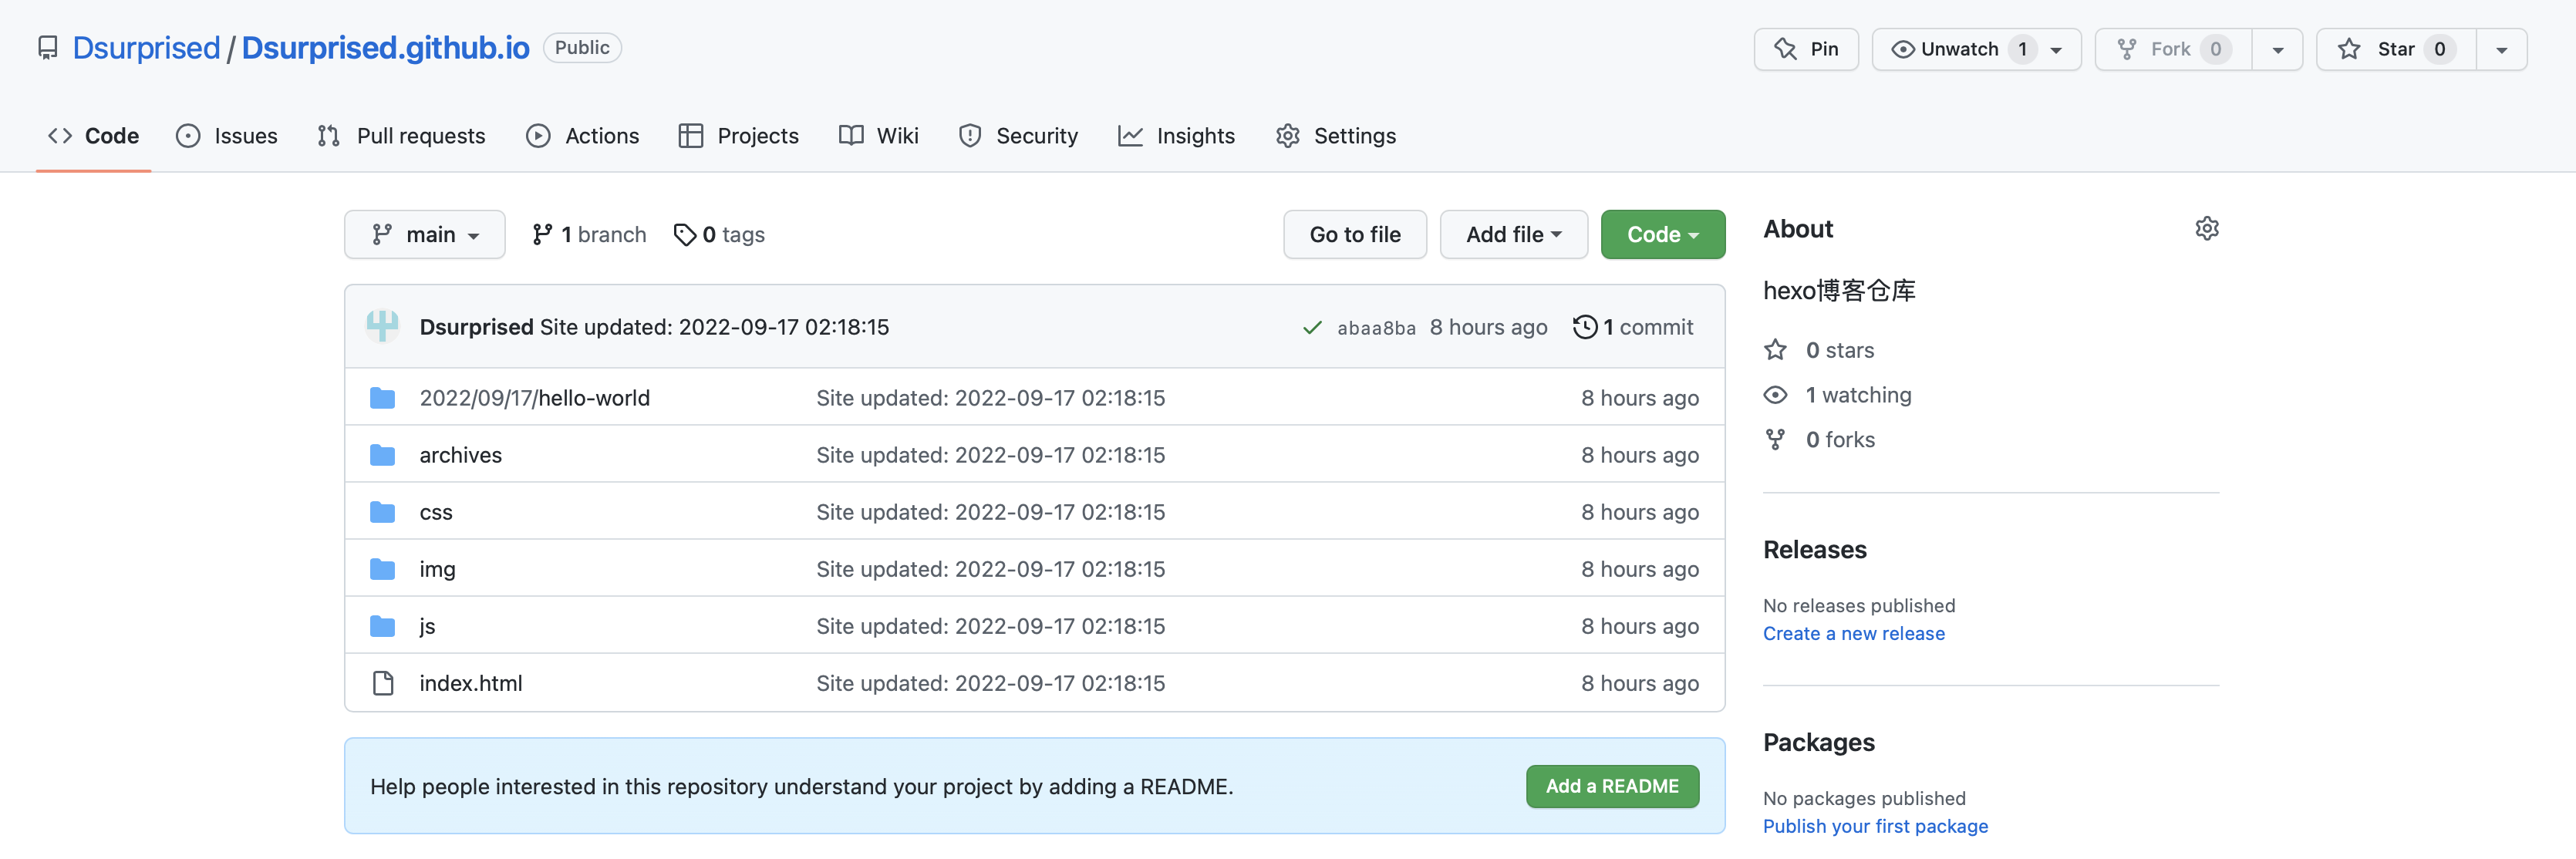
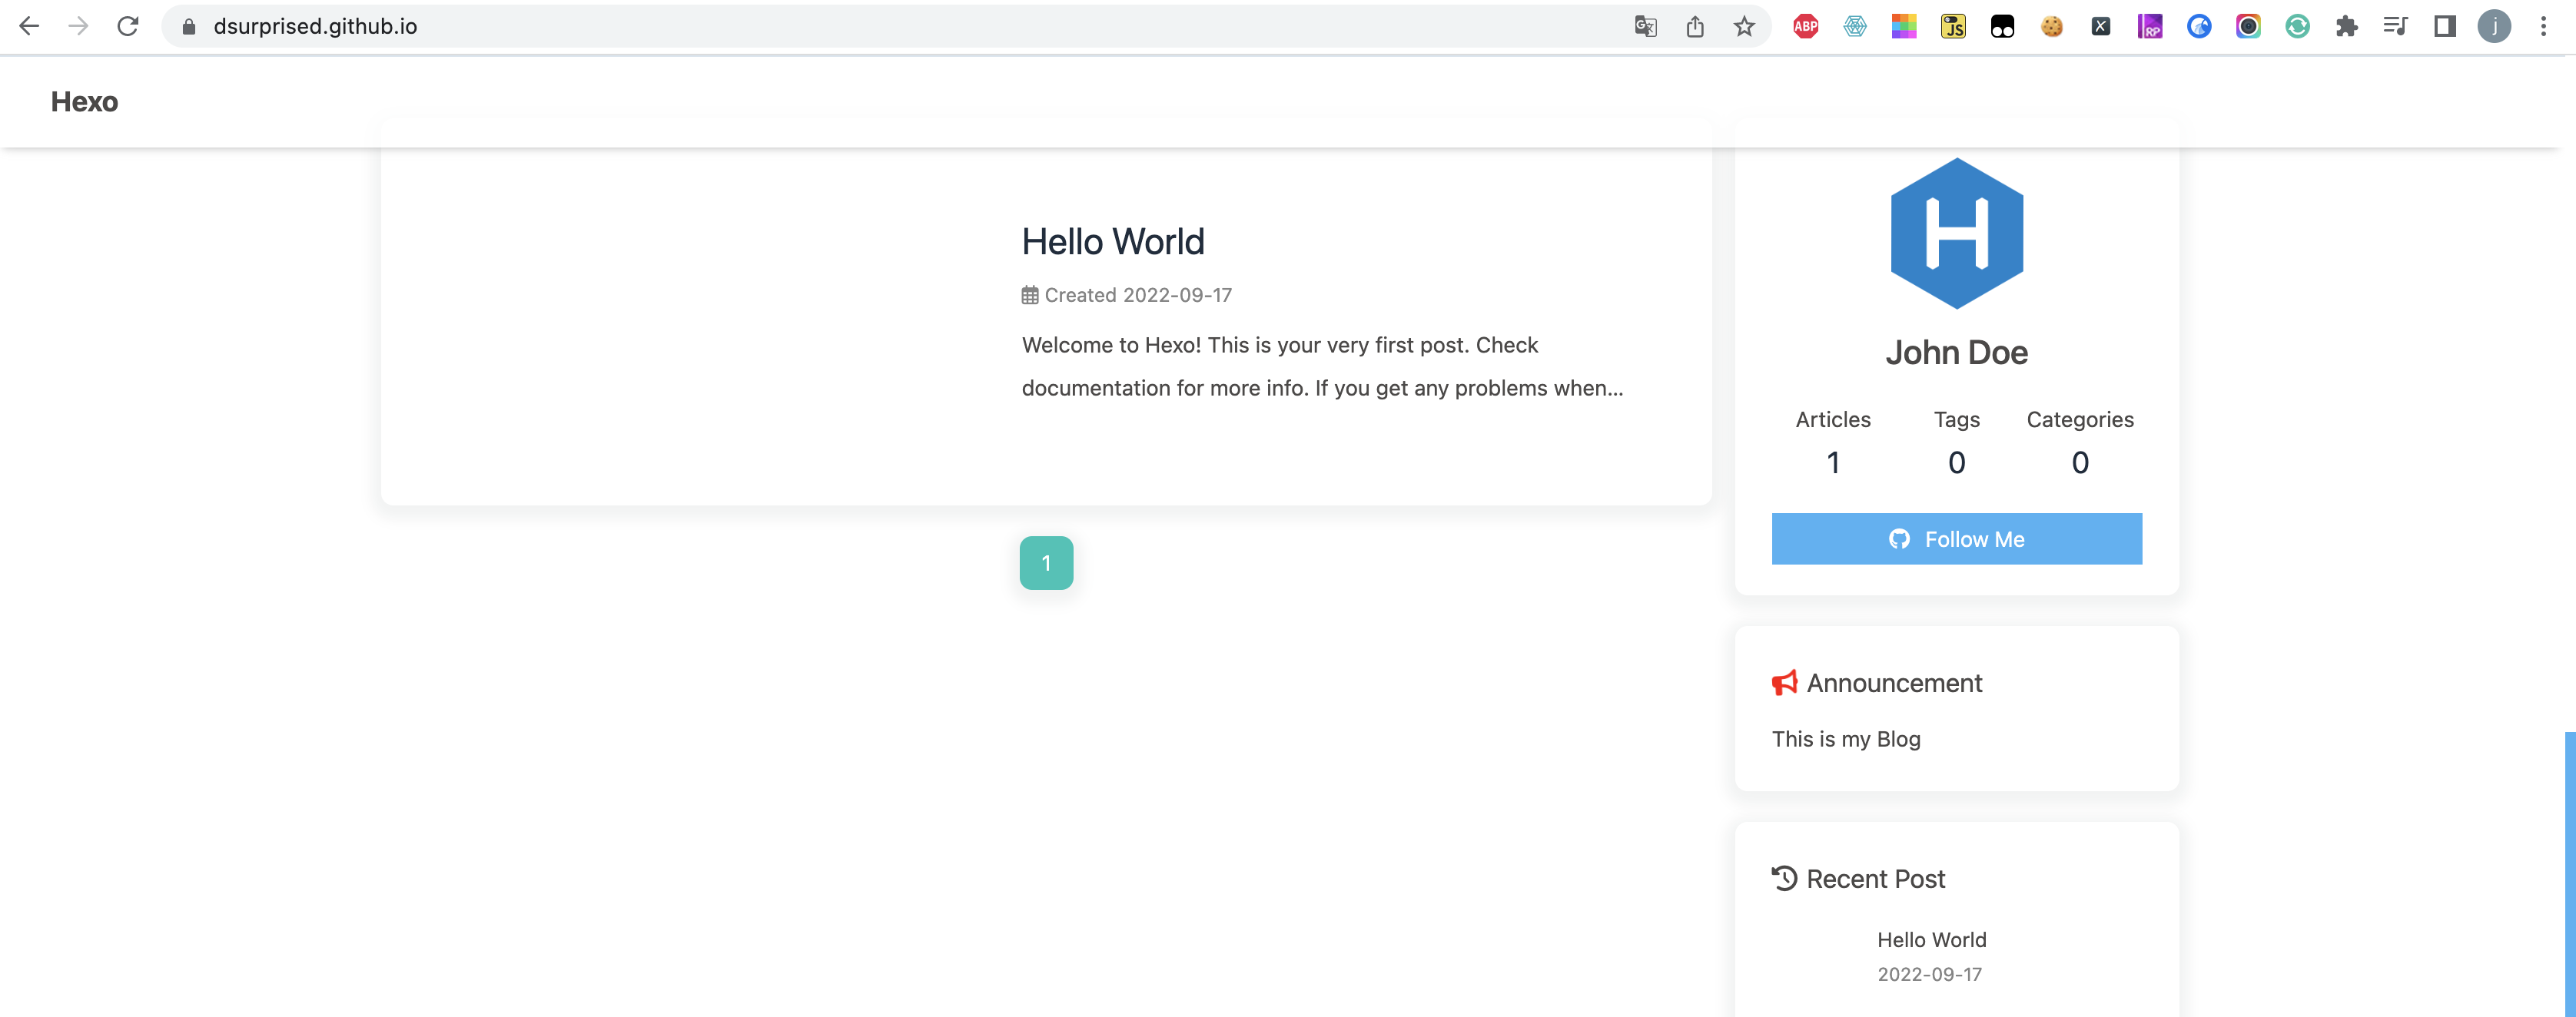
在浏览器输入仓库地址,公网即可访问到博客,如:Dsurprised.github.io
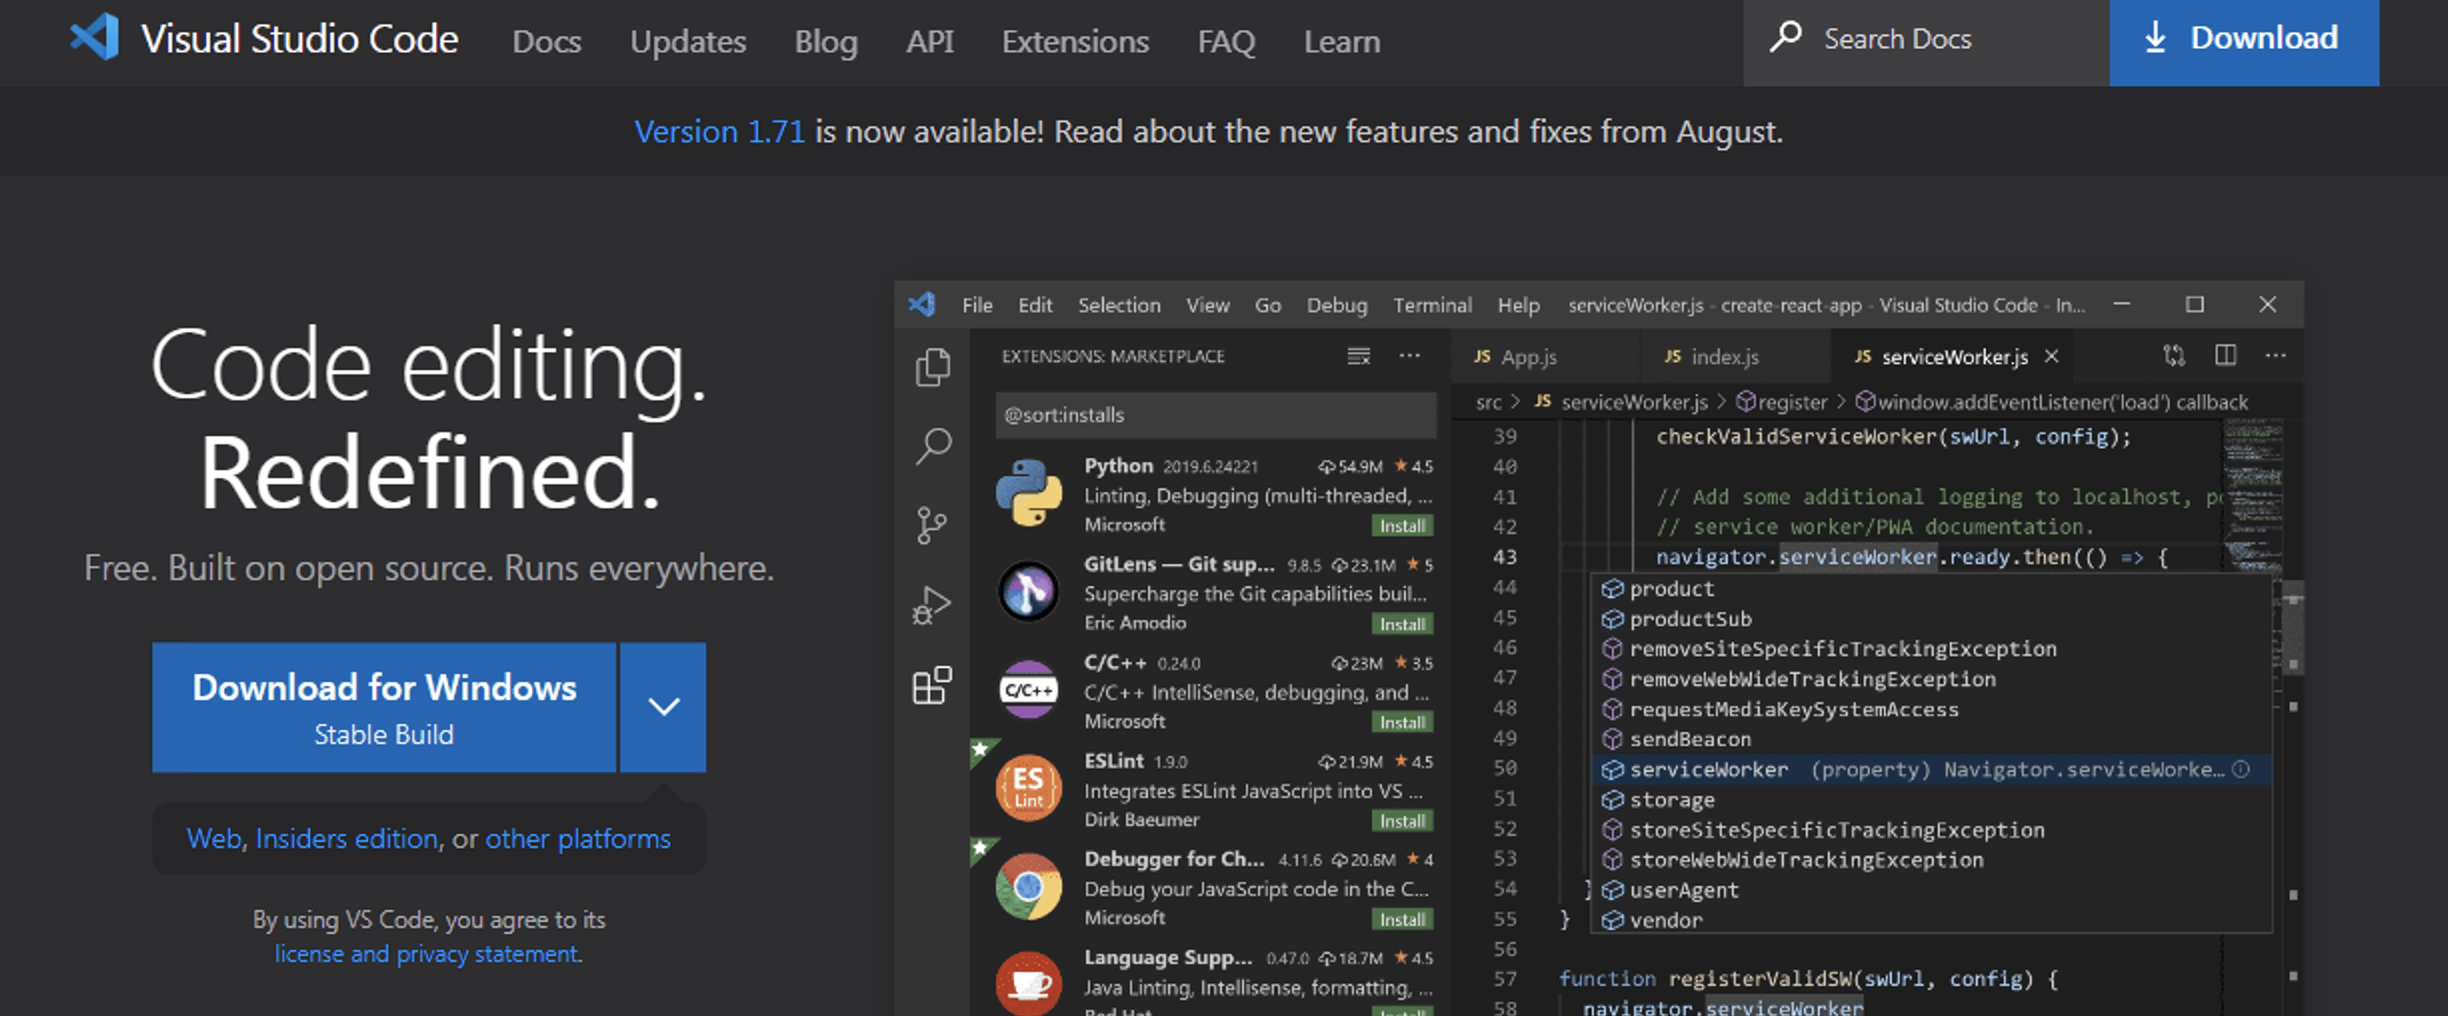
7、安装vscode
vscode官网:https://code.visualstudio.com/
1 | # 此处笔记以windows系统安装(mac系统安装以及操作基本一样) |
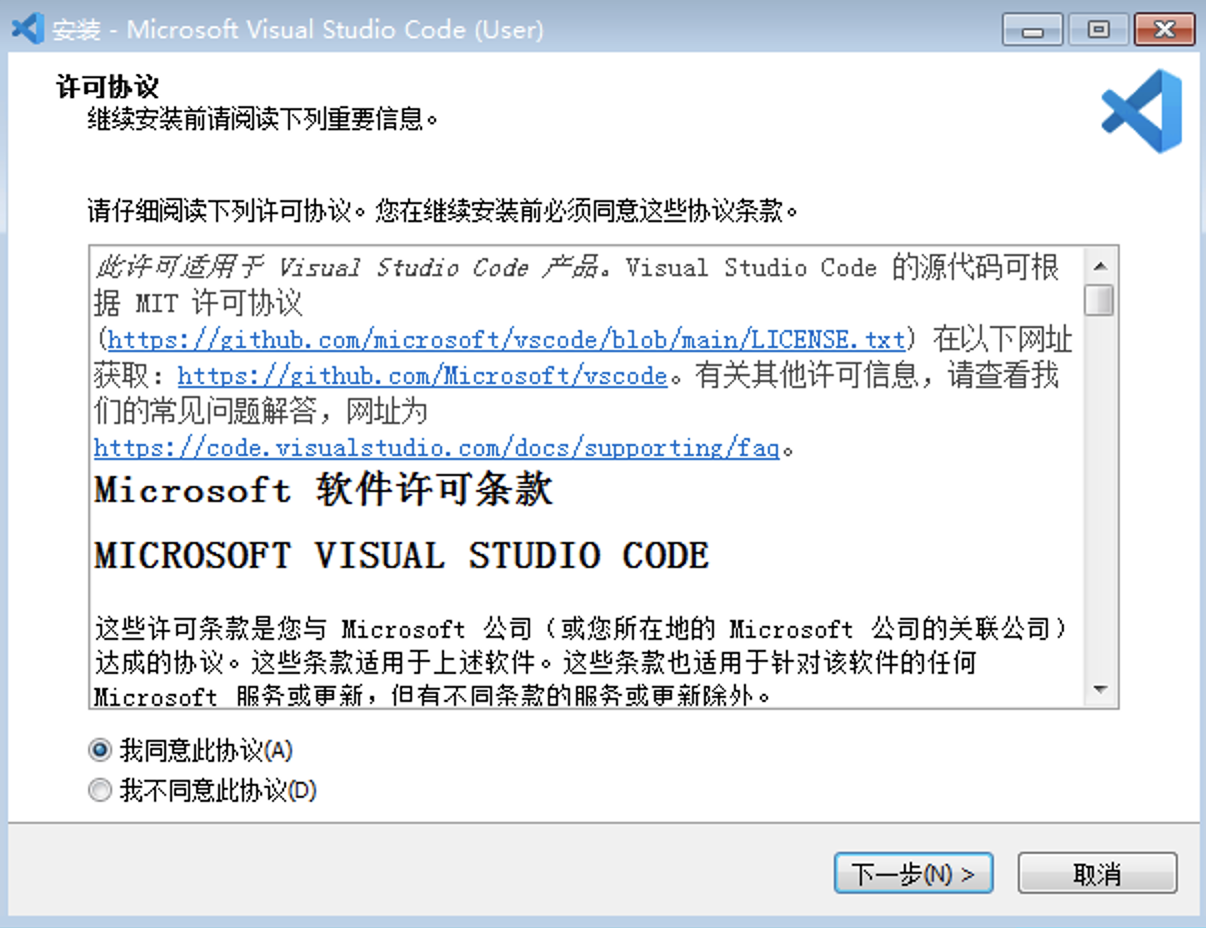
打开VSCodeUserSetup-x64-1.71.2.exe安装包,同意协议,下一步
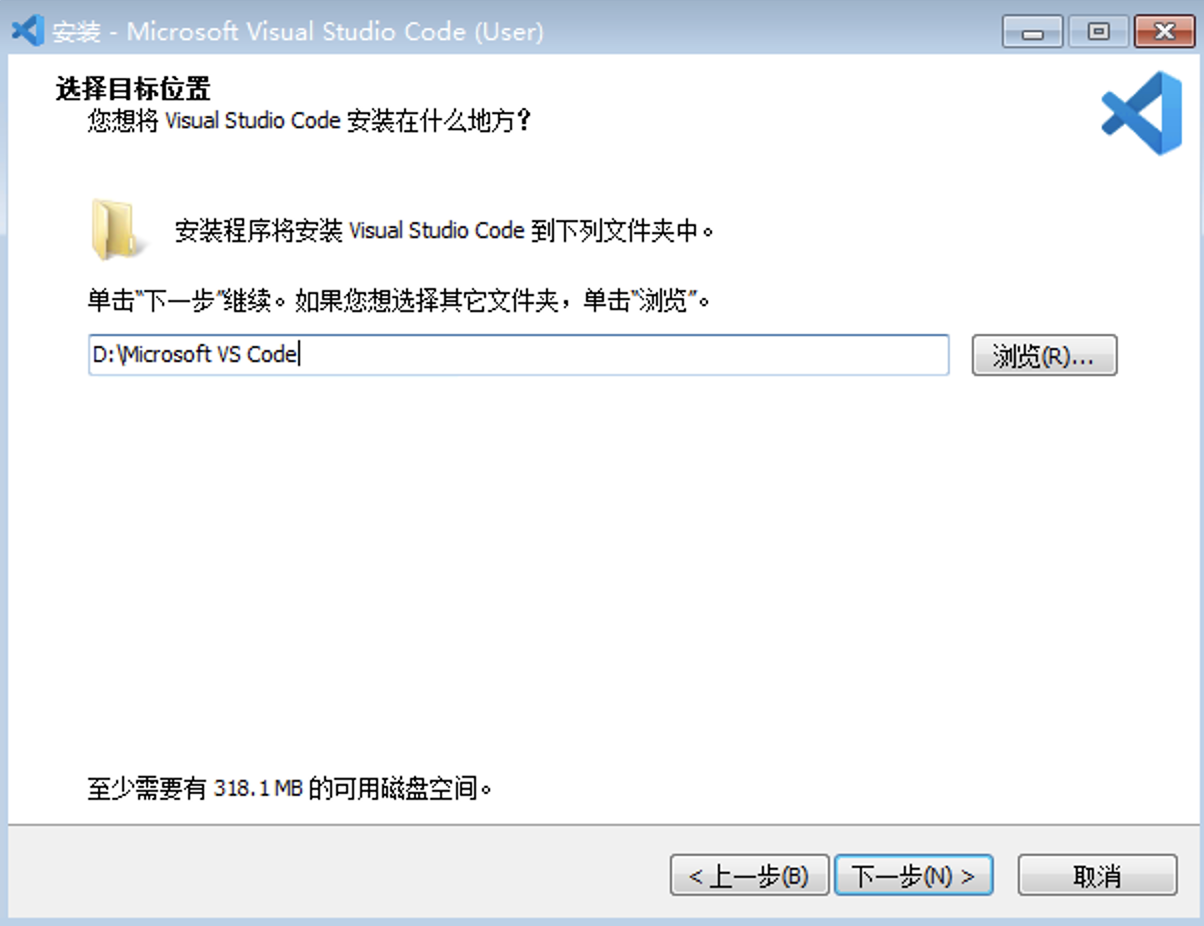
选择路径,下一步
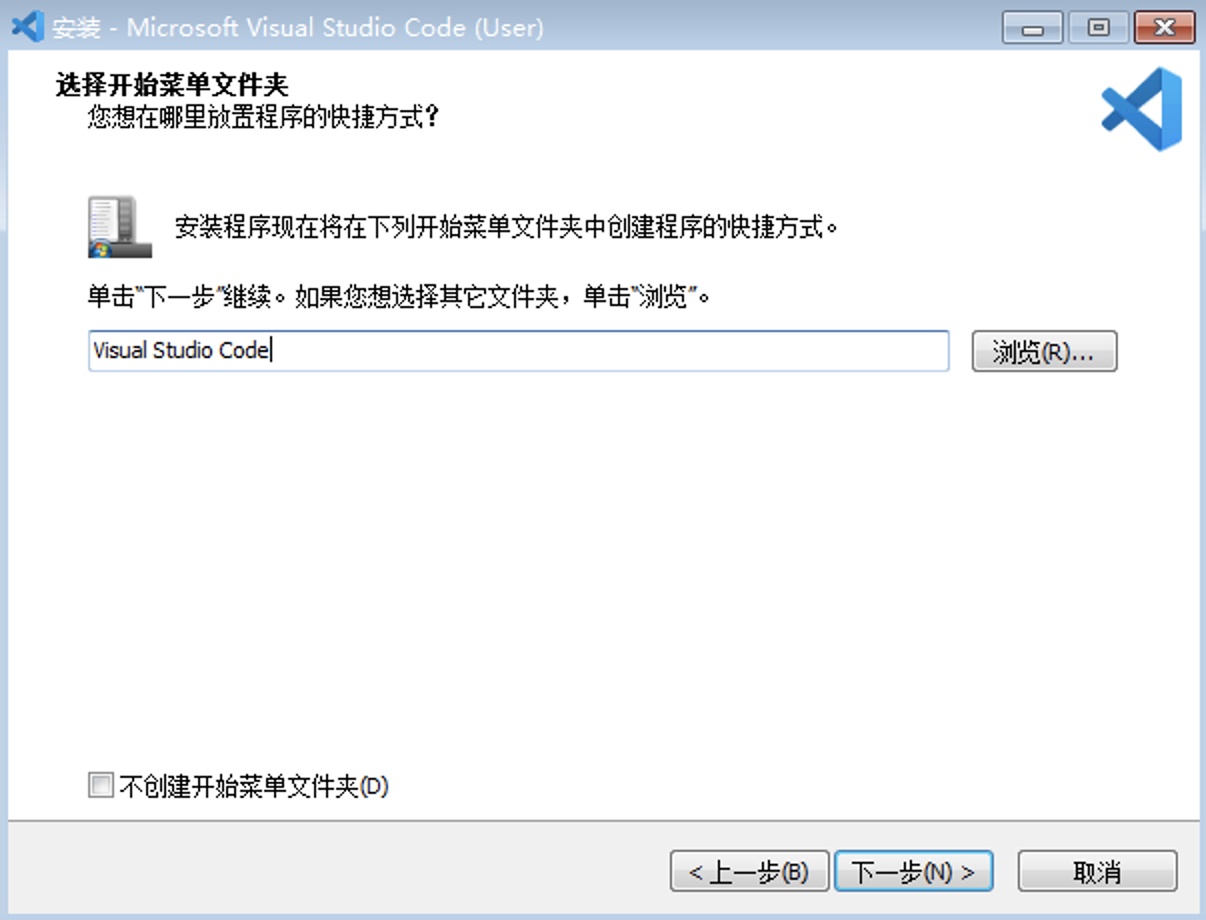
选择开始菜单文件夹,下一步
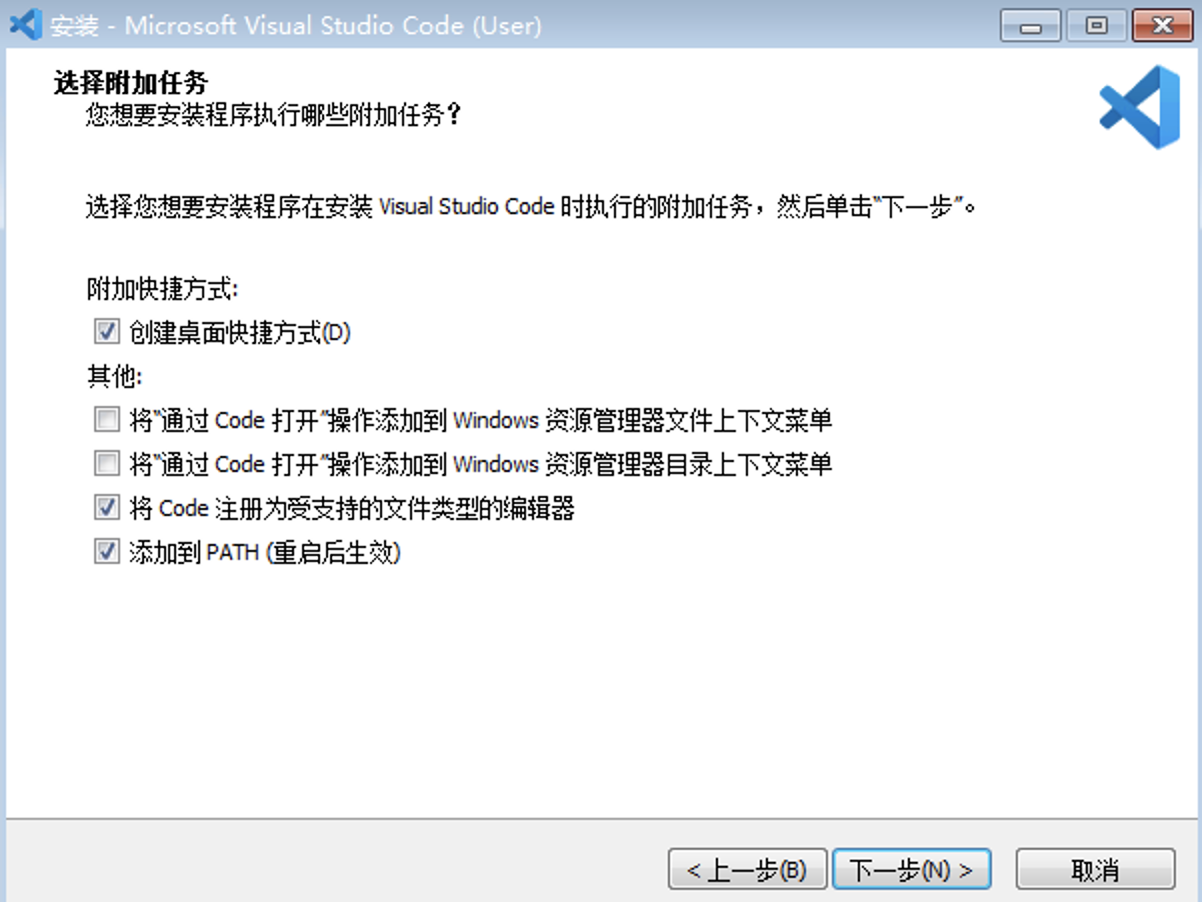
创建桌面快捷方式,下一步
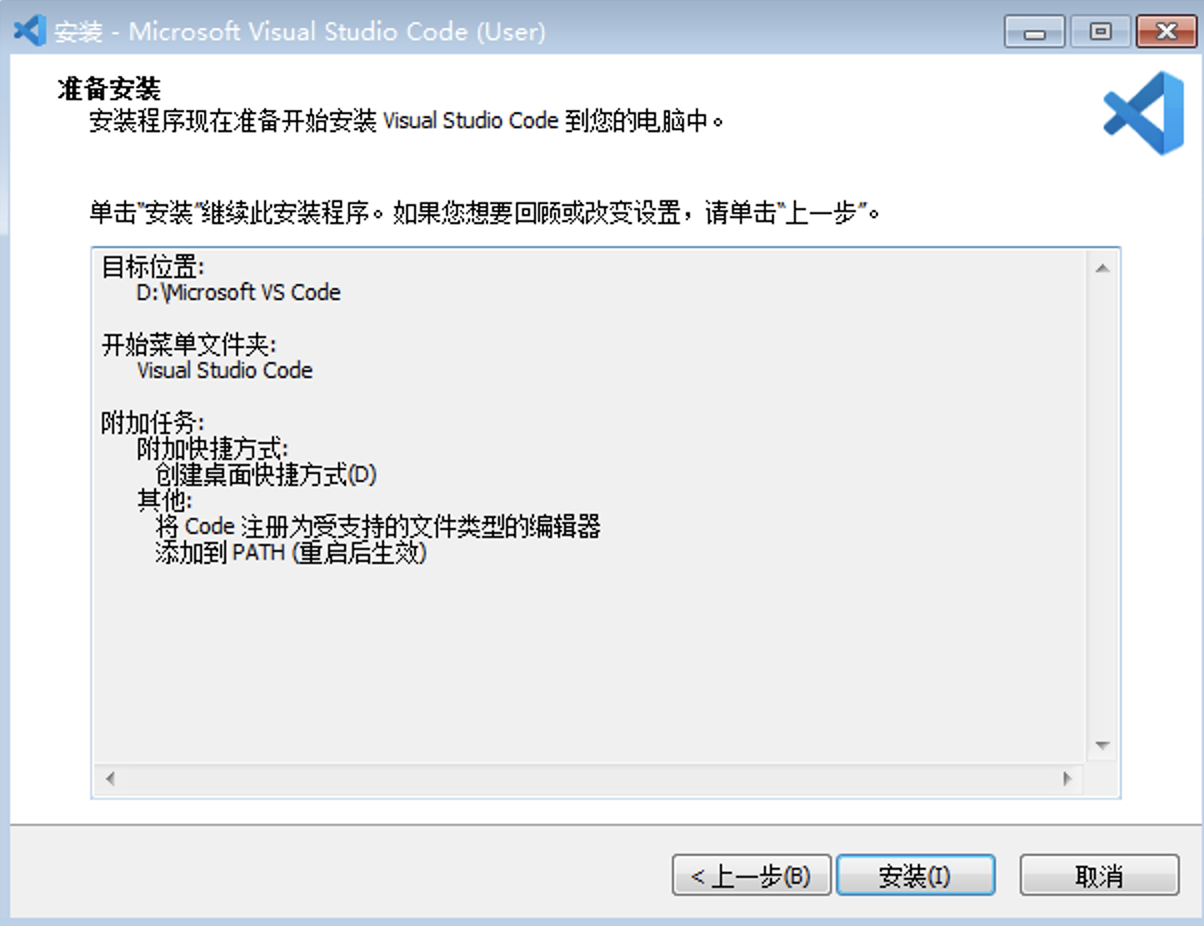
准备安装,点击“安装”按钮
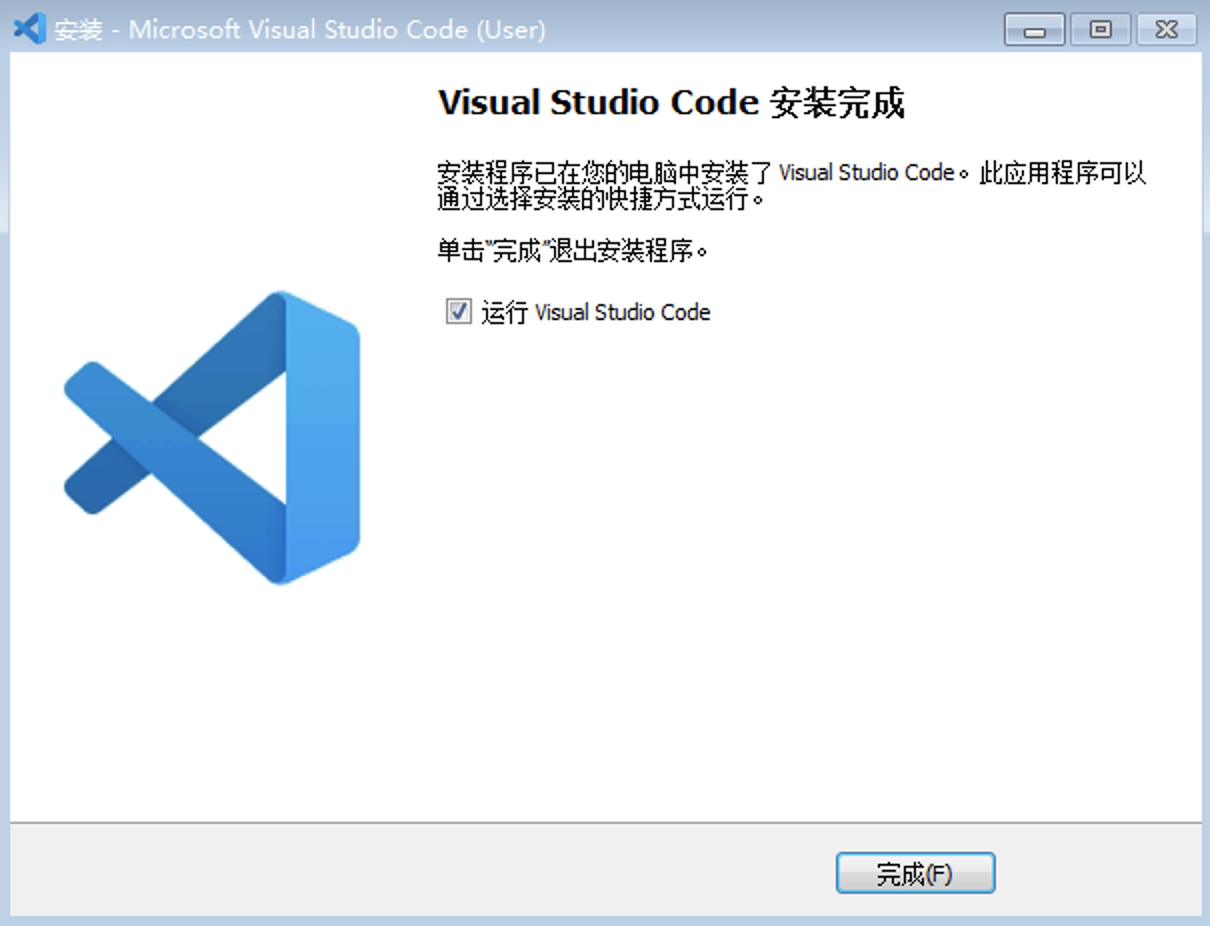
安装完成,点击“完成”按钮,打开vscode
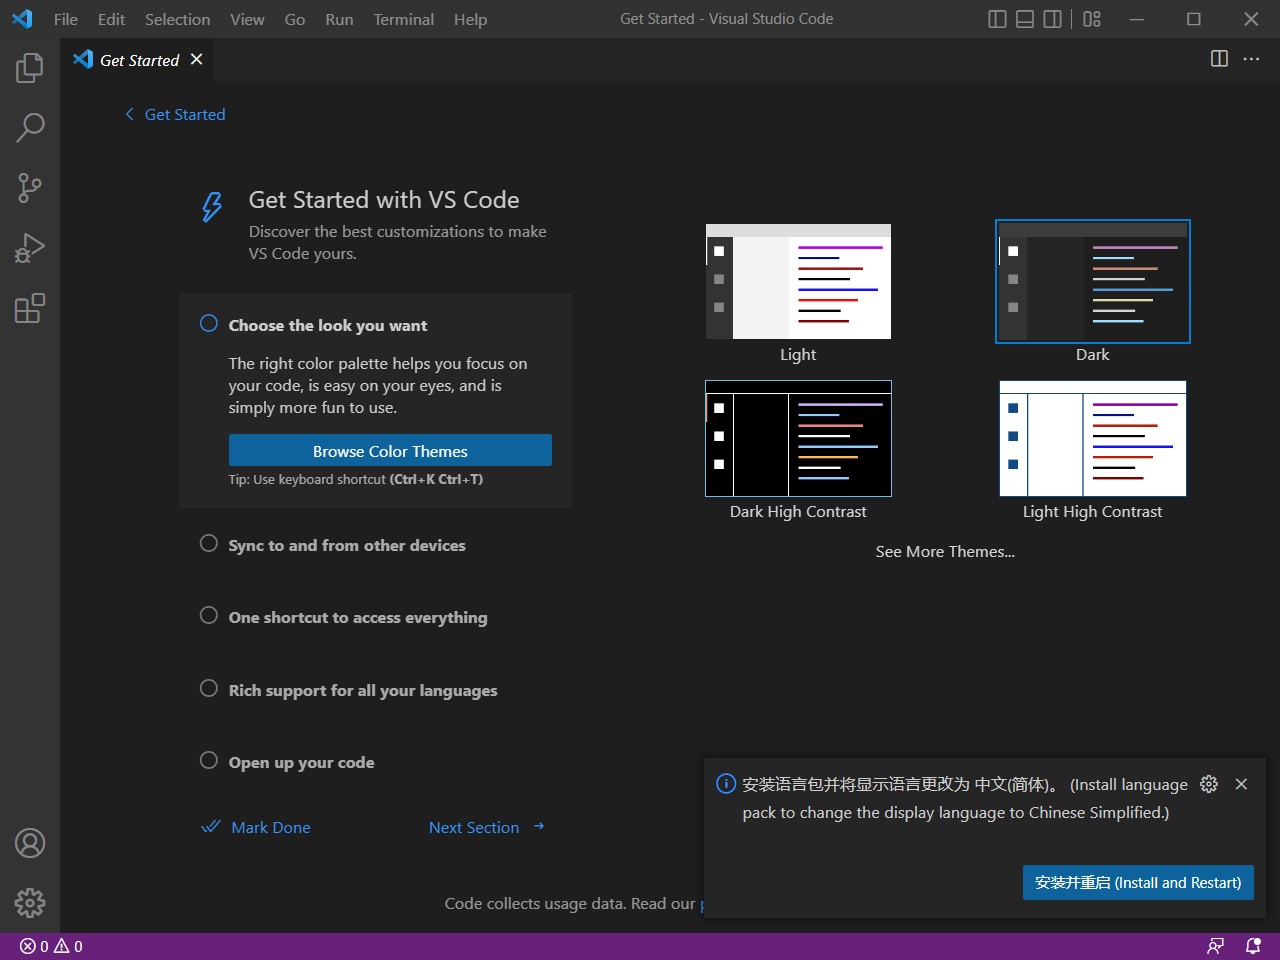
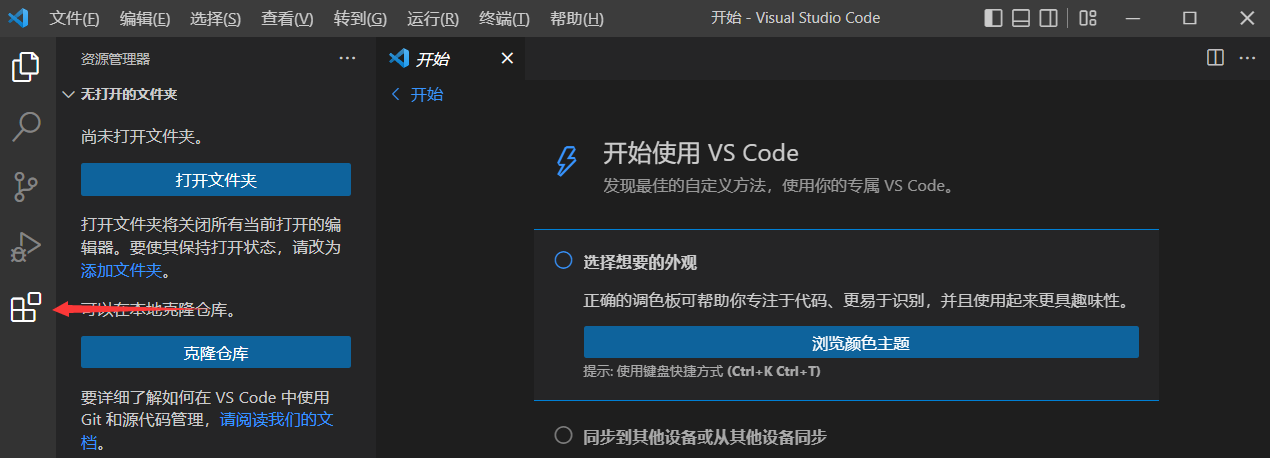
打开vscode,如果需要安装中文语言,请选择安装
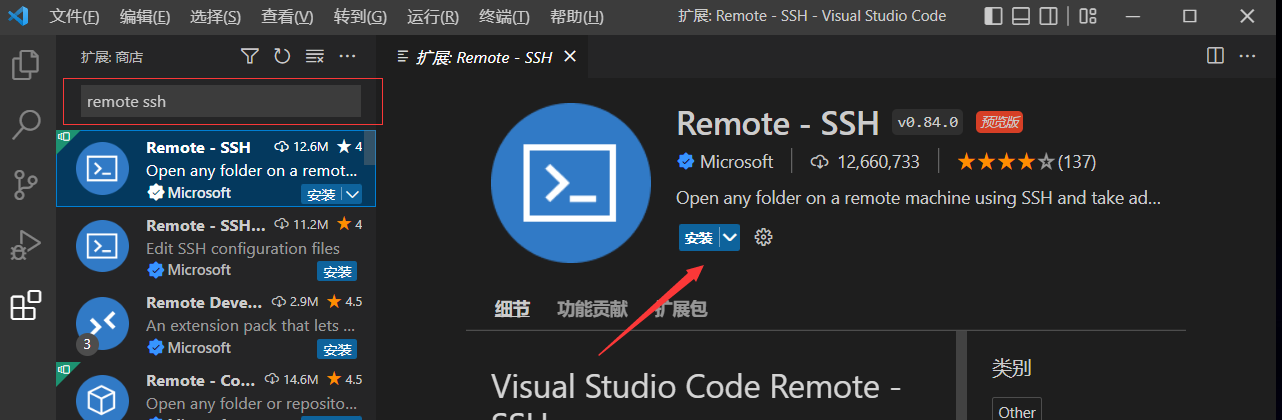
点击左侧栏扩展按钮
搜索remote-ssh 插件并安装
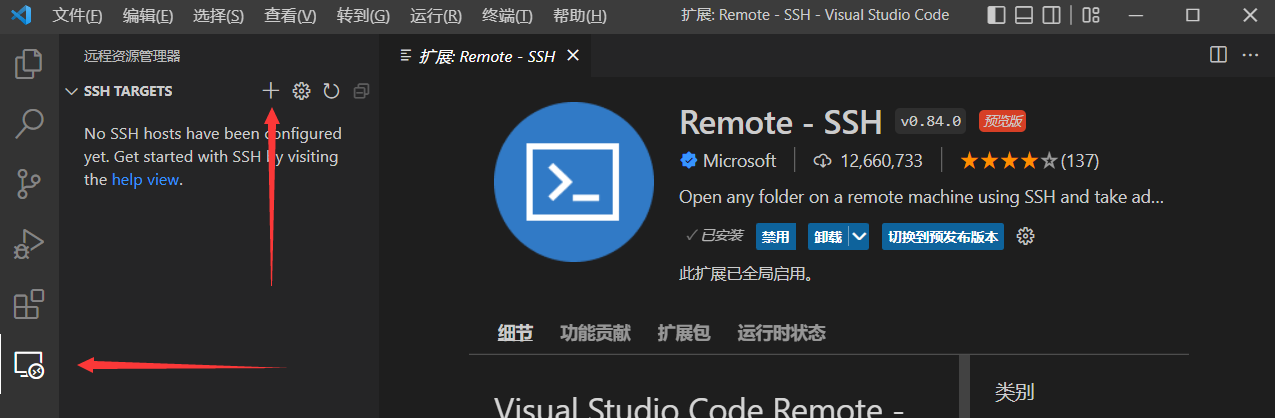
安装完remote-ssh插件后,左侧栏会出现一个新图标,点击远程管理,再点击“+”添加远程虚拟机的账号
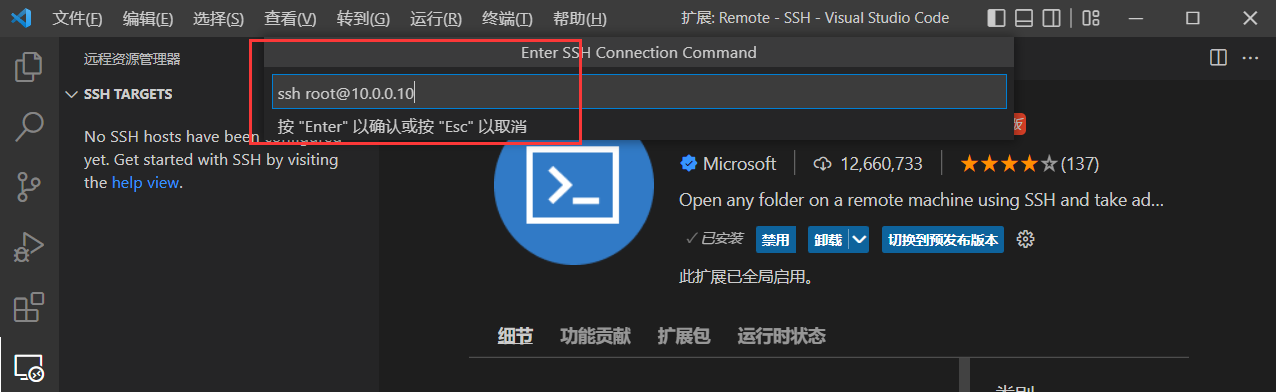
输入vmware虚拟机的账号,如果是云服务器就输入公网的ip
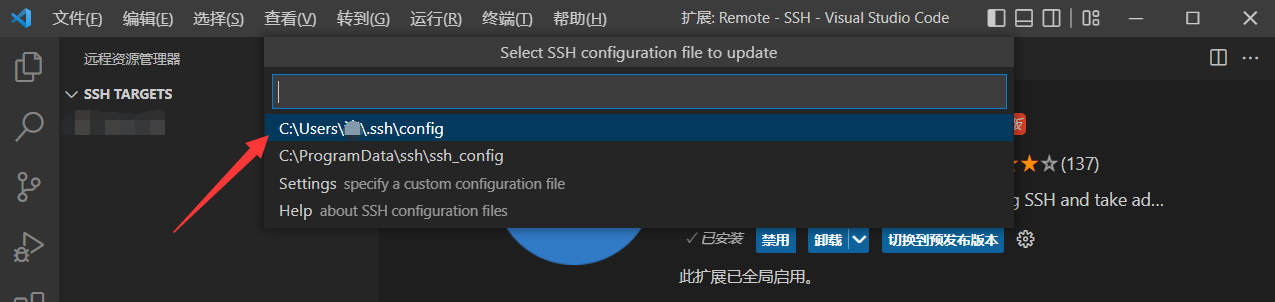
输入账号后,需要选择本地ssh文件路径,一般都是.ssh文件路径
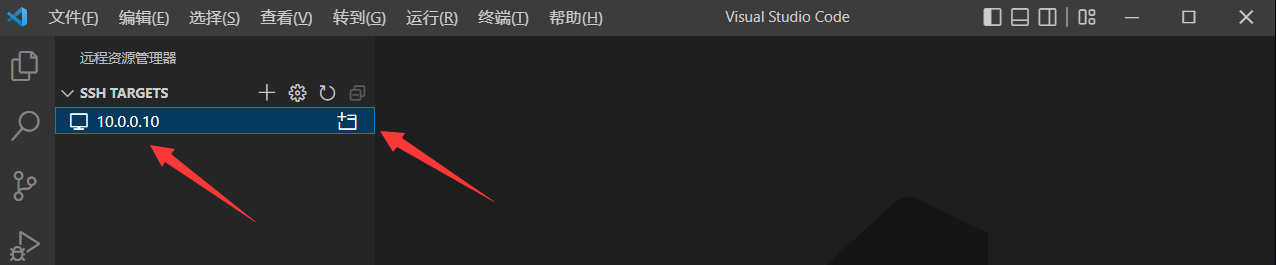
点击左侧框ip👉右边文件夹按钮,点击后会新建一个窗口
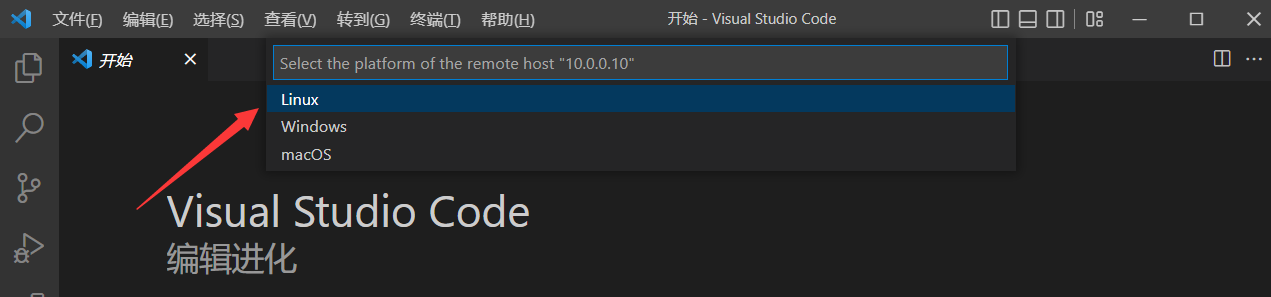
在新窗口会显示需要选择远程连接的系统,选择Linux
然后会显示是否继续操作,选择Continue,如果不选择会报错

然后输入远程终端的密码

1 | # 输入密码后,稍等一会,remote-ssh插件 正在初始化终端 |
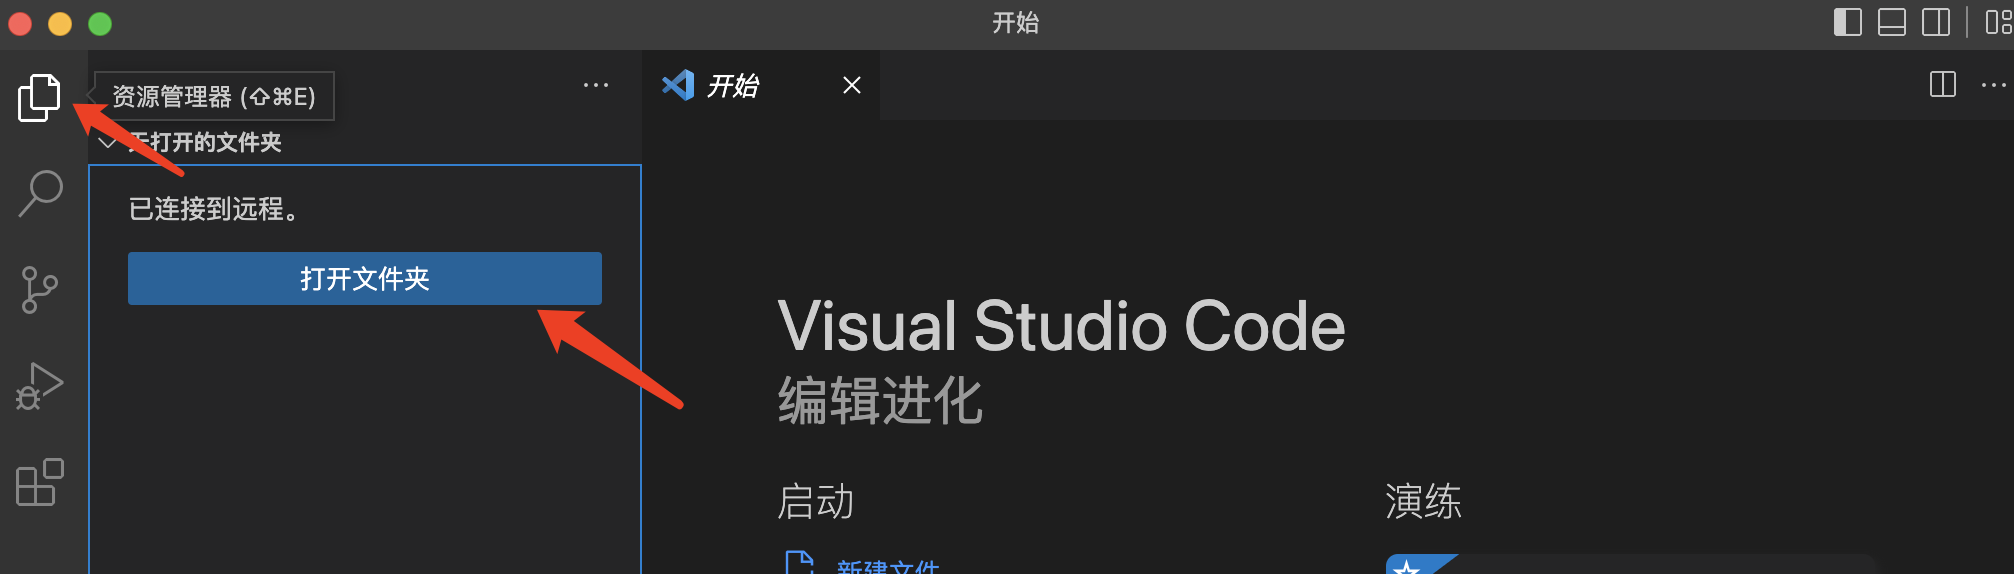
在左侧栏按钮,点击资源管理器,选择打开文件夹(这里的文件夹是Linux服务器的文件夹)
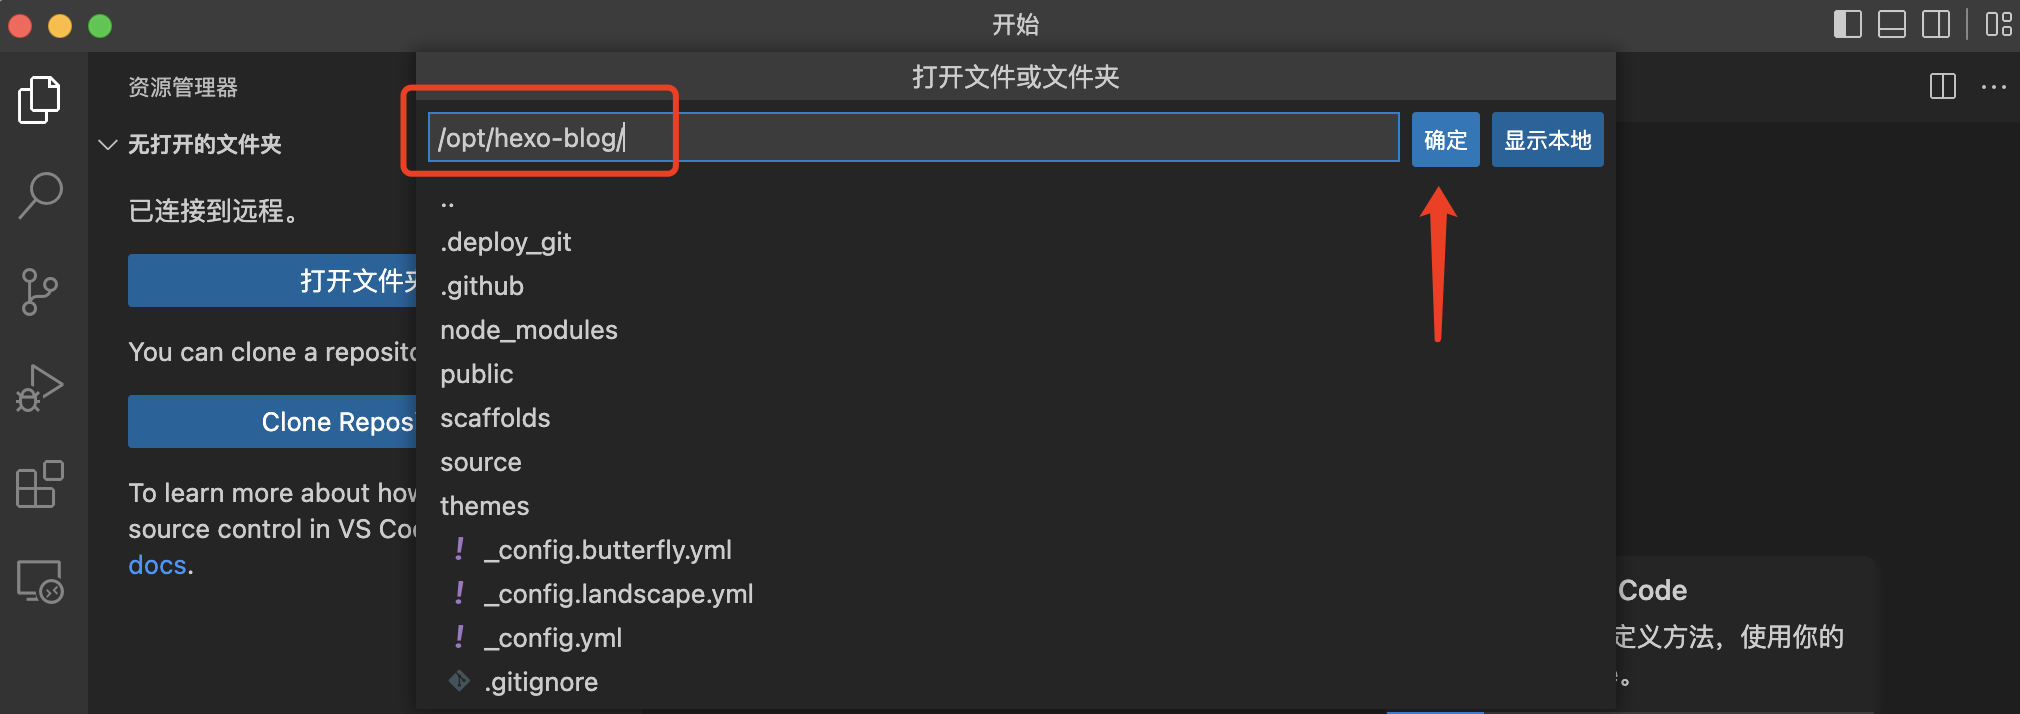
输入hexo根目录路径,点击“确定按钮”,输入密码
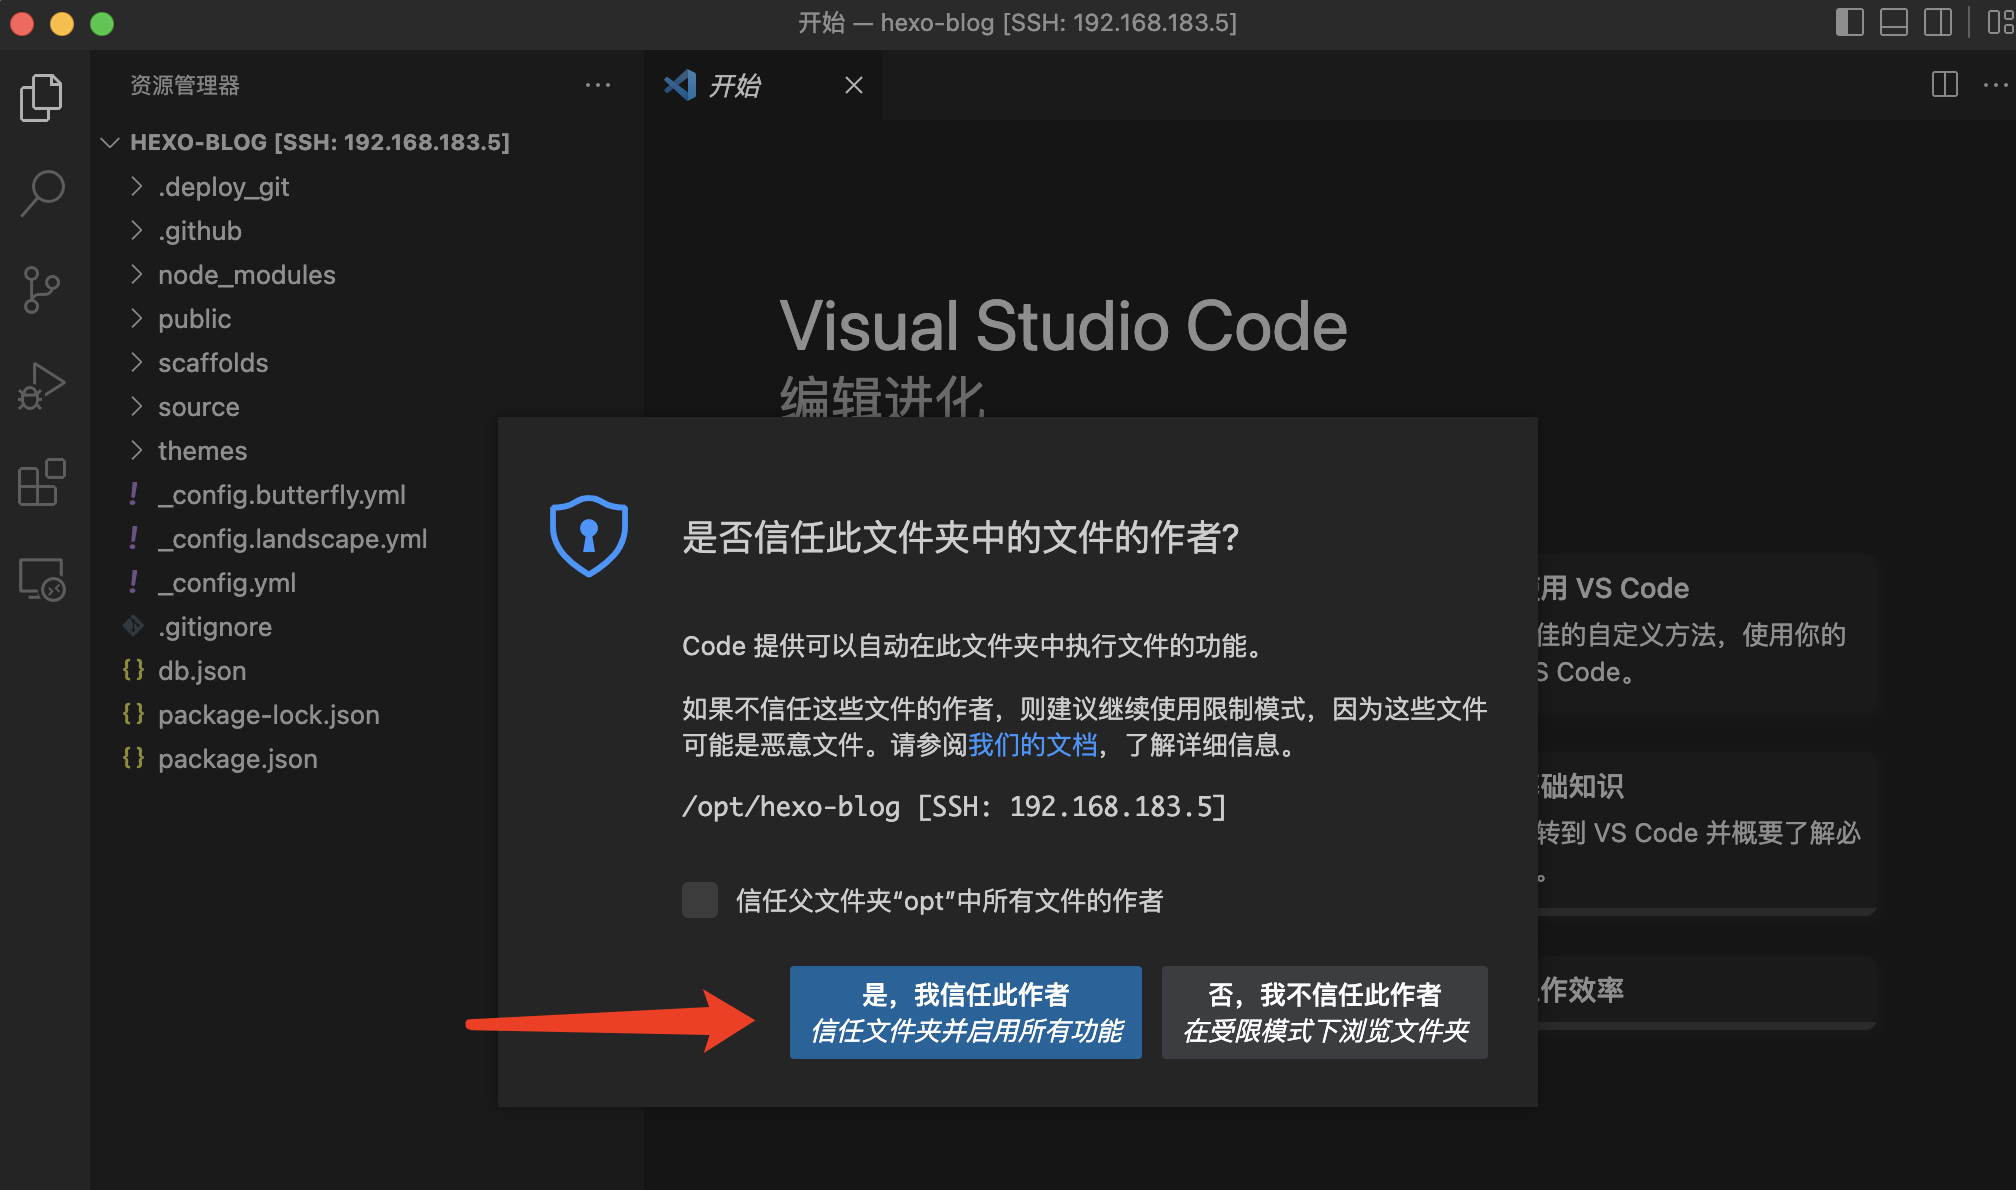
之后会弹出信任文件窗口,选择“是”
选择顶部菜单栏“终端”按钮,点击新建终端。
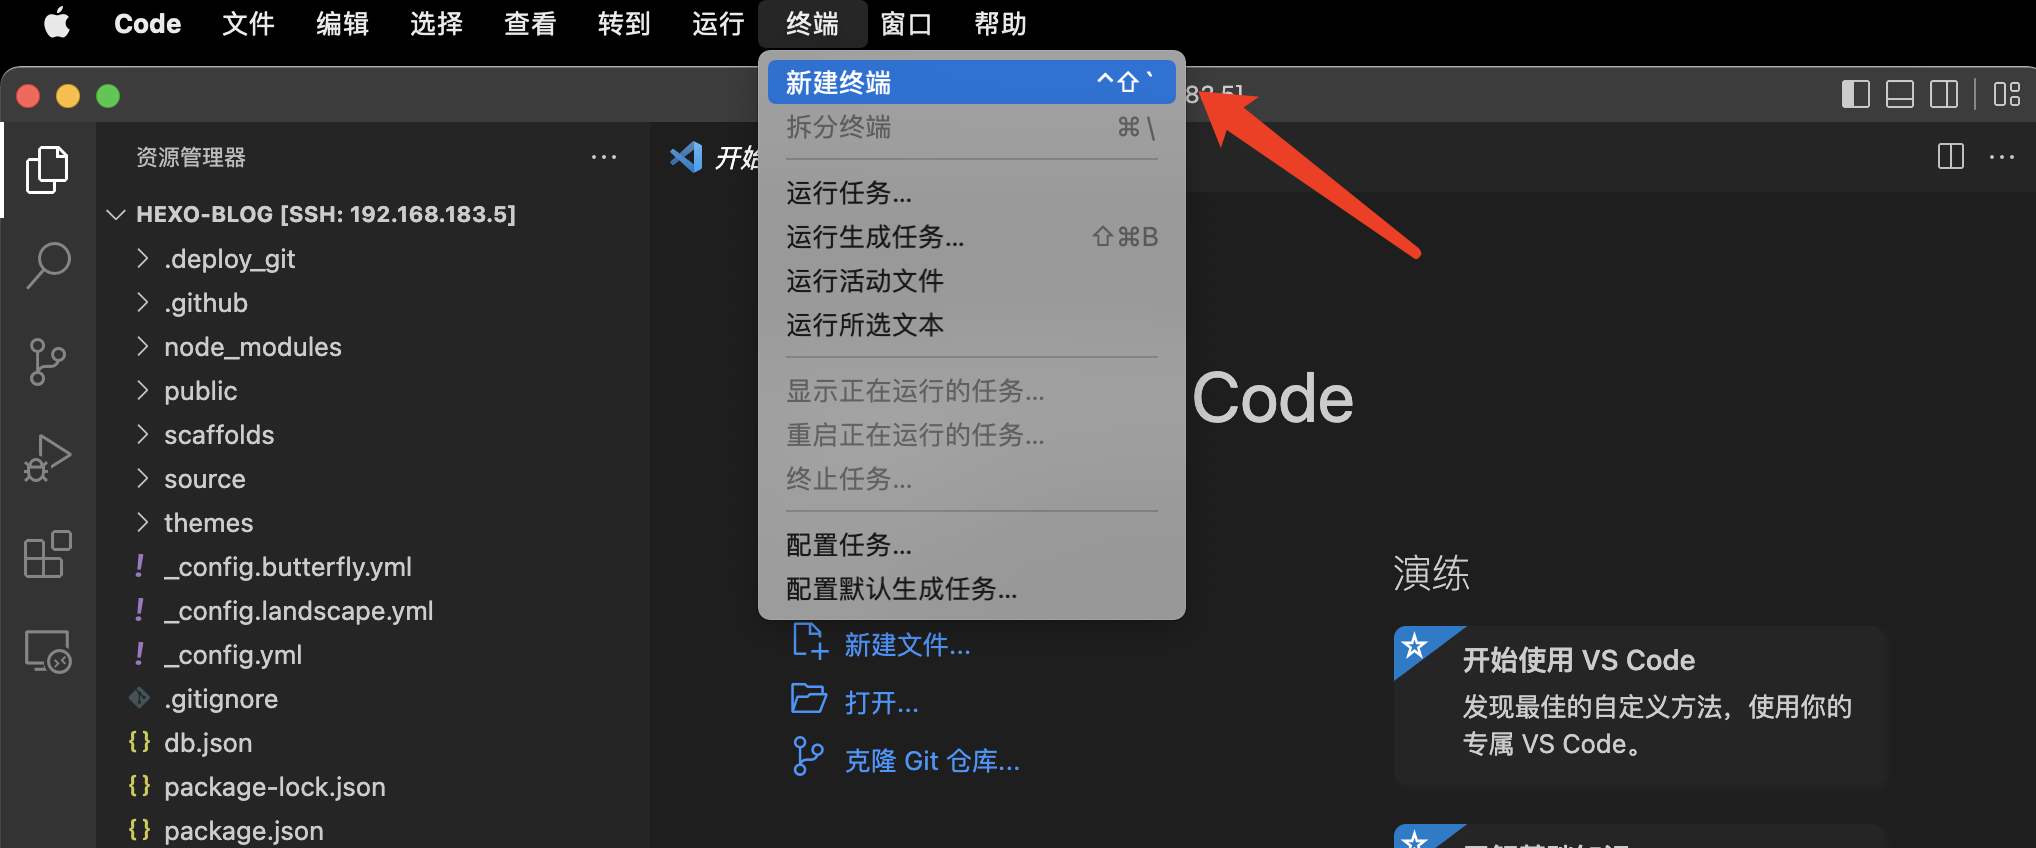
到这里了,基本安装配置完成,可以通过vscode远程编辑Linux服务器的文件,也可以直接新建终端远程操作Linux服务器

8、配置github action自动部署
参考up主博客文章:https://anzhiy.cn/posts/asdx.html
打开github,选择Settings
滑到底部,选择Developer settings

选择Personal access tokens,点击Generate new token

随意起个名字,选择NO expiration(token用不过期),勾上repo仓库以及workflow工作流,然后滑到下面点击创建
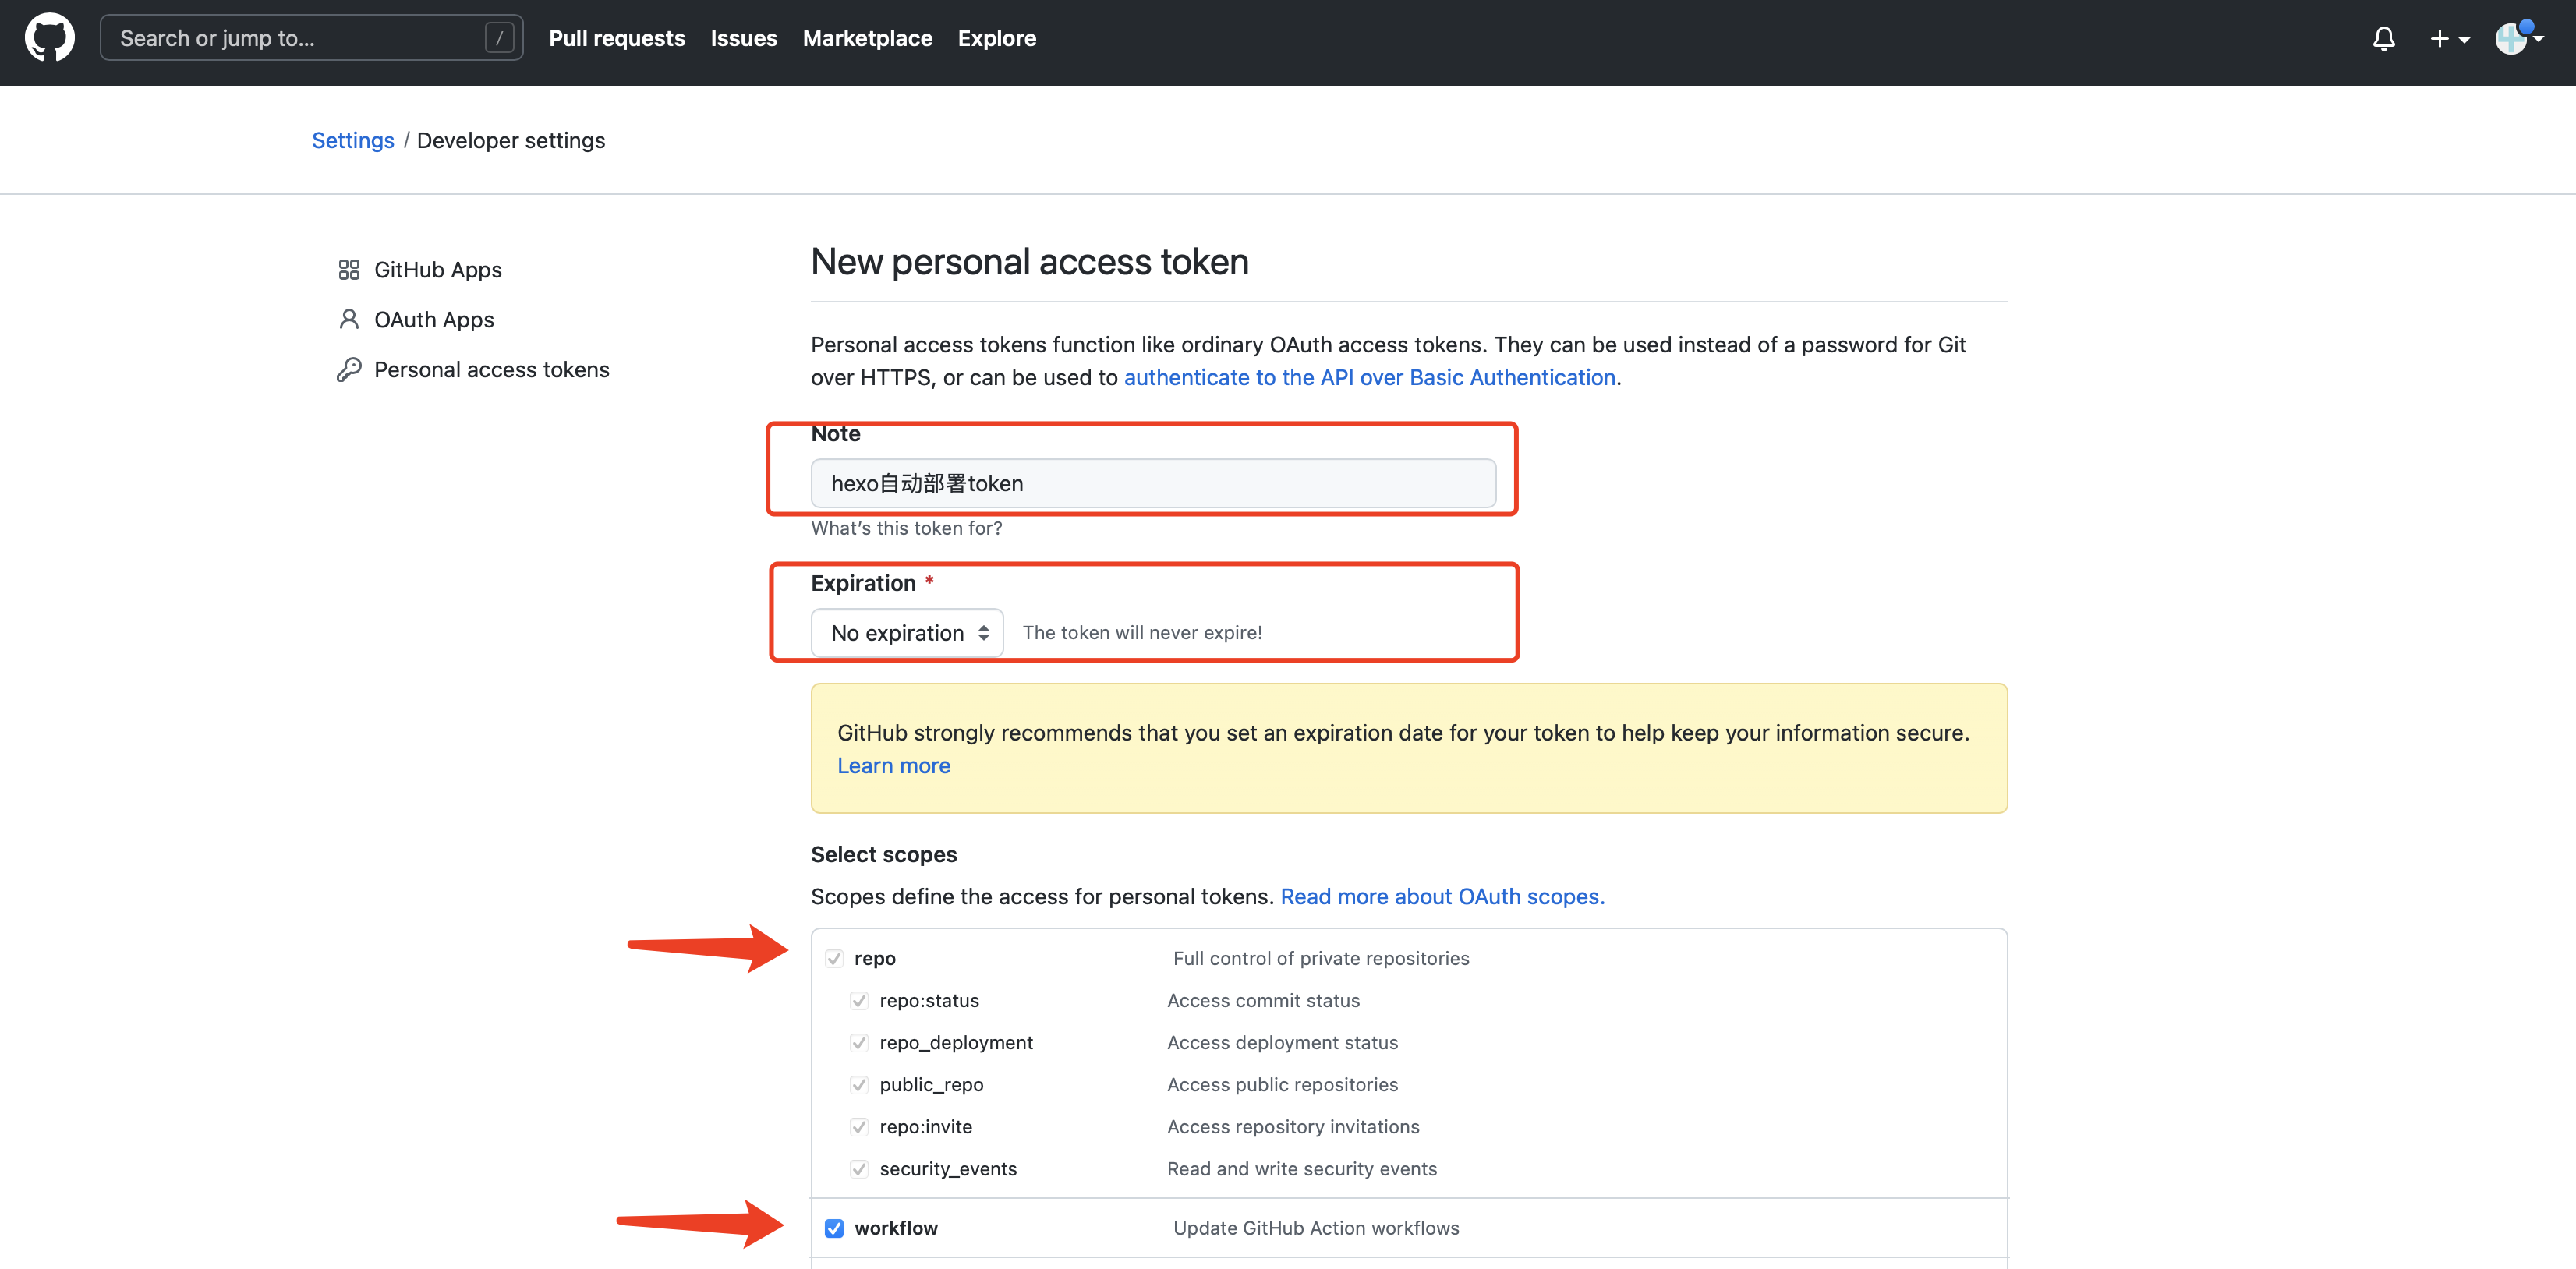

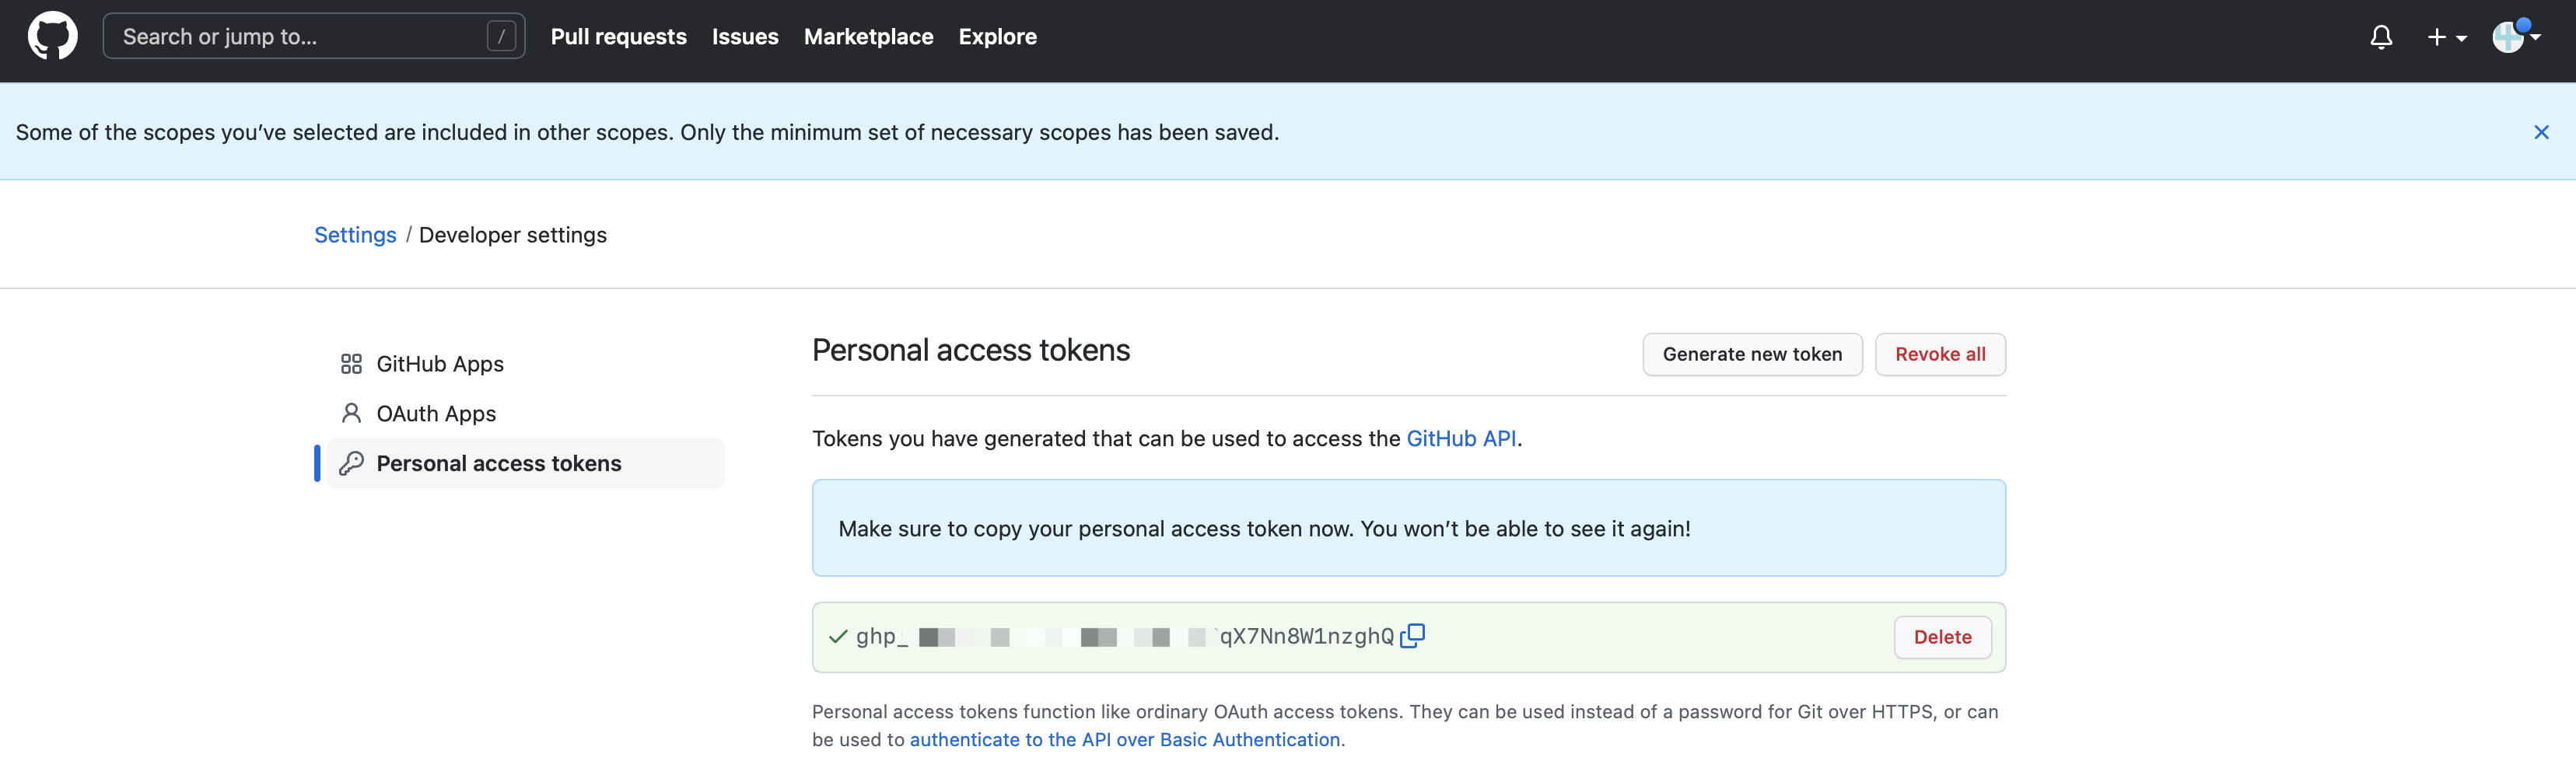
创建完后,会显示一个token。因为token只会在该页面显示一次,请保存下来。
1 | # 先保存token |
重新打开一个github页面,创建一个新仓库
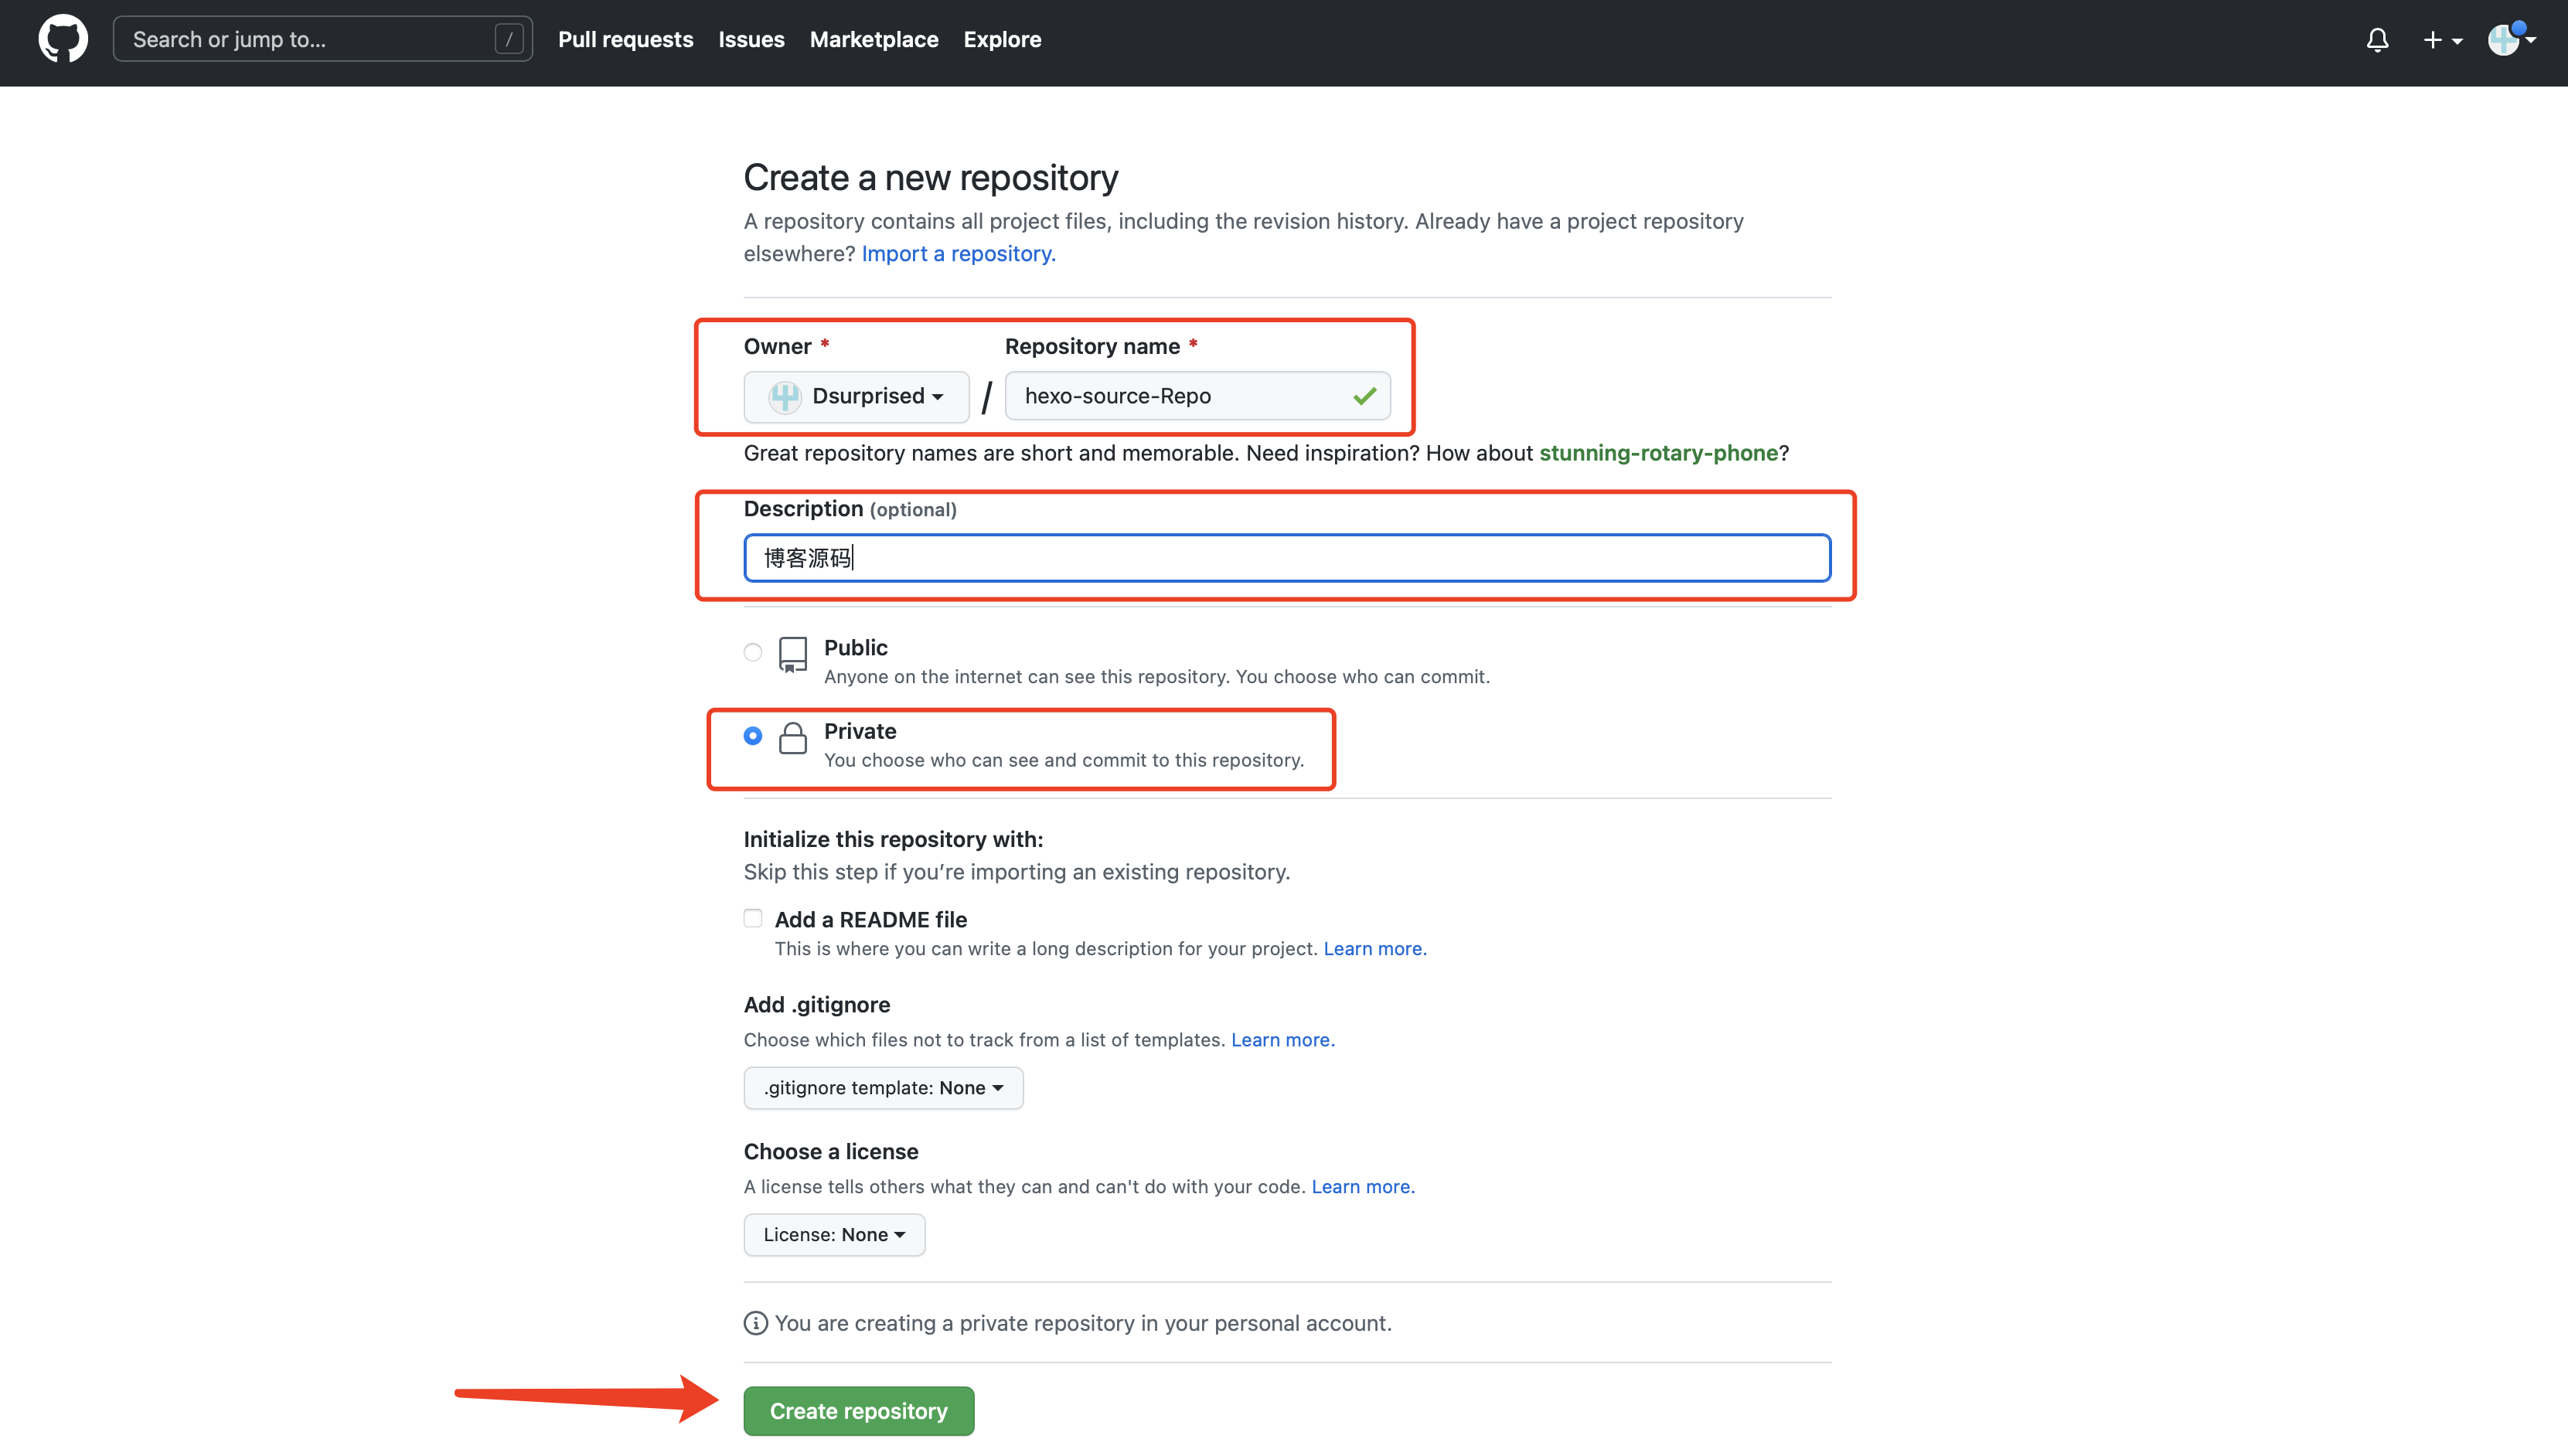
在 .github文件夹,注意开头是有个. 的。然后在.github 内新建 workflows 文件夹,再在 workflows 文件夹内新建 autodeploy.yml,在 .github/workflows/autodeploy.yml 里面输入
1 | # 创建文件夹 |
重新设置远程仓库和分支
1 | 因为能够使用指令进行安装的内容不包括在需要提交的源码内,所有我们需要将这些内容添加到屏蔽项,表示不上传到 github 上。这样可以显著减少需要提交的文件量和加快提交速度。打开.gitignore,输入以下内容: |
1 | # 关闭vscode,重启vscode,让vscode重新识别git |
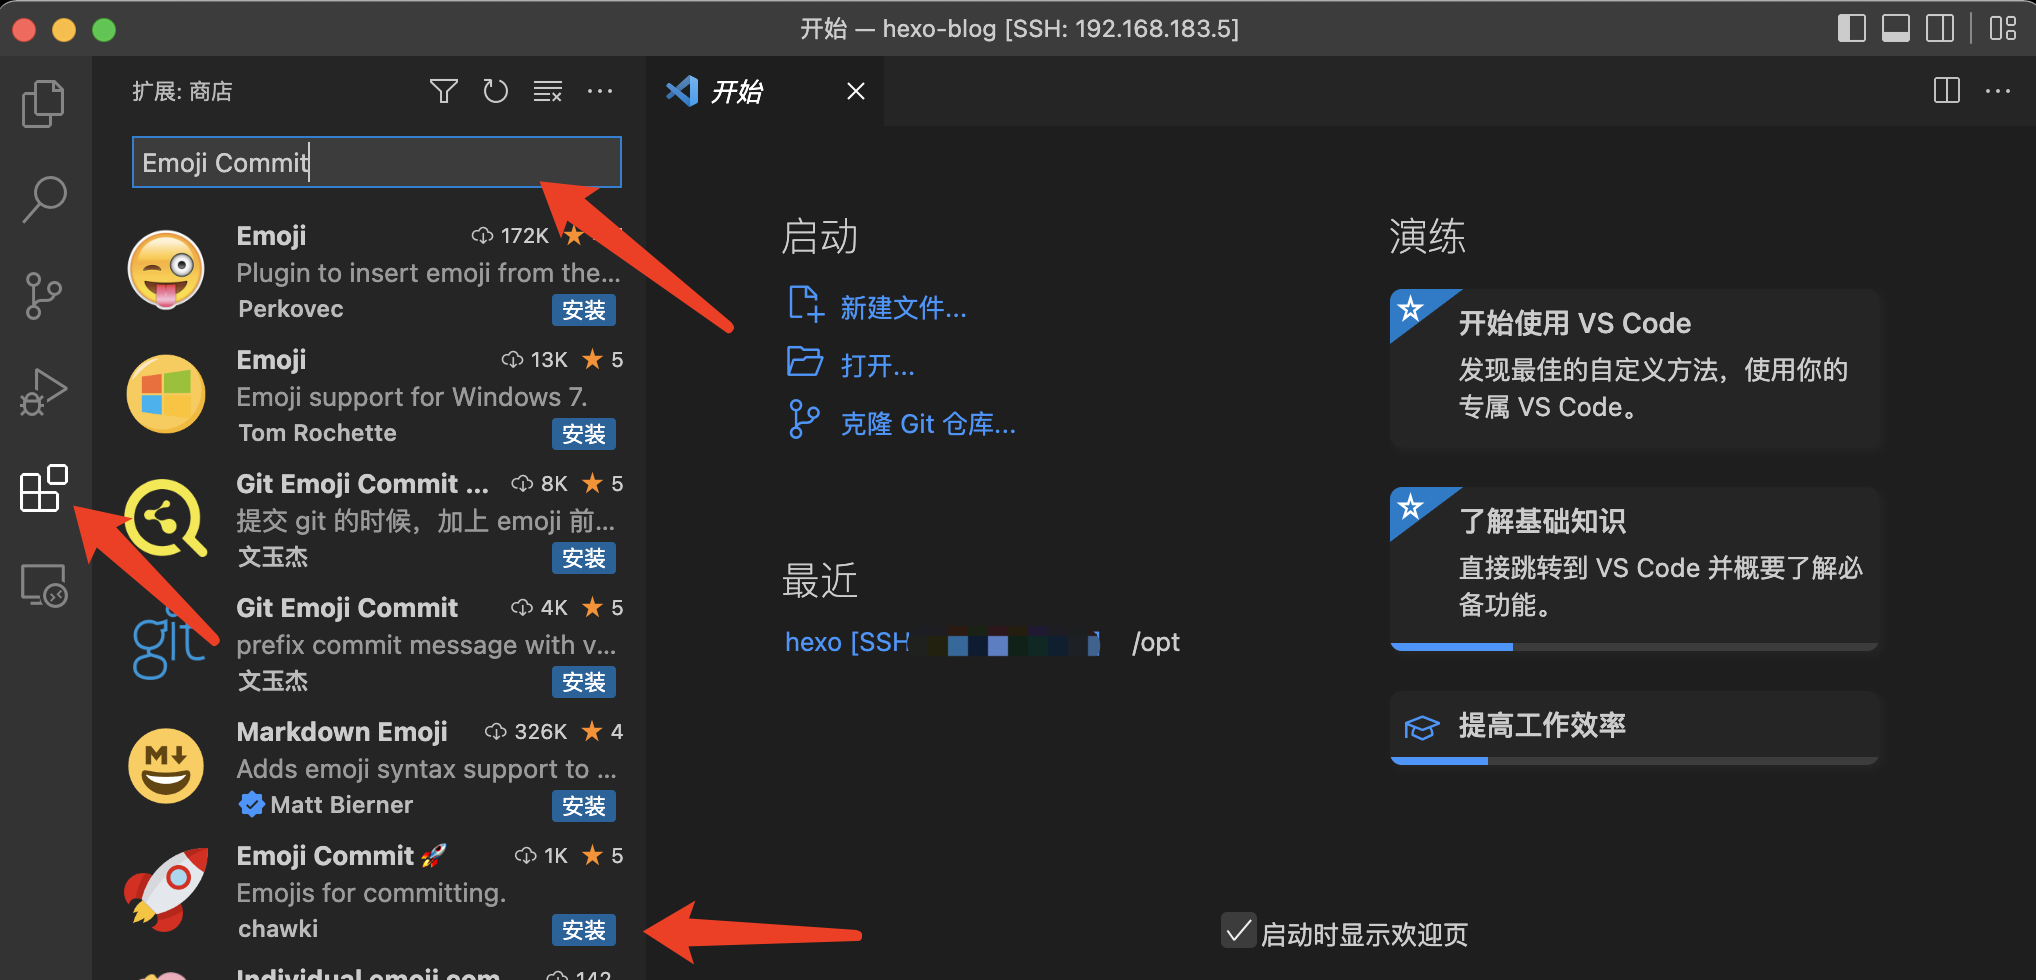
安装Emoji Commit 分支提交插件(可装可不装,这只是个表情插件)
测试自动部署的效果
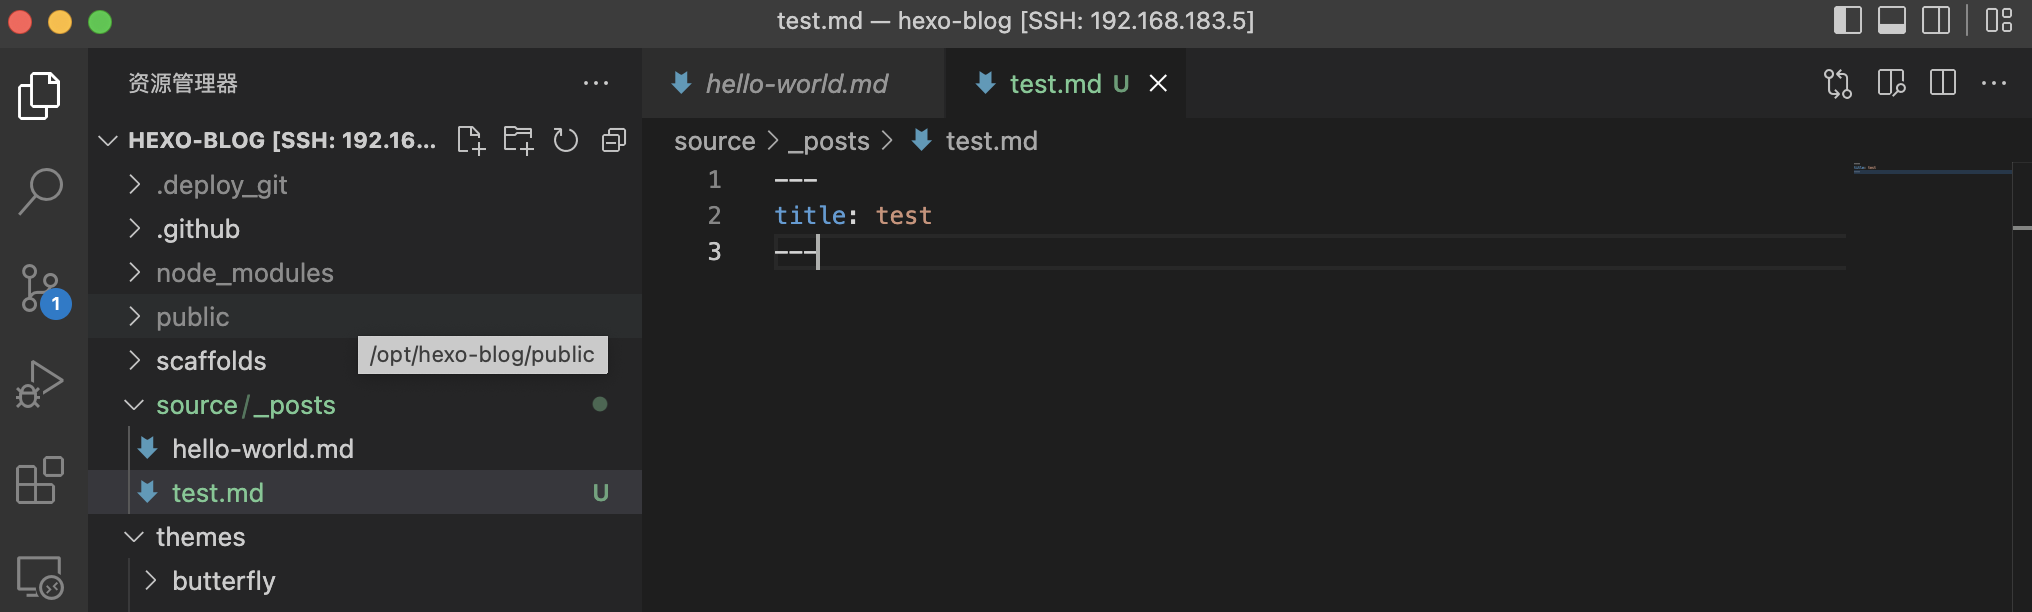
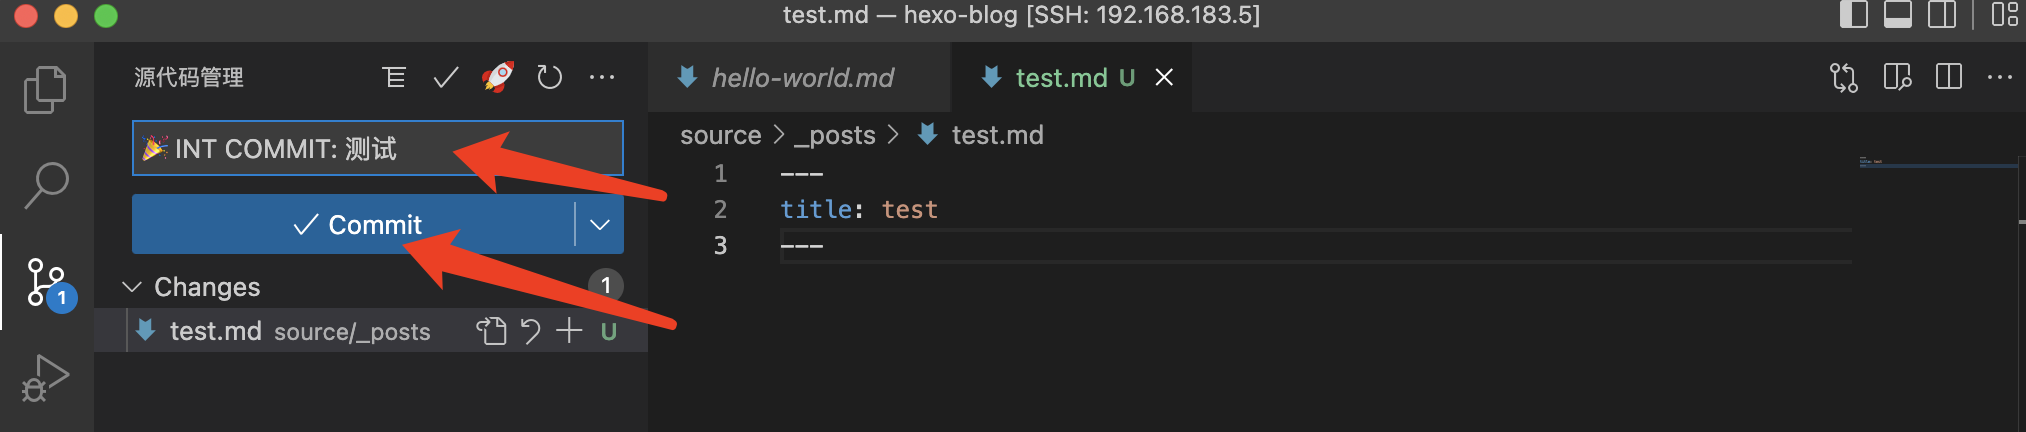
1 | # 在根目录 source/_posts 下创建test.md文档,配置个标题 |
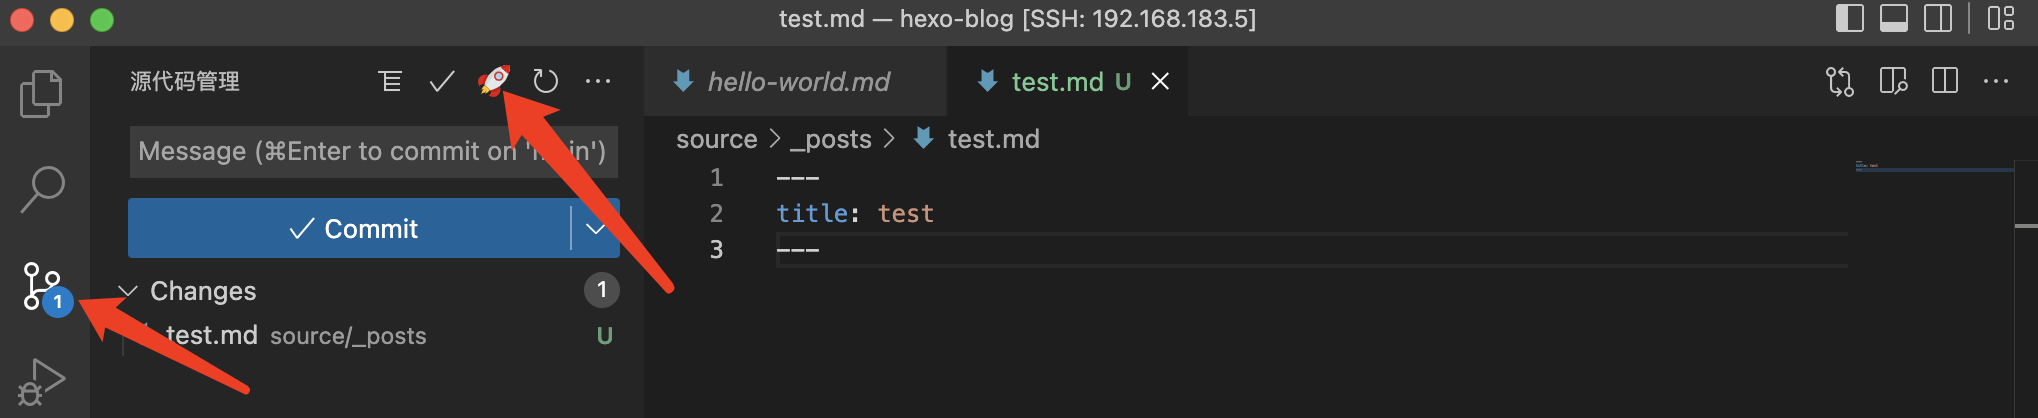
点击左侧栏源码管理,点击emoji插件
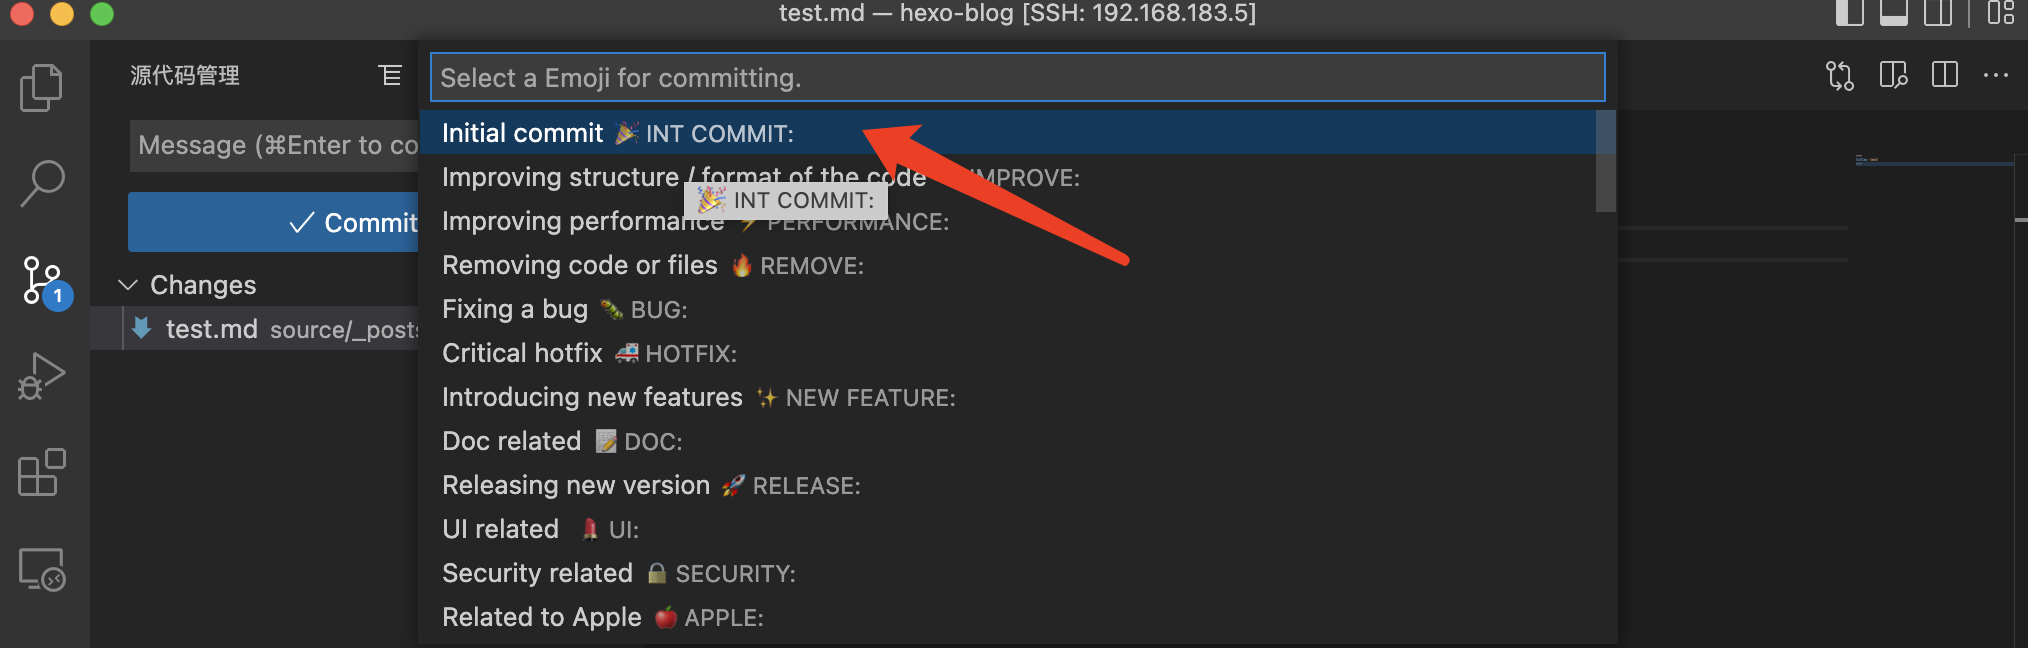
自行选择提交的备注语
输入本次更新的内容,如:测试。点击commit提交
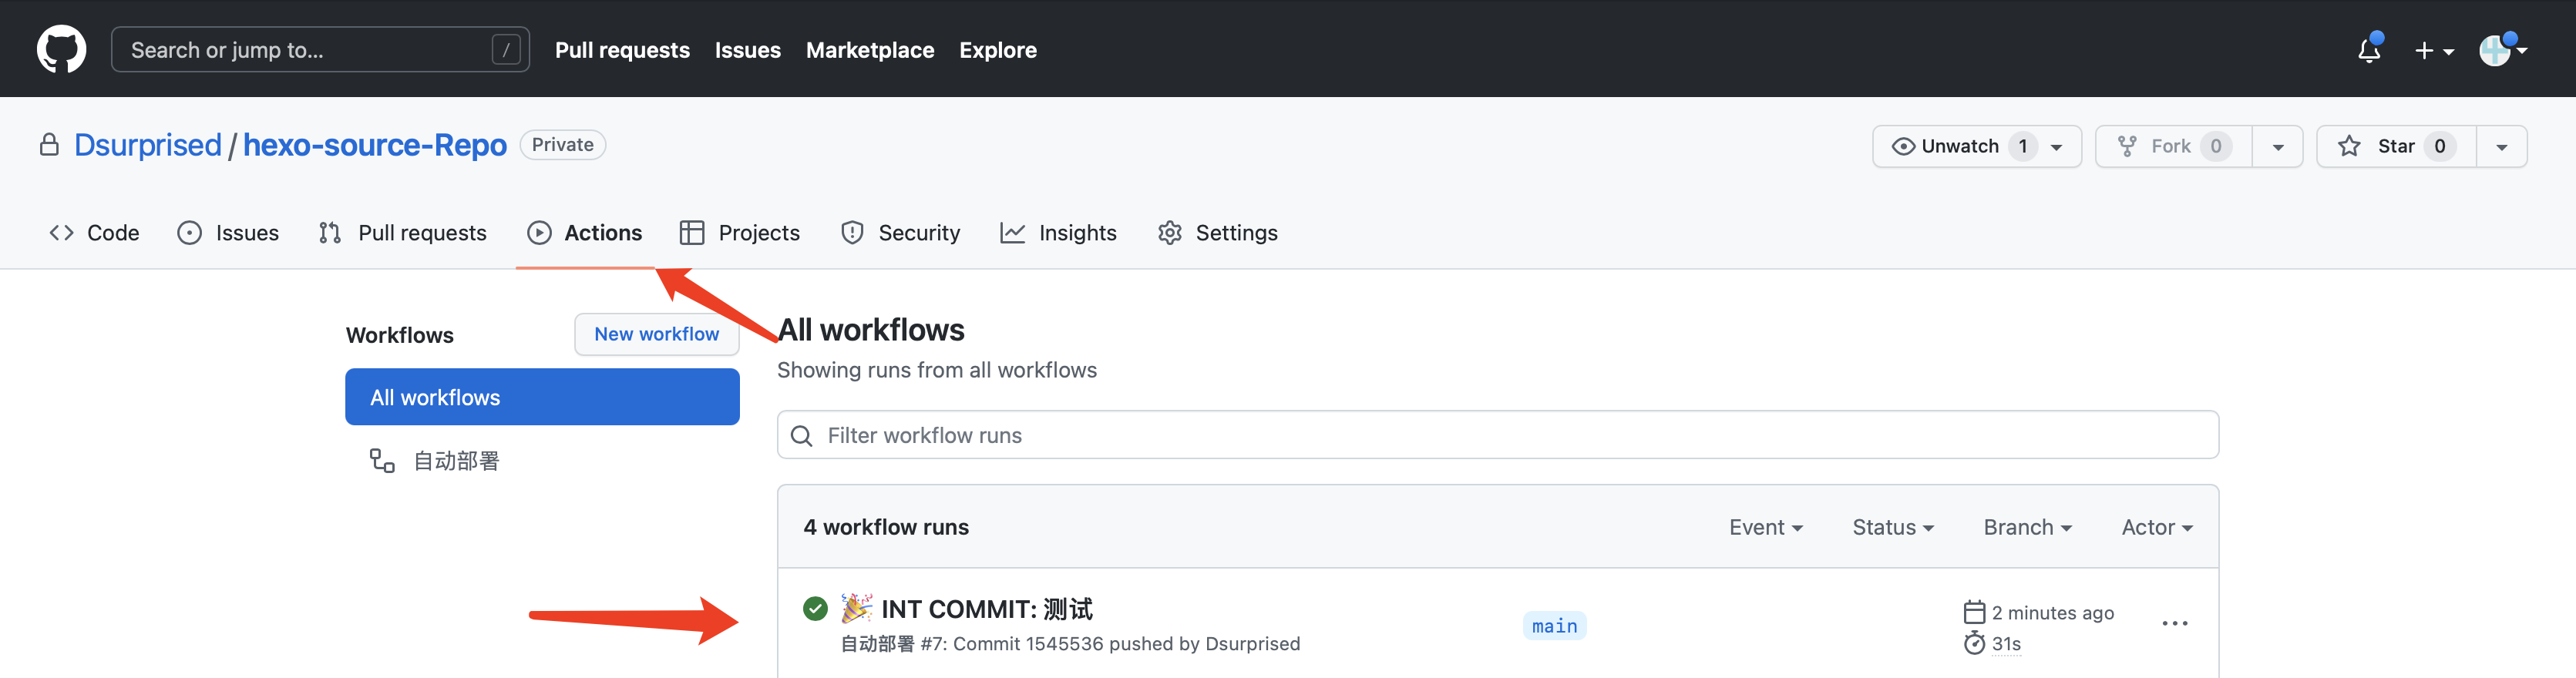
提交完后,点击sync changes 同步更新博客仓库,这样就可以快速的自动部署。

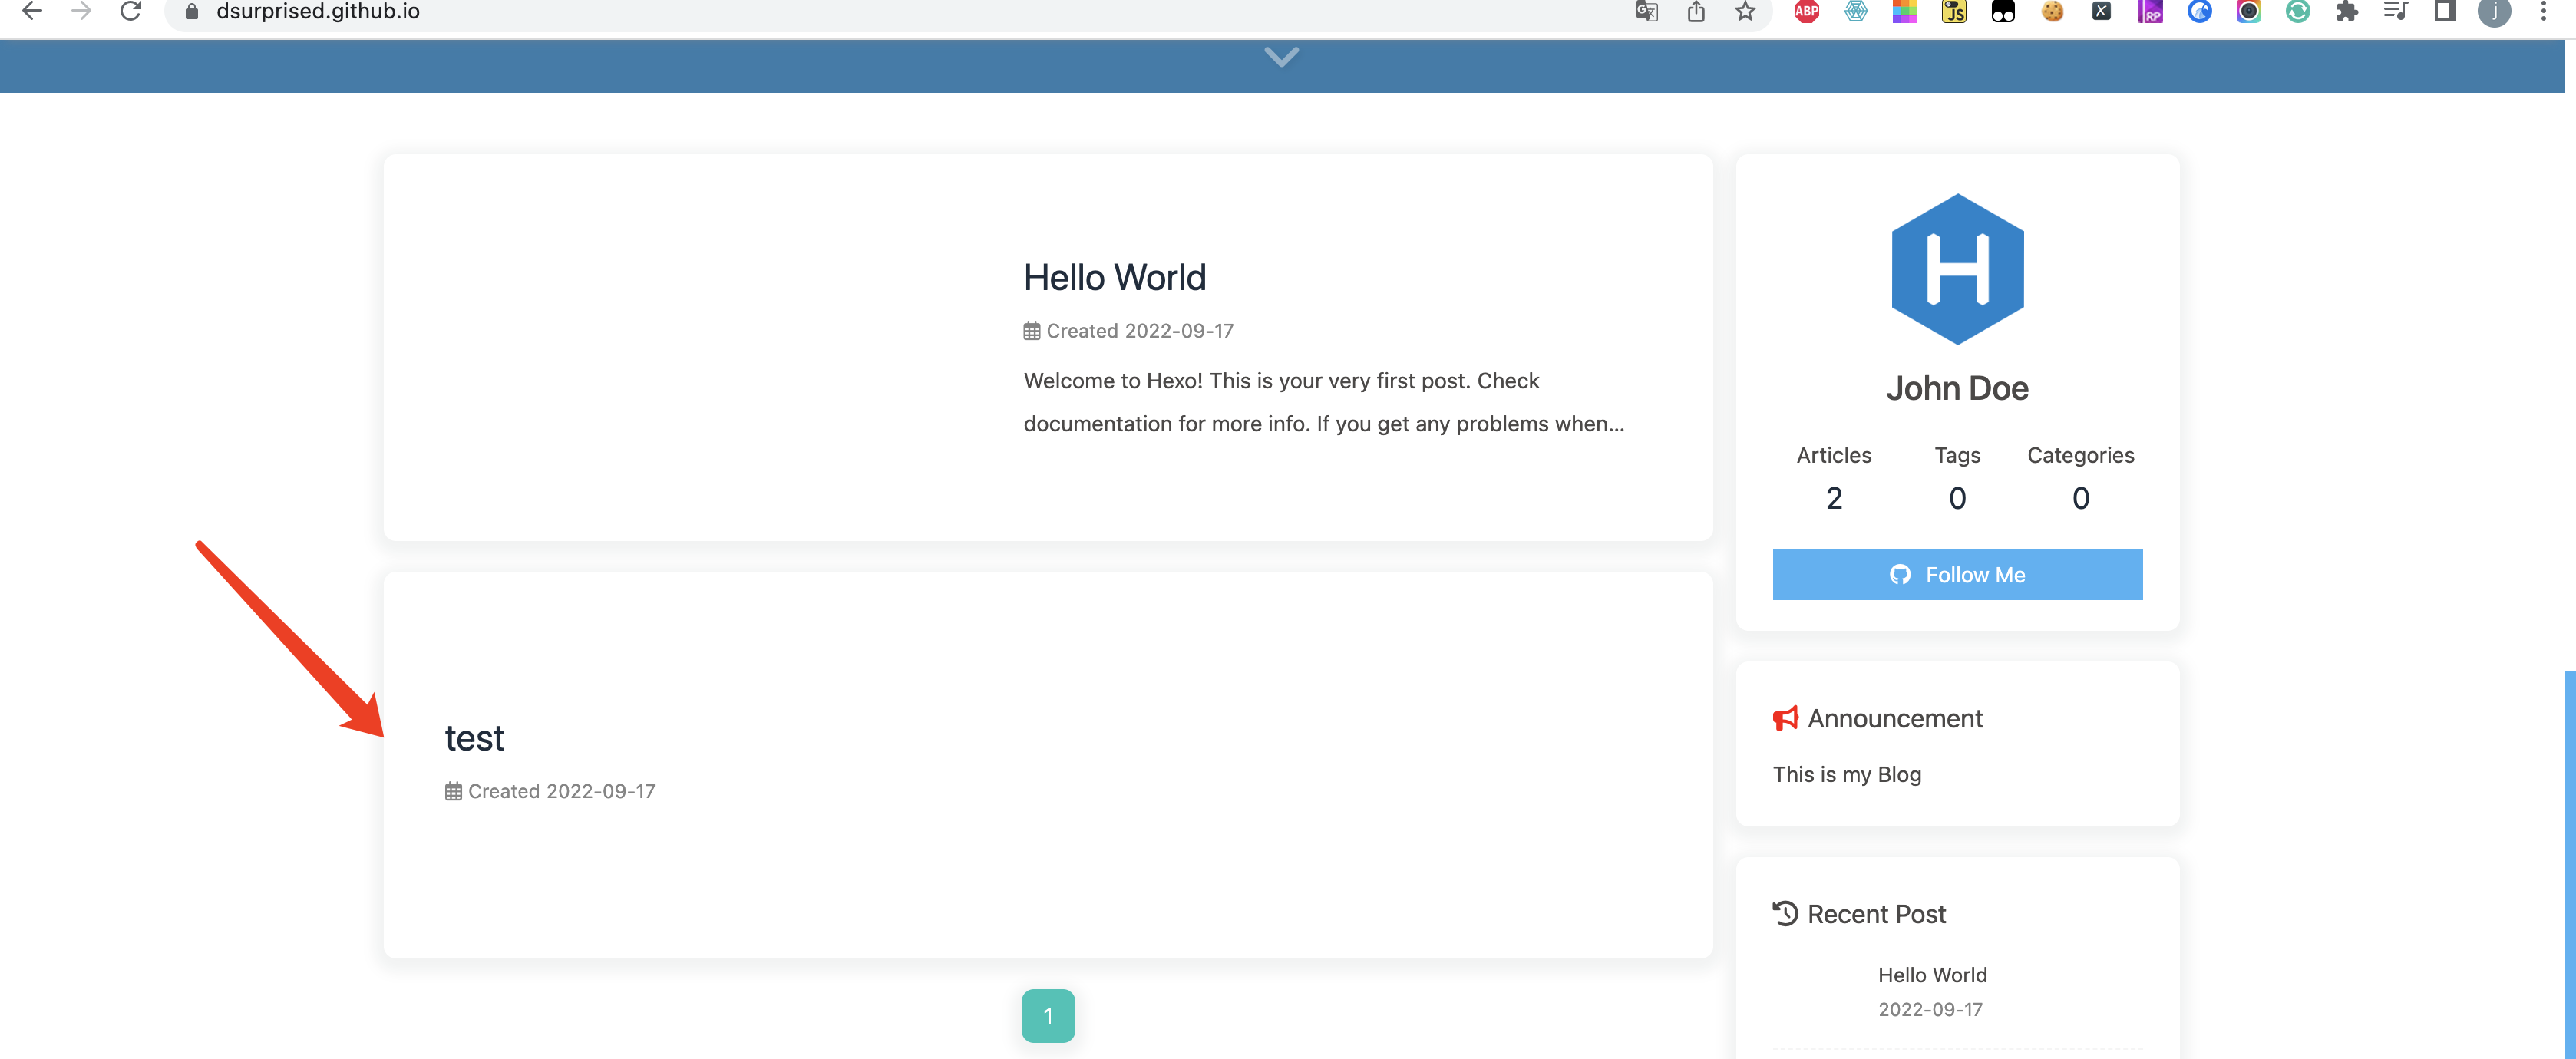
可以到源码仓库跟博客仓库上,查看是否自动部署成功
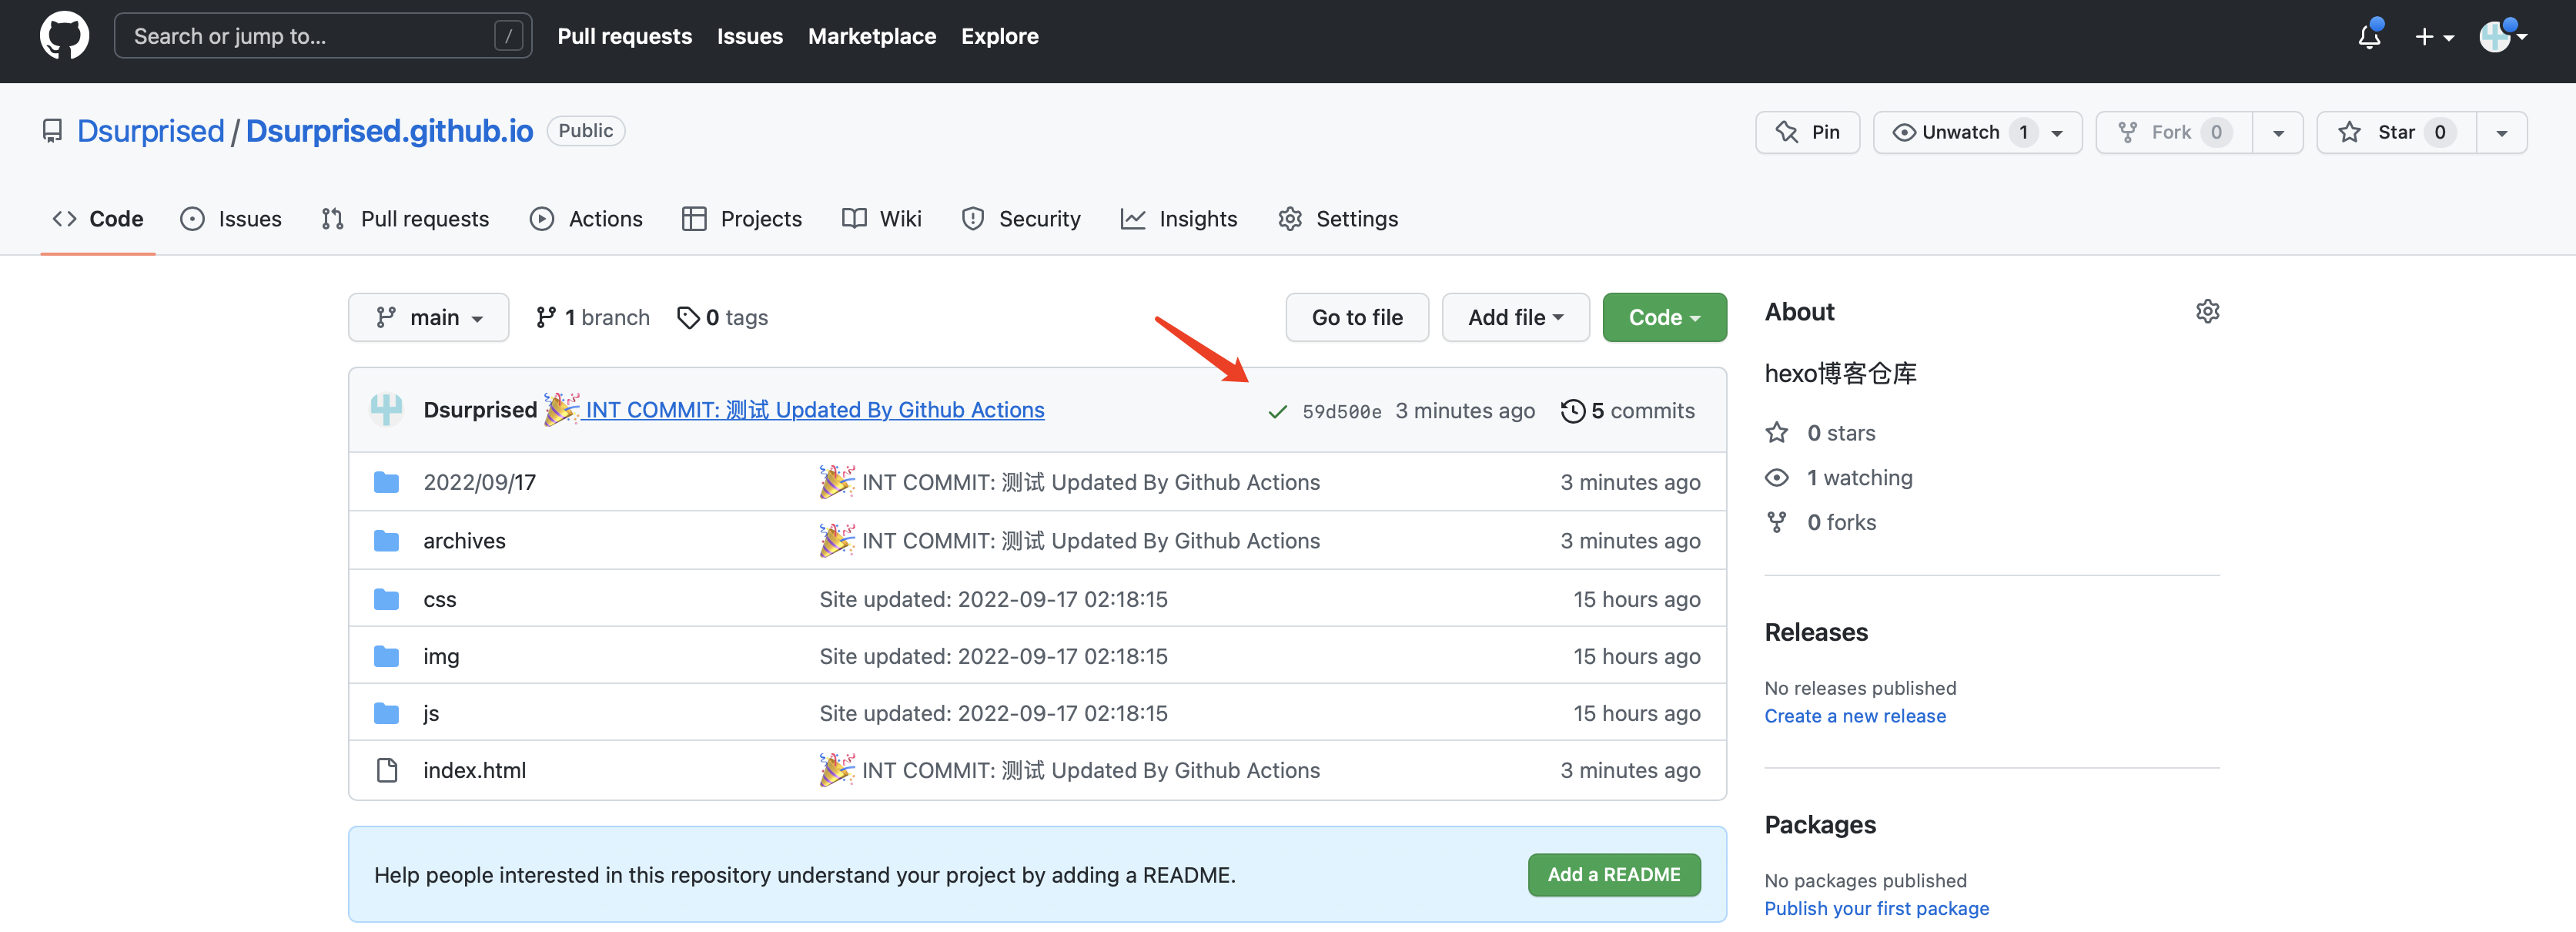
到浏览器访问用户名+github.io,如:https://dsurprised.github.io/ 看效果
9、Hexo seo优化
配置文章链接转数字或字母,方便百度、谷歌方便收录文章
参考: https://github.com/rozbo/hexo-abbrlink
1 | # 安装 |
1 | # 运行hexo三件套,查看效果。只是在本地运行,不会提交到github |
效果演示,修改前

效果演示,修改后

安装本地搜索依赖
参考:https://github.com/wzpan/hexo-generator-search
1 | # 安装 |
1 | # 运行hexo三件套,查看效果。只是在本地运行,不会提交到github |
效果演示,修改前

效果演示,修改后

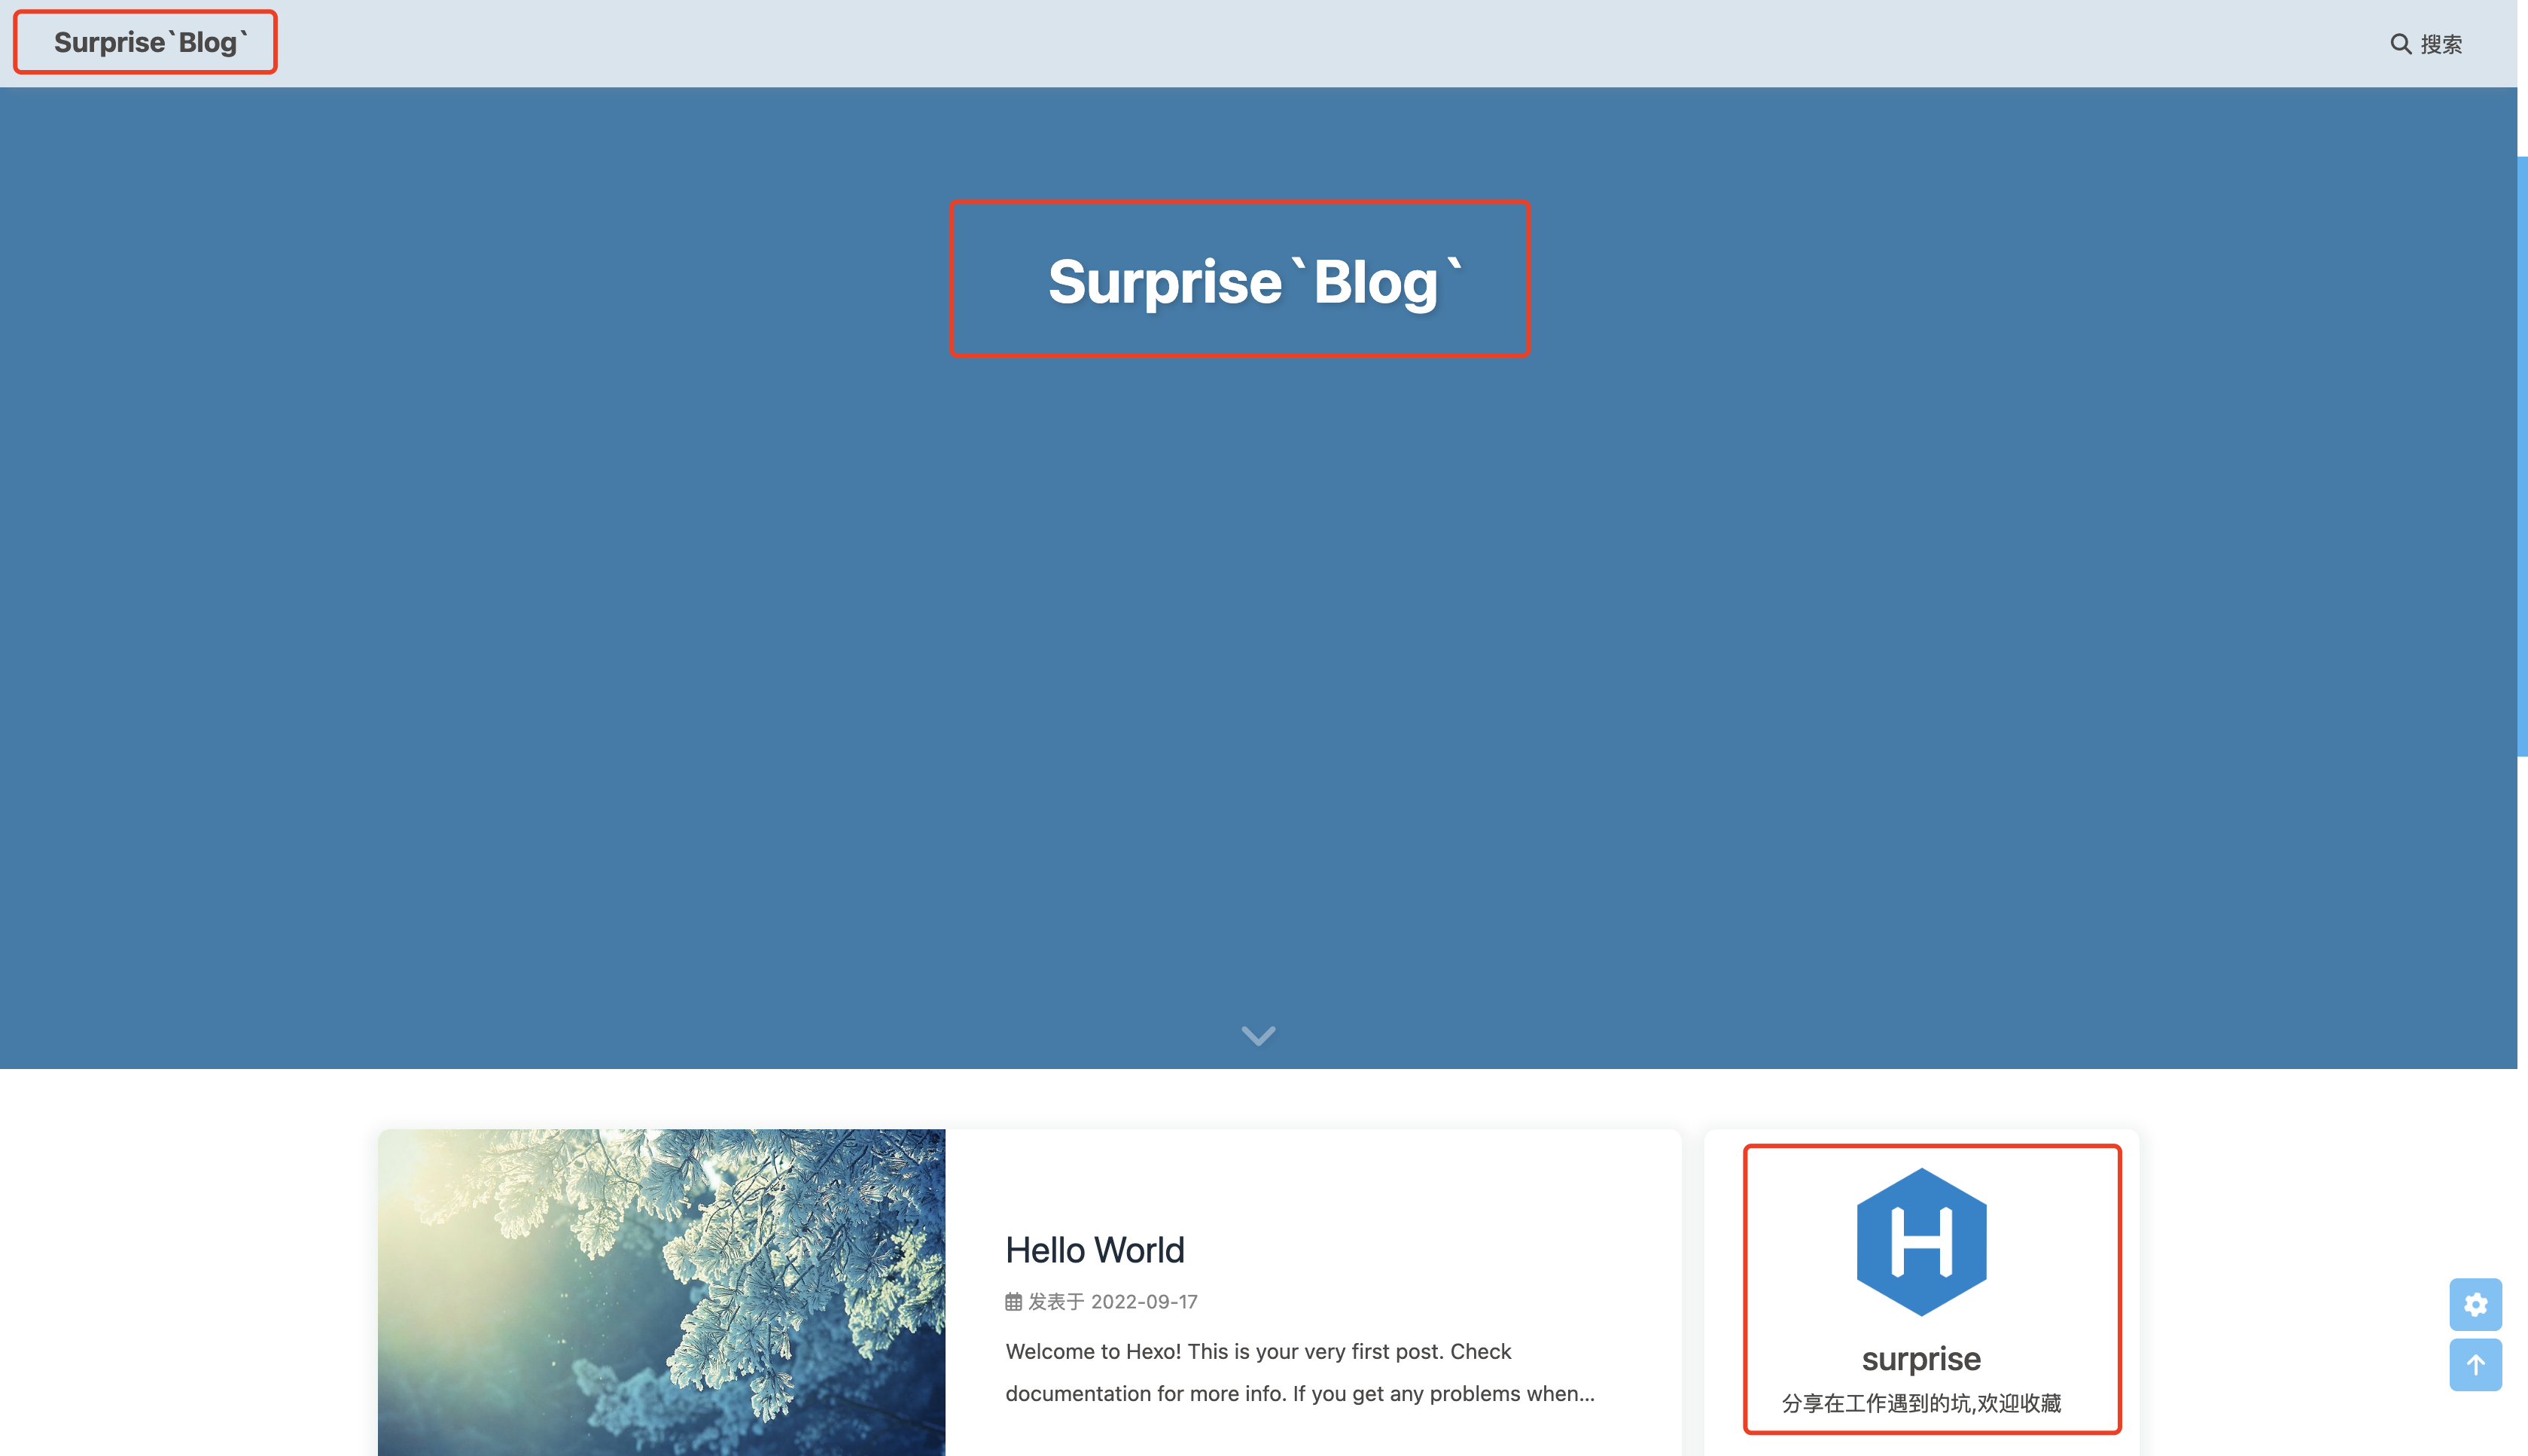
10、修改博客标题,添加文章
修改博客基础信息
1 | # 在hexo的_config.yml配置文件中,修改基础信息 |
添加新文章
1 | # 方法一:执行该命令可以直接在source/_posts目录下创建一个新文档 |
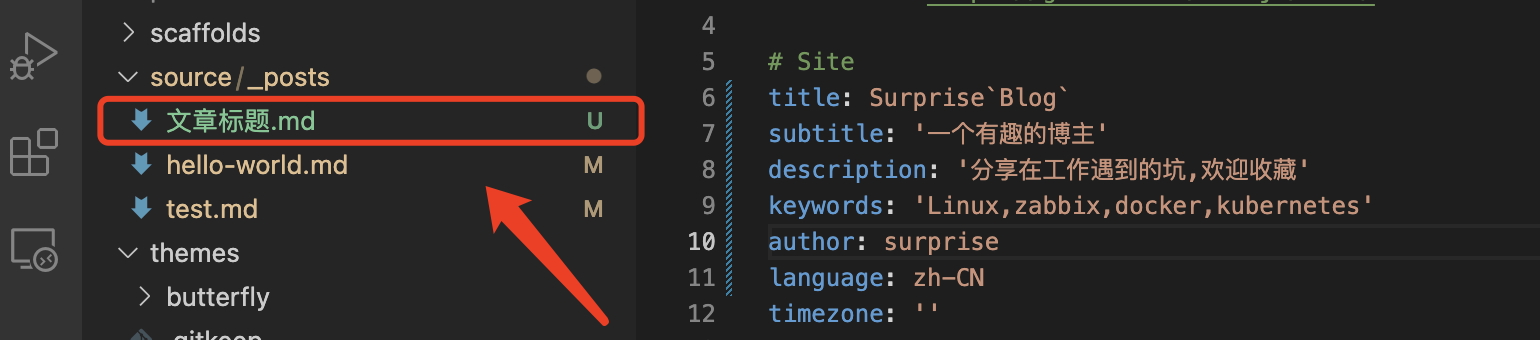
配置文章信息
参考:https://butterfly.js.org/posts/dc584b87/
1 | # 用命令创建的文章,默认会有title(必须)、date(必须)信息 |
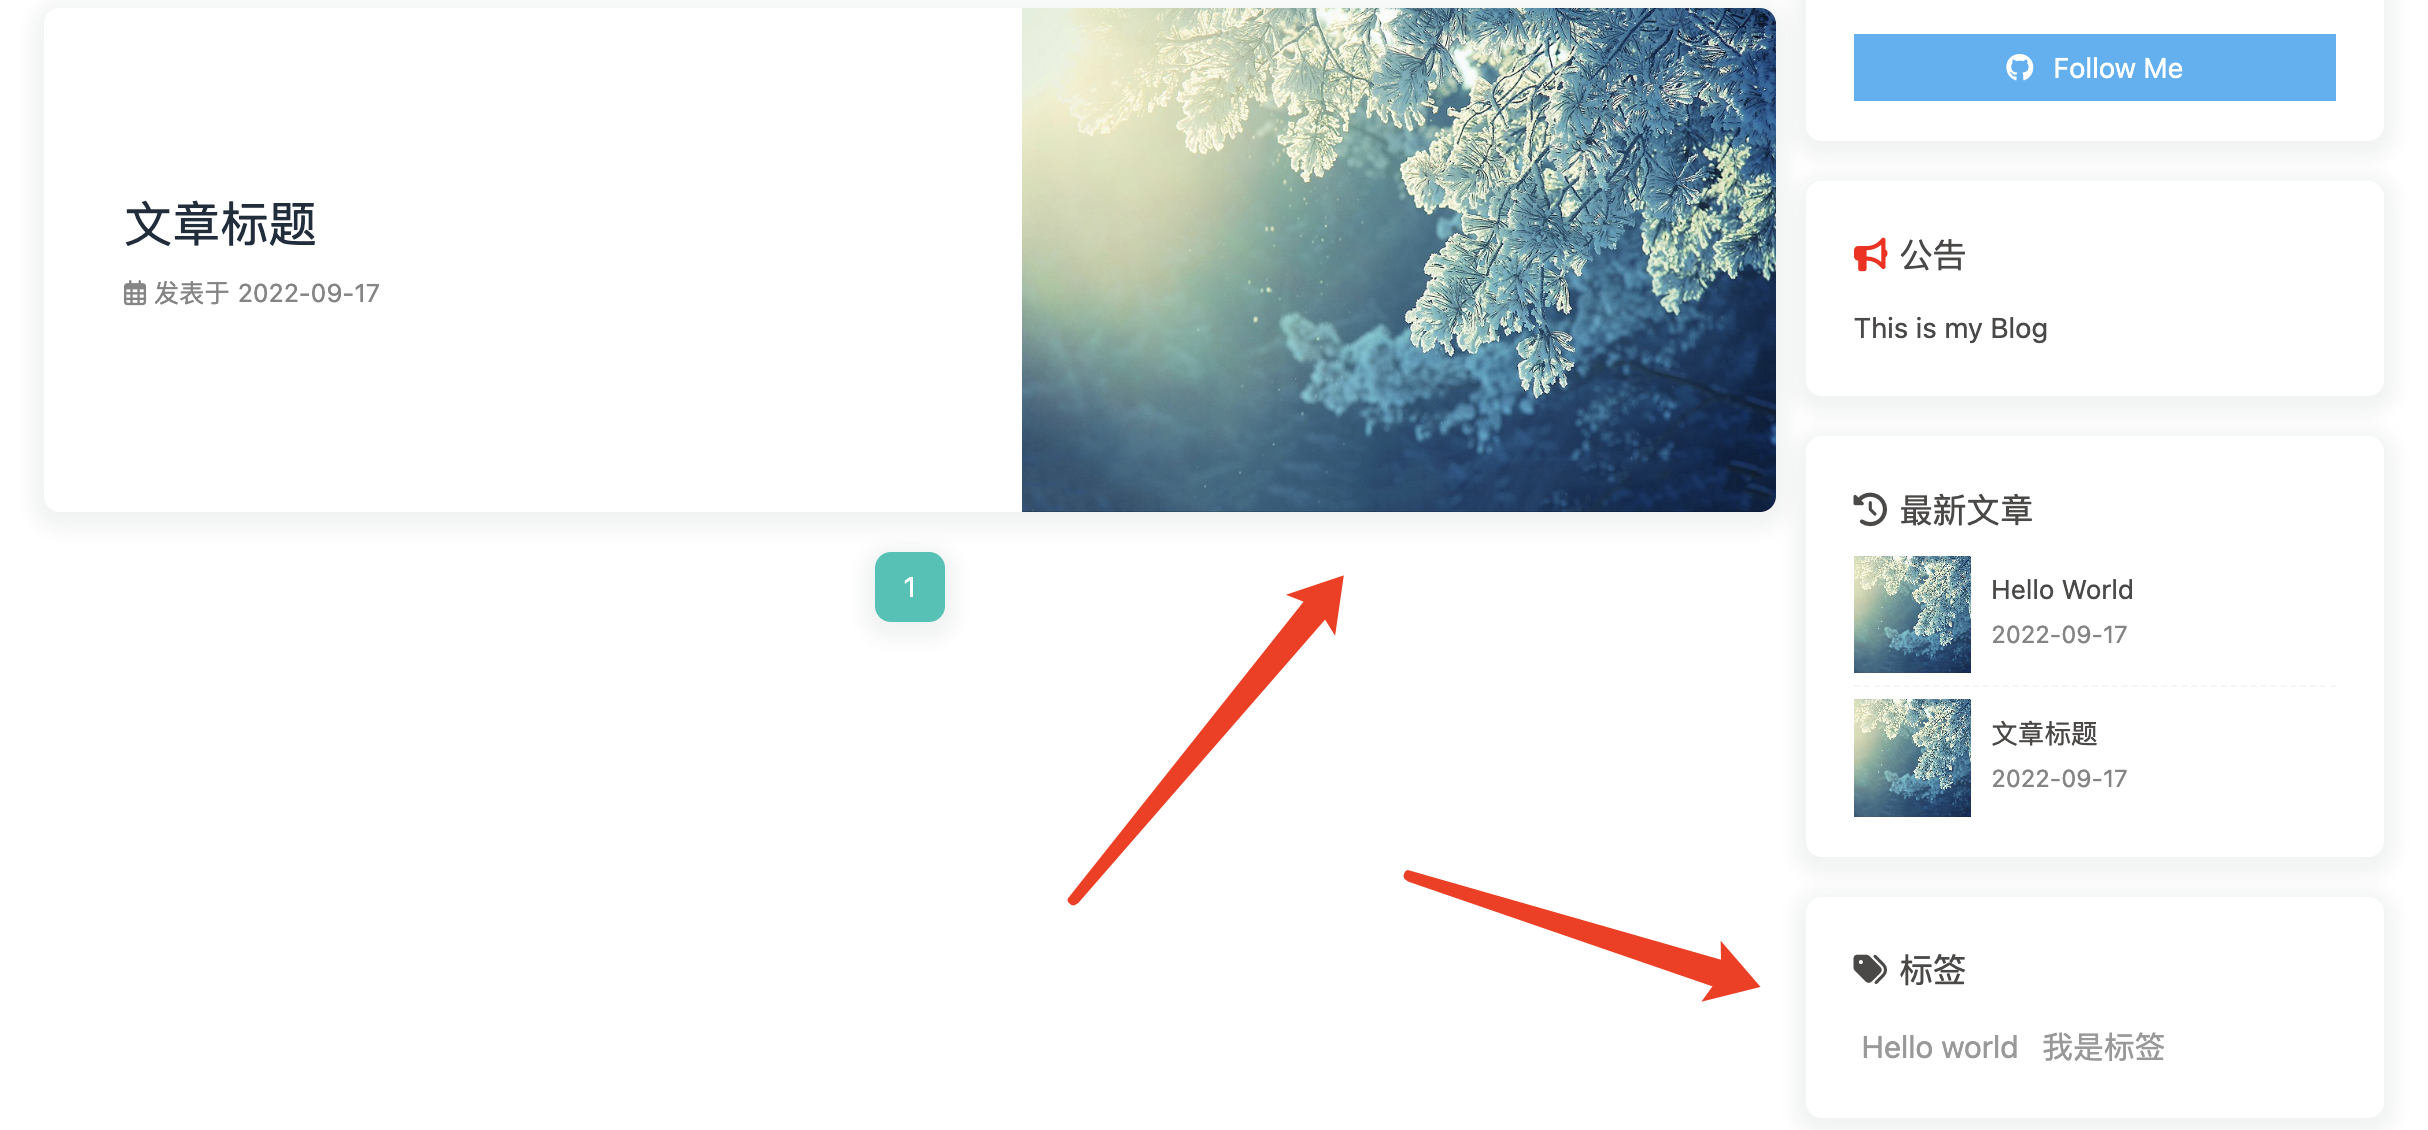
显示导航栏
1 | # 打开主题配置文件_config_butterfly.yml,把menu模块的Home、Tags、Categories、Link前面的“#”号和空格去掉,如下 |
hexo三件套本地预览效果,现在点击还是显示404,因为还没创建页面

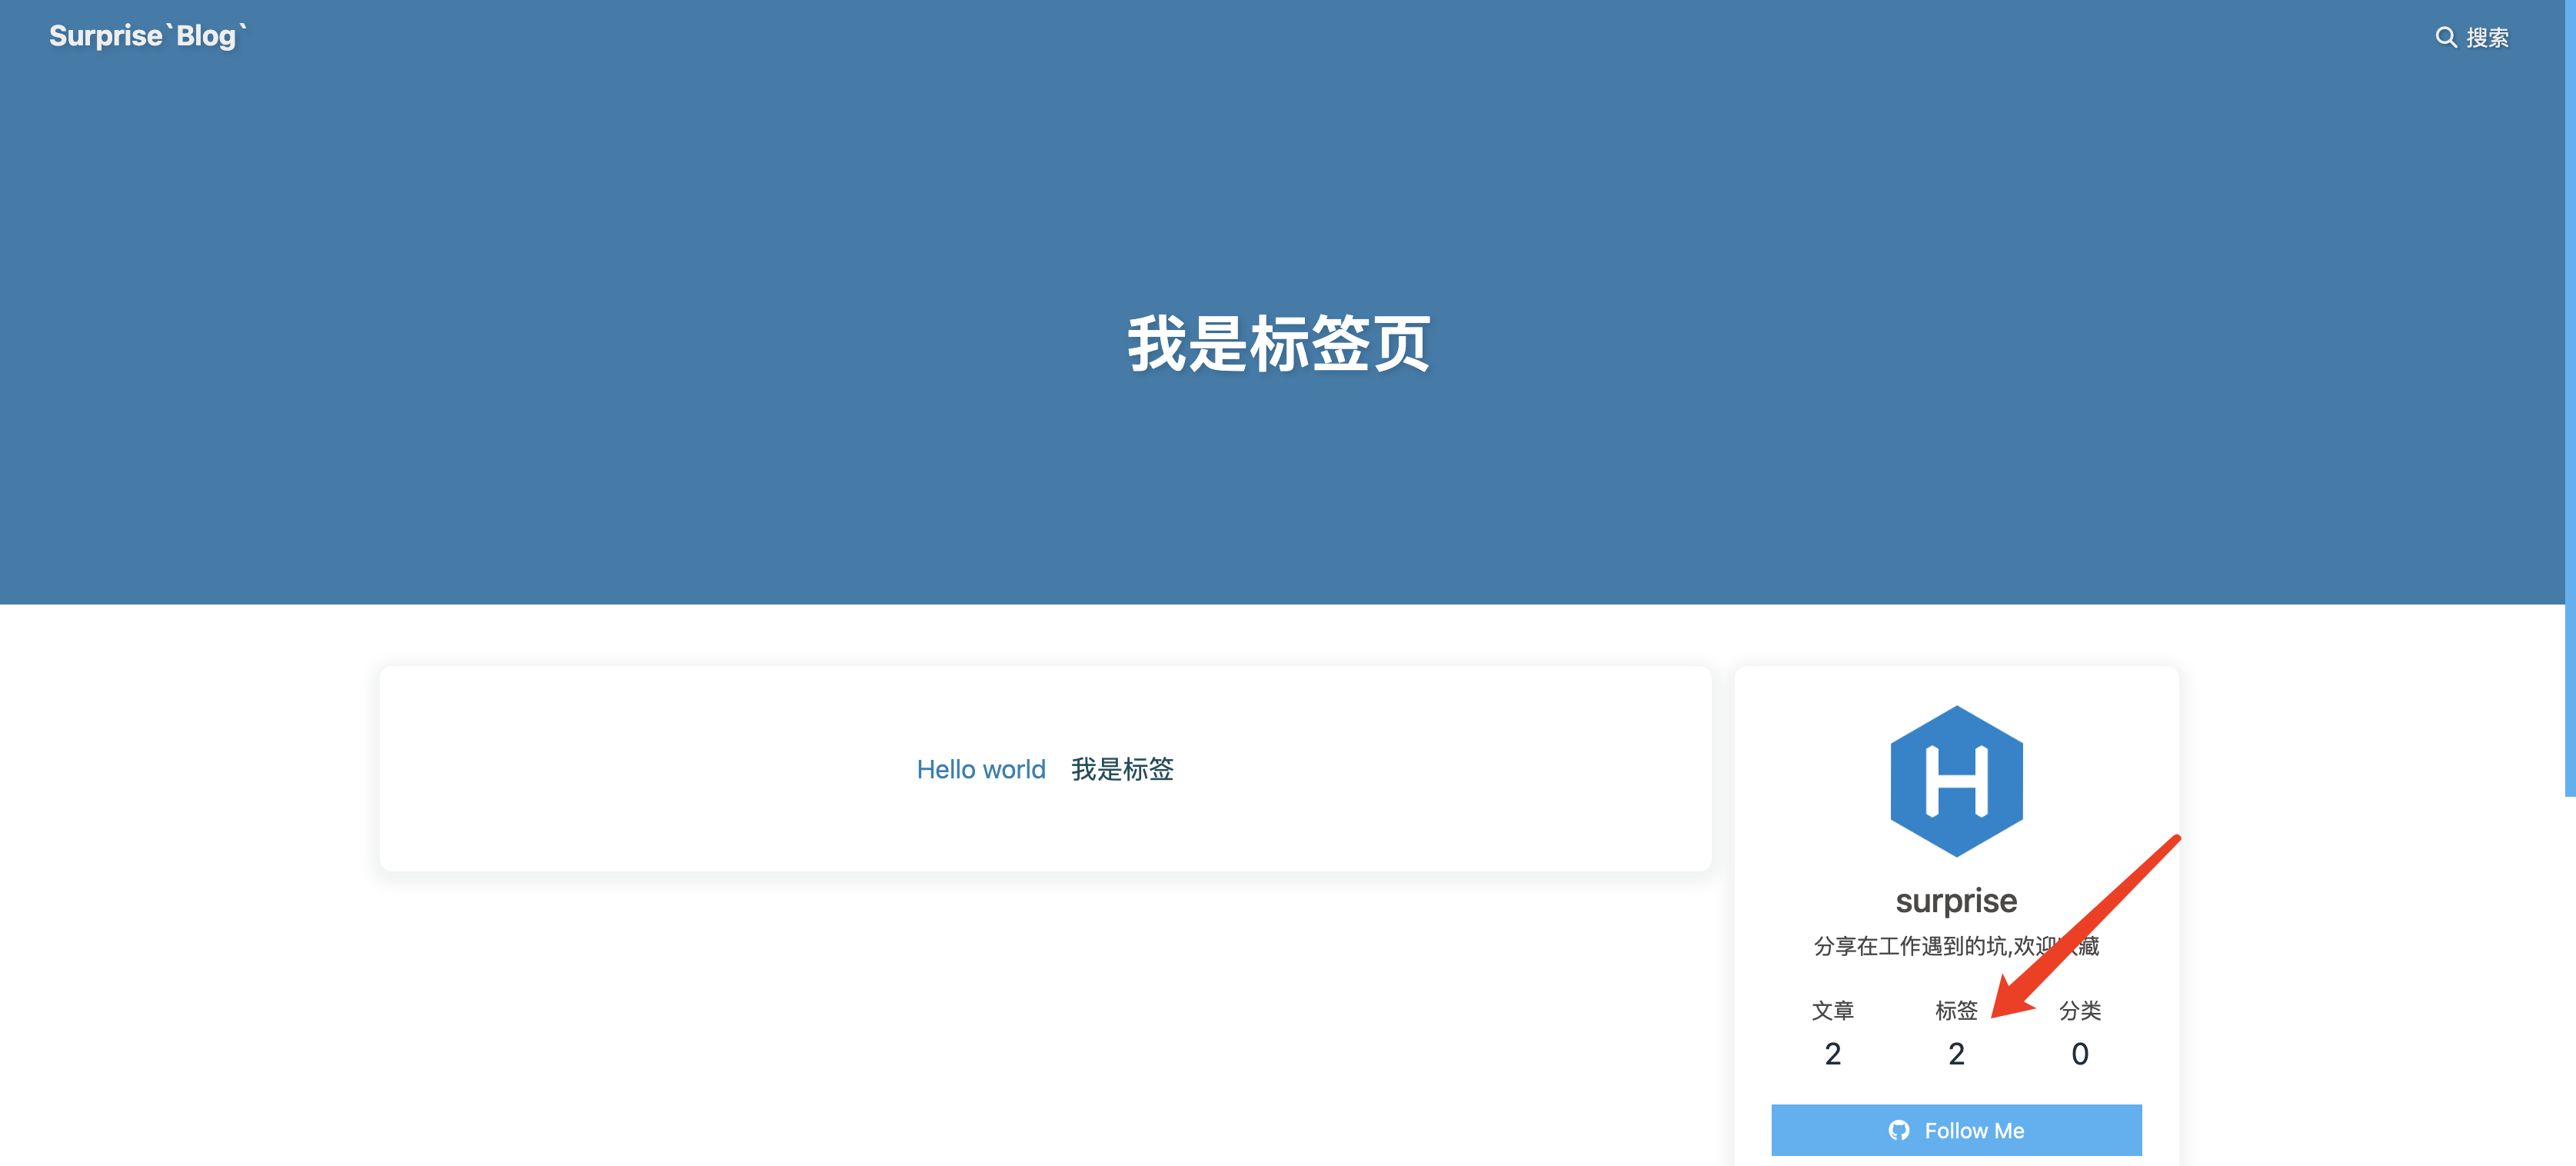
添加标签页
1 | # 输入以下命令新建标签页,根目录下会创建source/tags/index.md这个文件 |
hexo三件套本地预览效果,点击标签,会跳转到标签页,会看到所有文章的标签
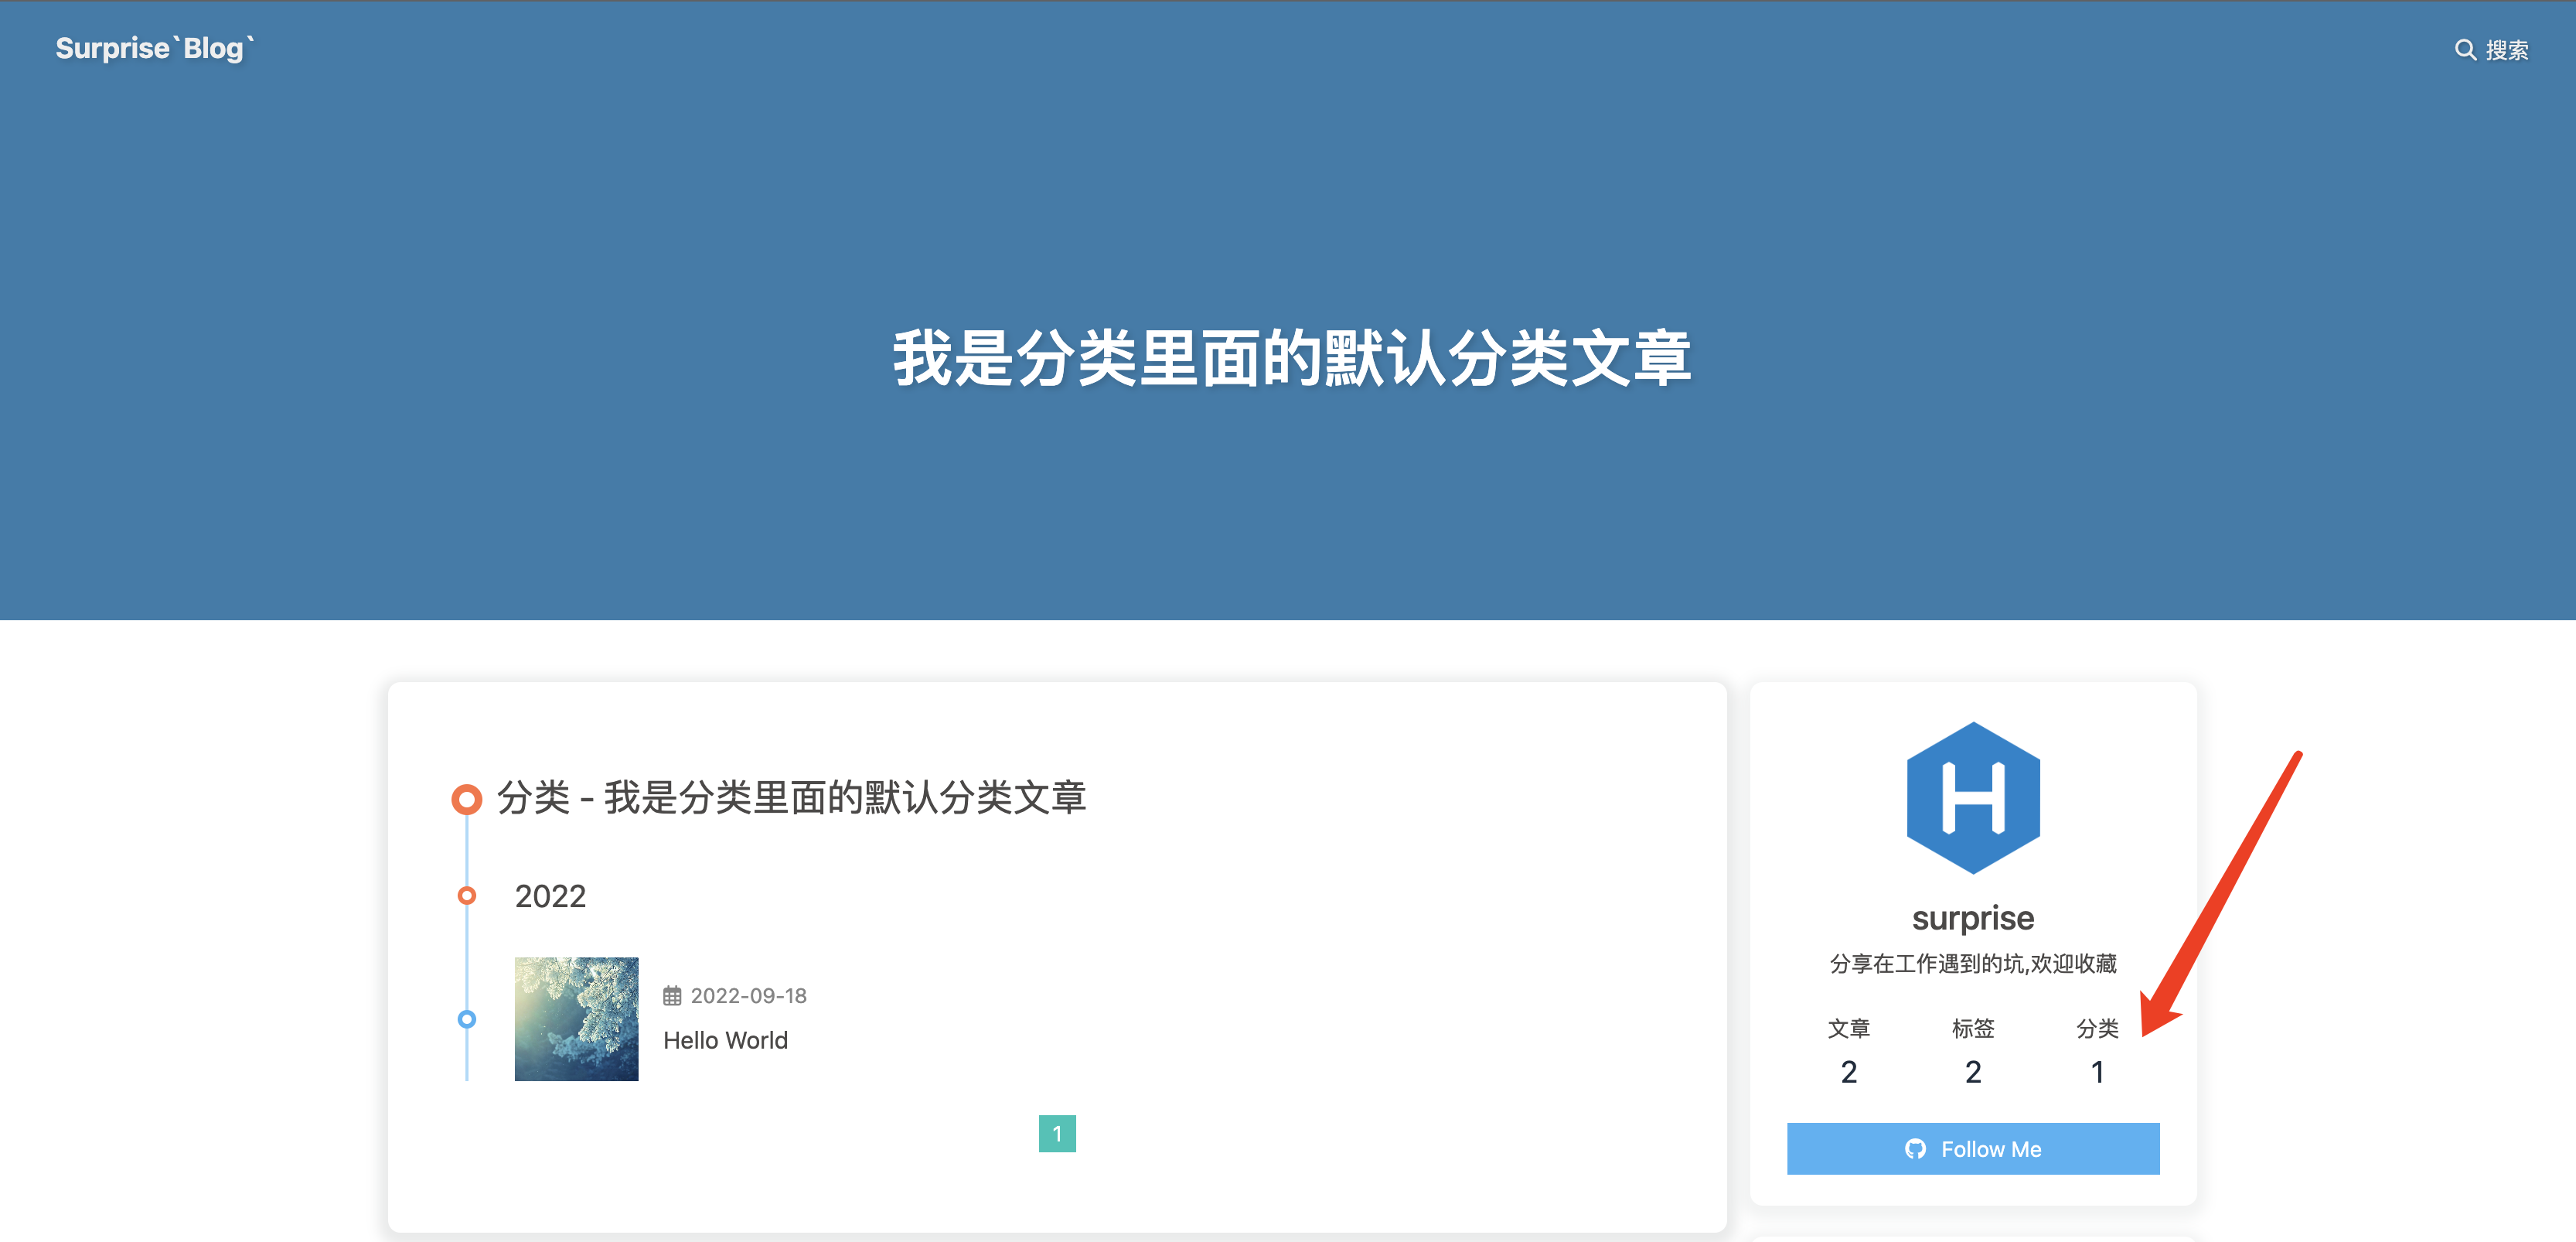
添加分类页
1 | # 输入以下命令新建分类页,根目录下会创建source/categories/index.md这个文件 |
hexo三件套本地预览效果,点击分类,会跳转到分类页,会看到所有文章的分类
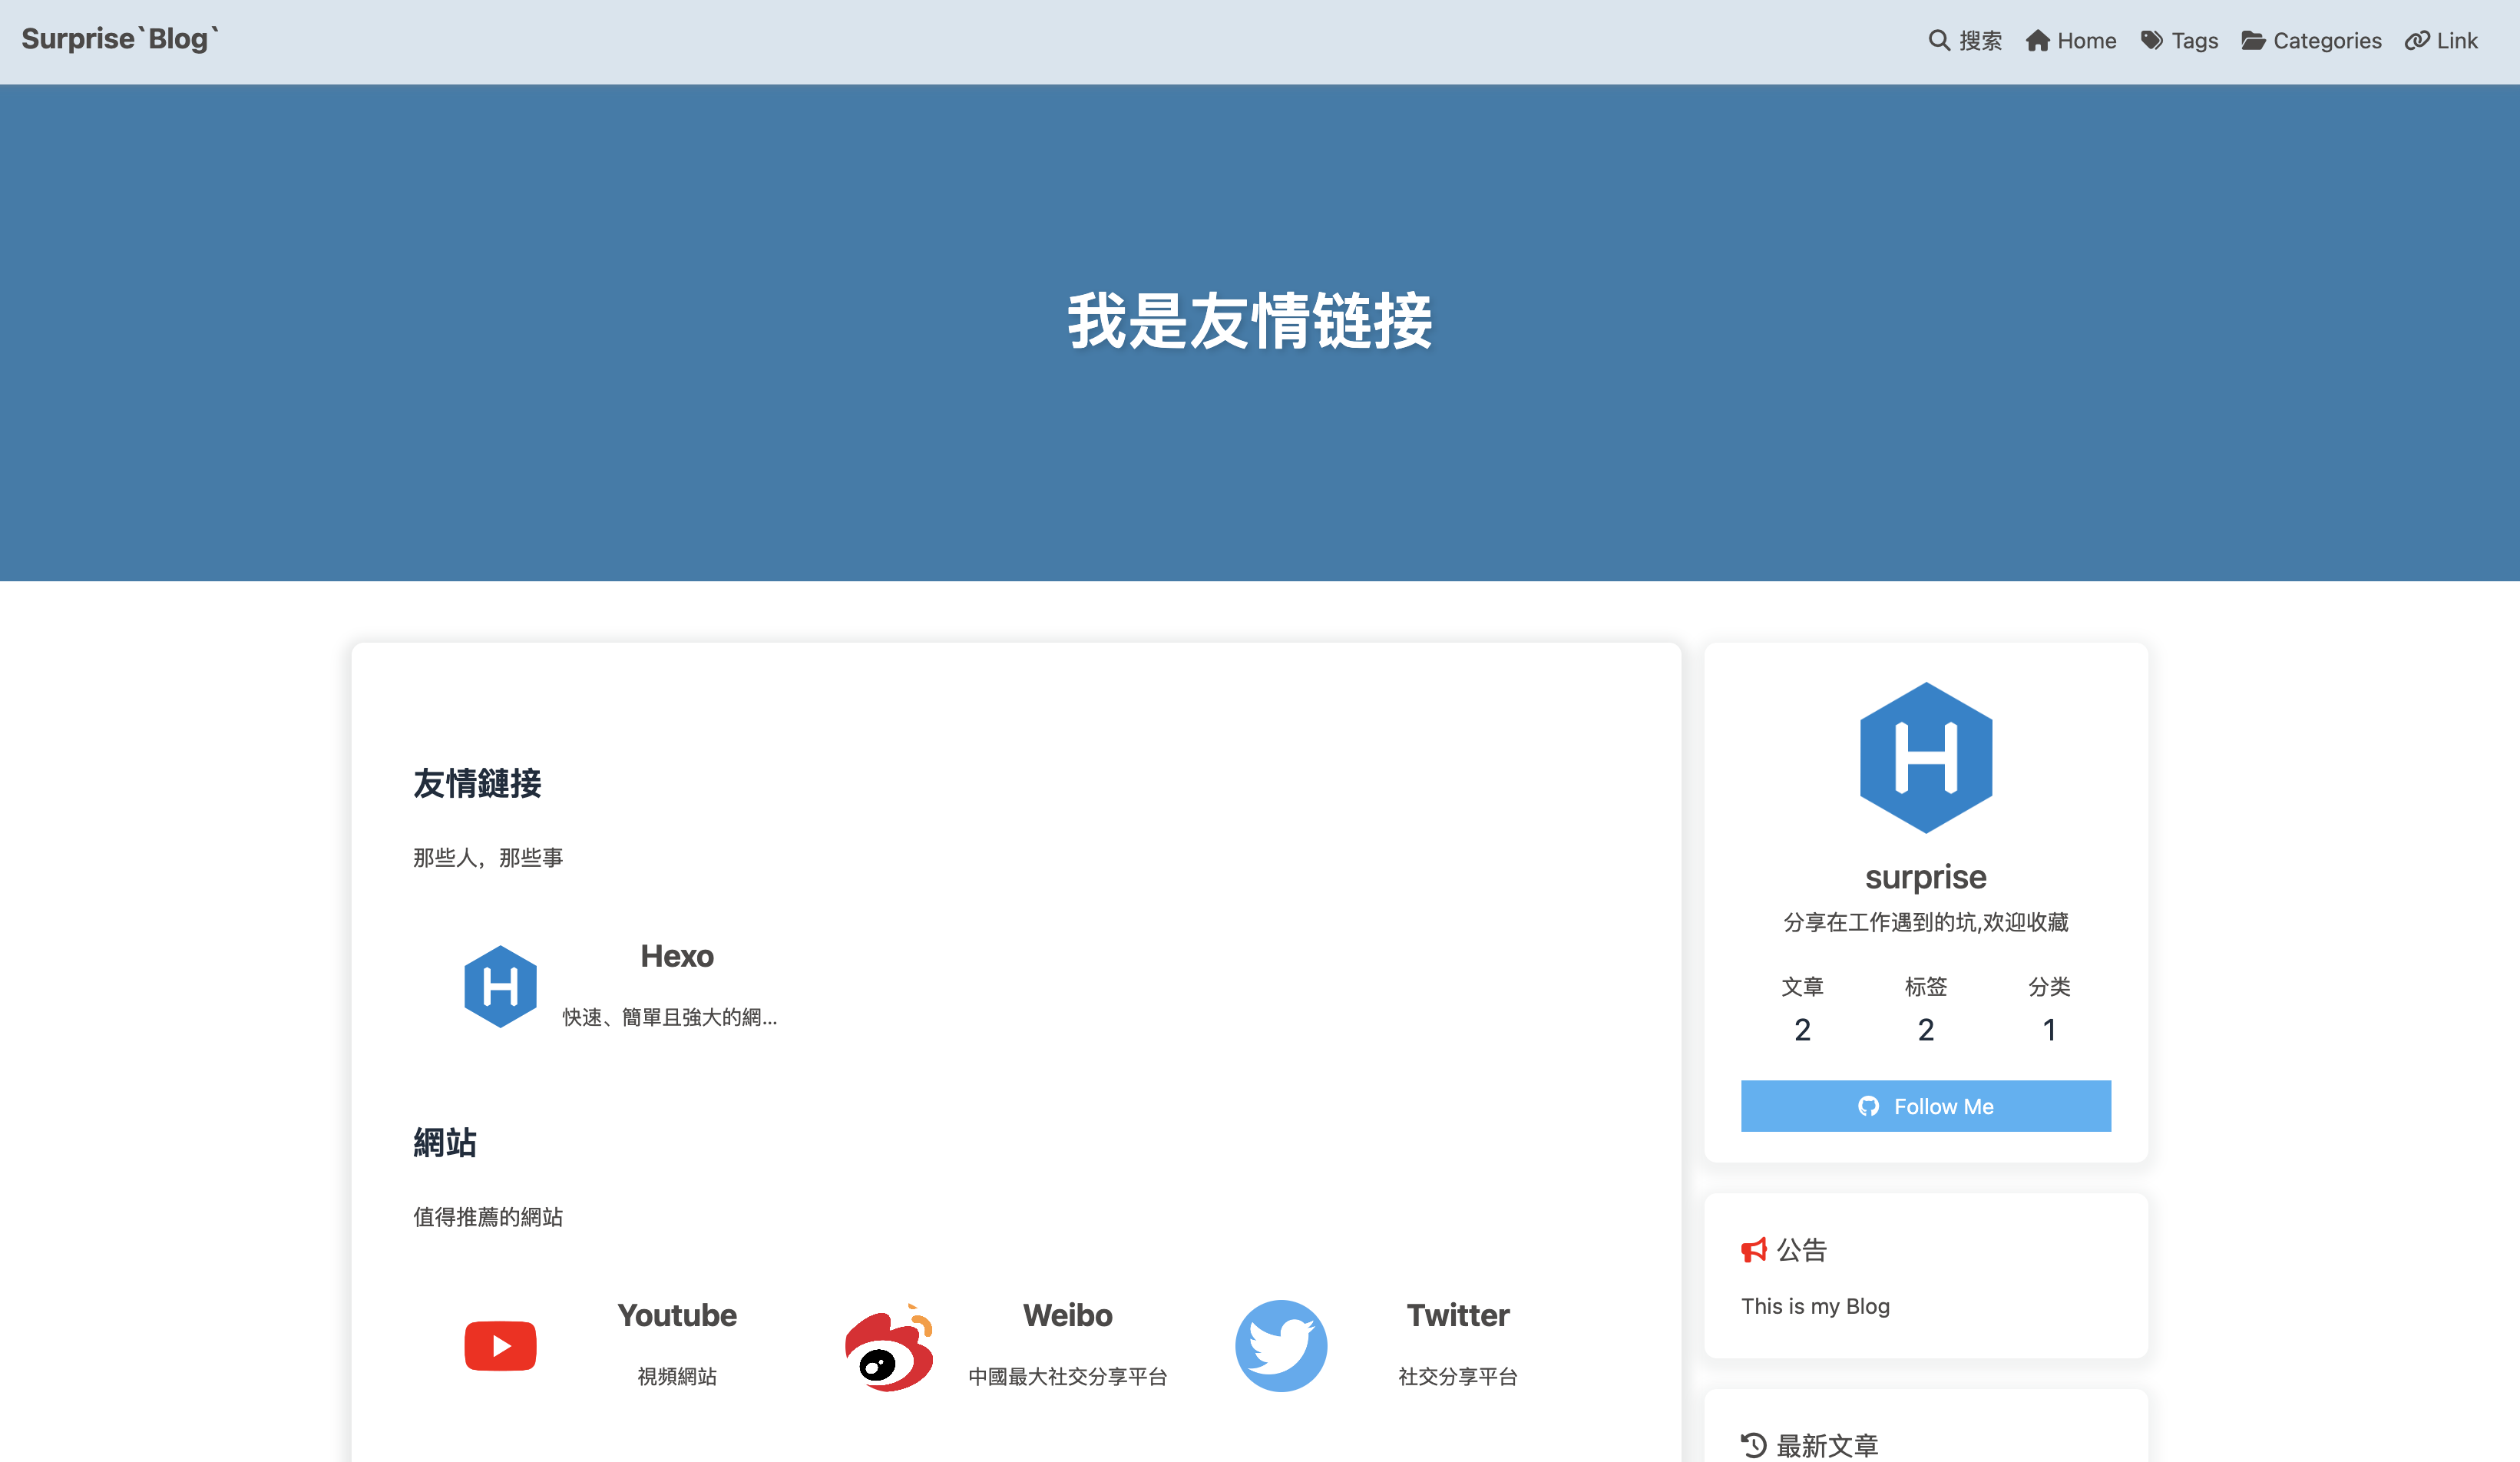
添加友情链接
1 | # 输入以下命令新建友情链接,根目录下会创建source/link/index.md这个文件 |
友情链接添加
1 | # 在Hexo博客目录中的source/_data(如果沒有 _data 文件夾,请自行创建),创建一個文件link.yml |
hexo三件套本地预览效果
1 | 注意:如果友情链接一刷新就出现多组,这是本地运行的bug。上传到github就没有啦 |
11、hexo修改默认端口号
hexo默认的端口号是4000,如果端口被占用,hexo就会启动失败。我们可以通过以下2种方法修改hexo默认端口号。
1)修改hexo根目录package.json
1 | # 在server命令中添加 “-p 端口号” 配置。 这时启动hexo就不能再用 hexo server 命令了,而是使用 npm run server 启动。这样端口号就改成4001了。 |
2)修改启动文件
hexo的启动文件地址 node_modules\hexo-server\index.js 修改port即可。我这里把port改成了4001。这样再执行hexo server的时候,端口号就变成了4001
1 | hexo.config.server = Object.assign({ |
推荐第1种方法,修改package.json。因为这样可以保证修改可以被同步到git上。这样当你换一台电脑的时候,修改依然生效。
而使用第2种方法,因为修改不能上传,换一台电脑或者换一个文件夹,修改就丢失了。